|
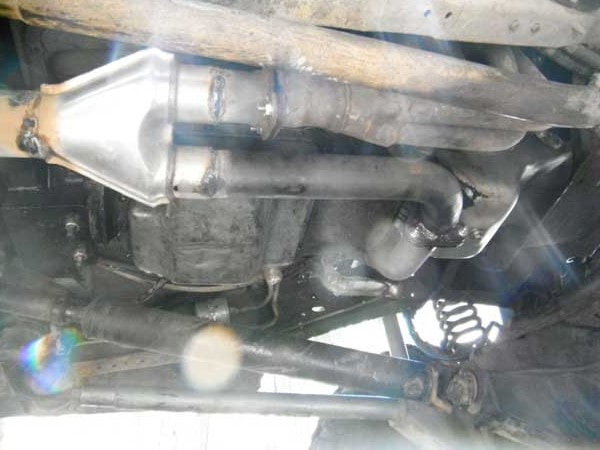
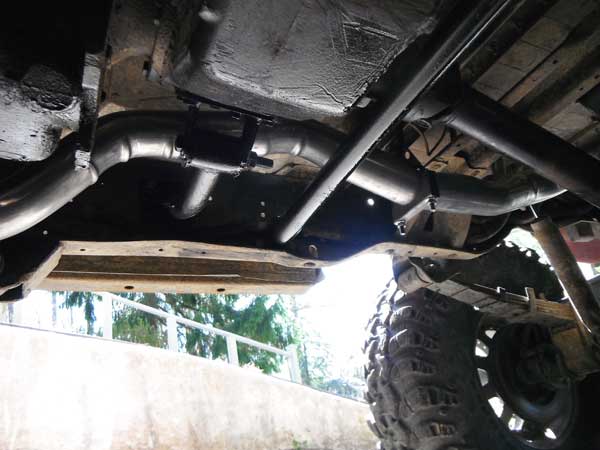
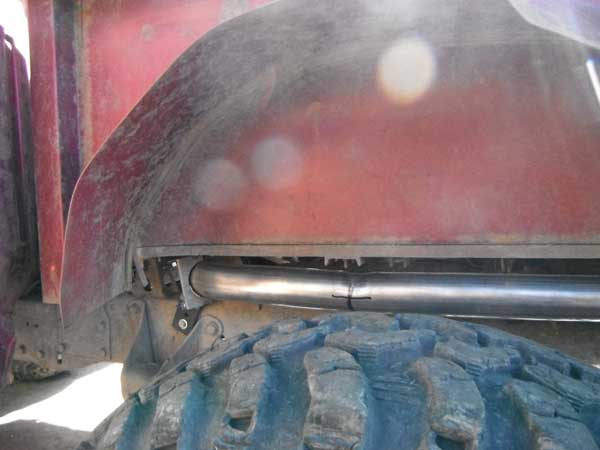
The closest matching header i cound find, was made by Doug Thorley. Its ceramic instead of stainless, and they are worth more new than i paid for the engine/trans. But, theyre only available in ceramic coated and mine are stainless. Both have 3/8" flanges, 1.75" primaries, and both have a d.side header that wraps down under the motor. I bring this up, because i was unable to find collector gaskets that matched the flange, including gaskets from Thorley. So mine are either old ones, or some other brand i cannot locate. So after a bunch of wasted time ordering miscellaneous gaskets that didnt fit, and i finally broke down and made my own set.  They are made from a sheet of Percy's carbon collector gasket material, available from Jegs for $12. it looks like carbon sheet with felt on both sides. Apparently they are working, because i dont have any leaks, altho it does not have much run time on it at all, so we will see. I finally got the exhaust done yesterday. Its tucked up as high as we could get it. Actually, i removed my OBA tank to make room for the muffler, so i am going to remount that in some free space under the tool box next to the batteries. The exhaust is 2.5" into the Y, 3" out, to a Flowmaster. Just a mild rumble, nothing crazy, and its nice & quiet. IMO theres nothing worse than a loud truck when youre trying to hear your spotter offroad, so i think this will work out well. 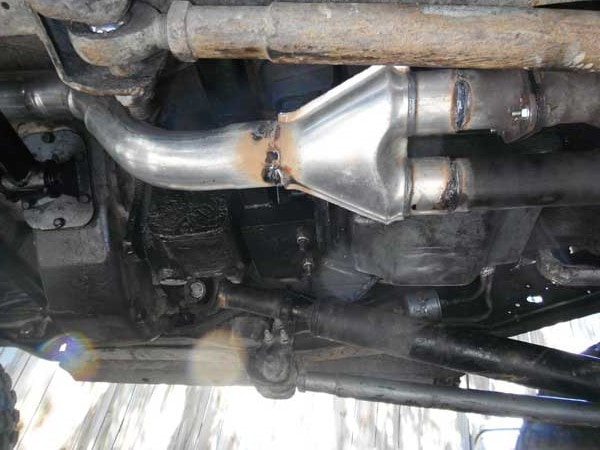 The O2 sensor is in the top of the y-pipe, but you cant see it.
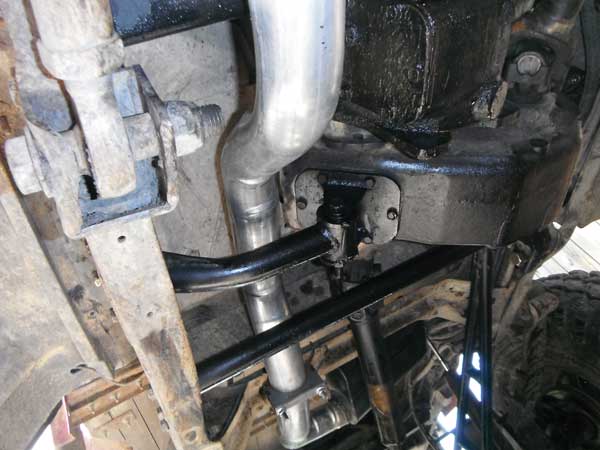
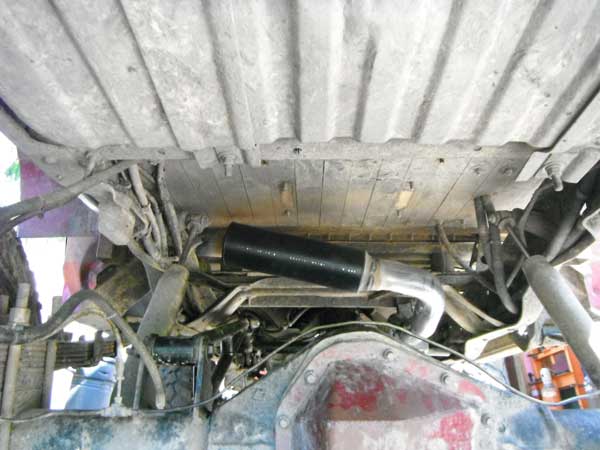
Looks like a tight fit but its not, the pipe is right above the spring, and still underneath the bed. The tire comes up into the wheel well and slightly rubs the side of the bed, but will never come close to the pipe. These pics dont show it well, but the pipe exits right next to the shackle hangar. Its tucked up pretty tight, but i didnt notice until now that the pics make it look like it sticks way out. I dont think ill be able to smash it on anything. 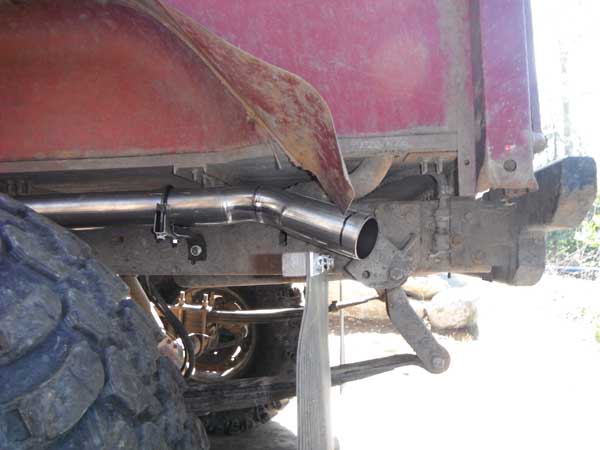 There was no room for the muffler forward of where it is, with all the extra xmembers under there. And once the muffler was in there, the only way to get back to the pass side was to made a 180º bend, so i opted to have it go out the d.side. It is a very tight fit under there with 3" pipe. I could have had the muffler go on straight and then have the pipe run under the tank & out the pass side, but ive already smashed the tank a few times, i know a 3" pipe wouldnt survive under there. This whole exhaust is a series of compromises to get the pipe tucked up where i wont smash it as easily. Ok, heres where we left off:  Made a plate to bolt to the York 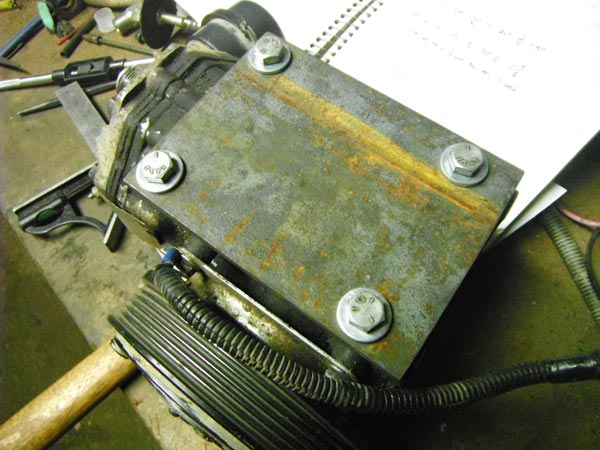 ...and one to bolt where the idler was. Note: the mounting pattern isnt square: 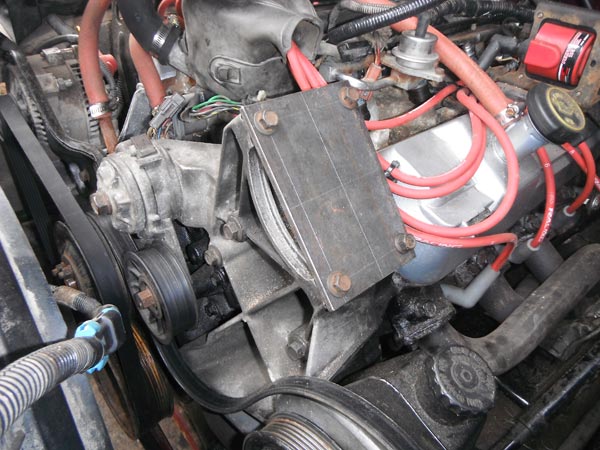 This next part was a little difficult. I had to figure out where the clutch had to go, so the belt would run square. Not impossible, just requires measuring the clutch depth and comparing it to the ilder. Tacked in place to take some measurements: 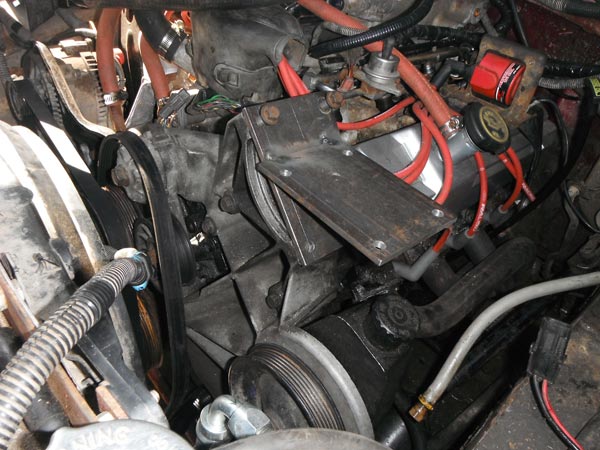 Everything looked good, so i welded it all up and painted it.  Pump installed on bracket. Gotta do this first. Those 2 bolts on the bottom just barely fit in there 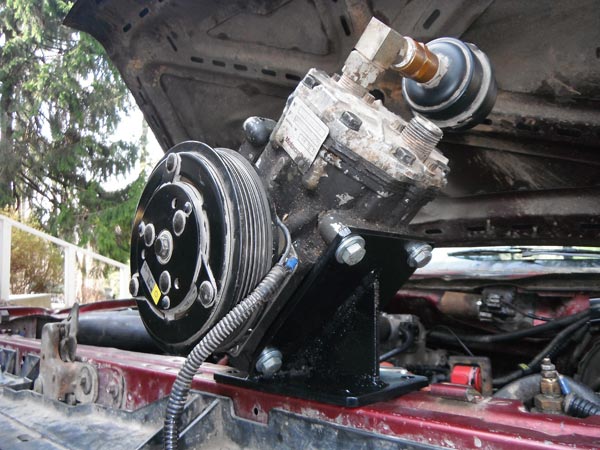 ...and installed! It might seem like its high up there (it is higher than the idler was), but its nowhere close to the hood and i have good belt engagement with both the York & the Saginaw. 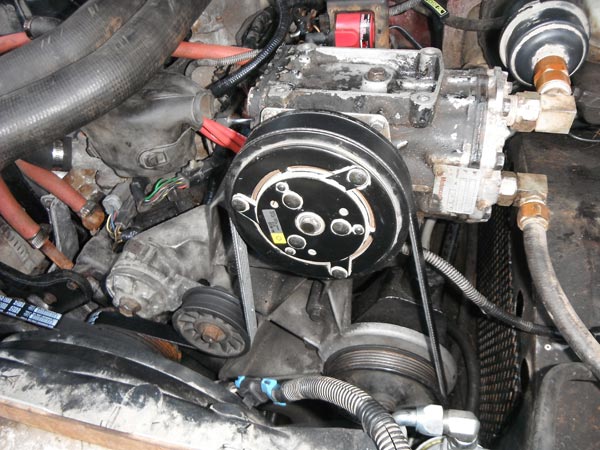 And here's my new custom belt routing diagram, complete with belt p#s  So the truck needs an O2 sensor, but im putting it off till i get an exhaust on the truck, which wont happen for about two weeks. So today i decided to mess with the OBA a bit. I needed to find a left hand York, since mine is right hand, and cant be laid over the way i want. Well, it just so happens i have a left hand, but the threads were broken off the pressure port. Well, that is no longer the case! Ive had this pump sitting around for close to 10 years now. Its off a 70s Ford, and the outlet port was busted off, but i saved it because its a 210, and the pump was good. Well, today it got revived! 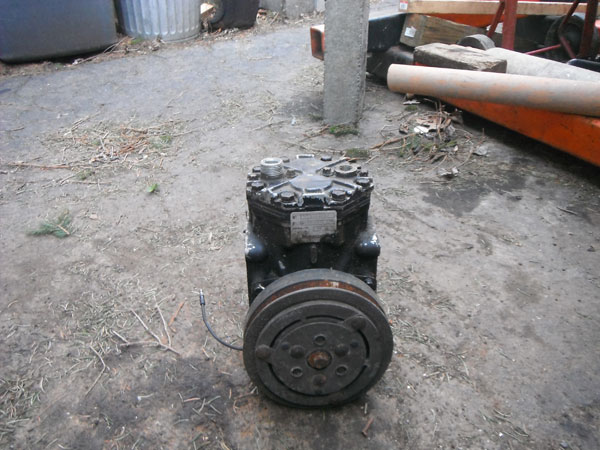 With the top cap removed. Pretty neat looking. The valves in the middle are the pressure side, the little holes around them are on the suction side.  Top cap of mine removed. Not quite as clean! But notice it is a mirror image. 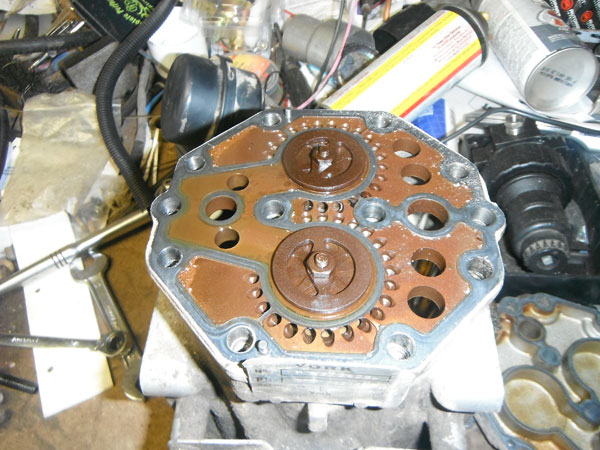 So, you just take the cap off the good one, rotate 180º, and reinstall on the other pump. Done! 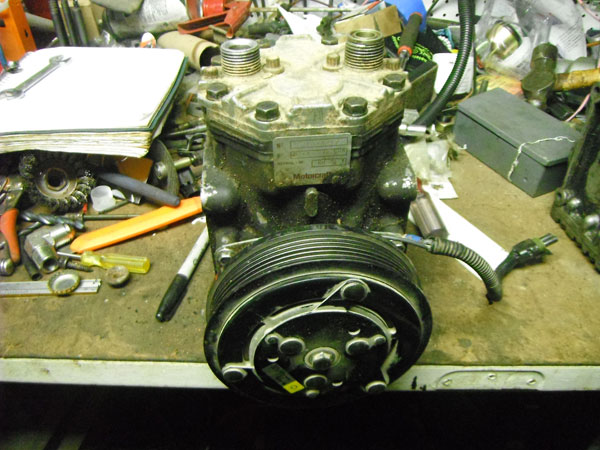 Tomorrow i will start designing a new bracket to mount it on the motor. Shouldnt be too hard to have it all done by the end of the week. Remote oil filter hoses finished, wrapped in loom, and i marked on both ends which direction the oil flows, so i didnt accidentally plumb it backwards: 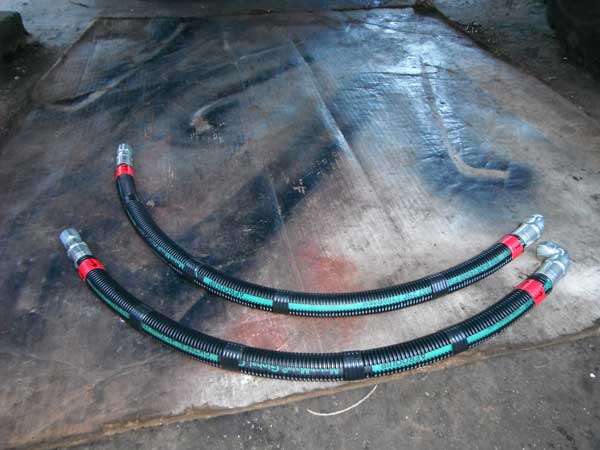 My homebrew hackjob O2 sensor, until i get the exhaust done: 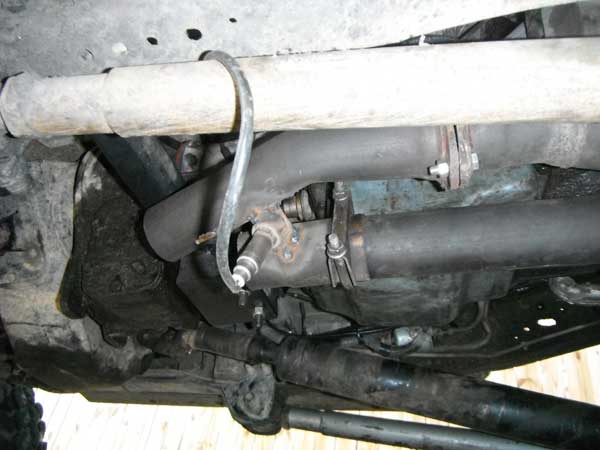 Airbox mods! Since i moved the box to the other wheel well, i had to move the crankcase breather to the other side of the box. So, drill a 1" hole, file a small notch into it for the stock filter and reinstall 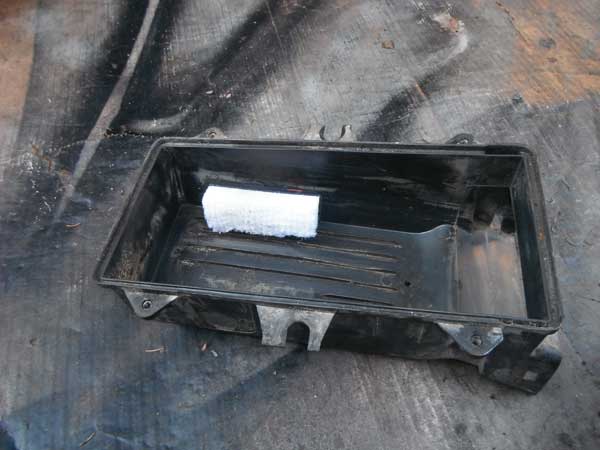 ...and the airbox installed in its new home 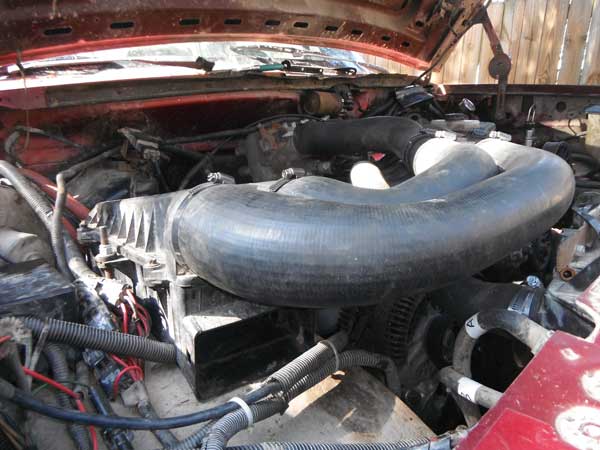 I cut the last elbow off the end of the 86 hoses, and it all fit together nicely. In this pic the IAC & crankcase breather had not yet been plumbed. 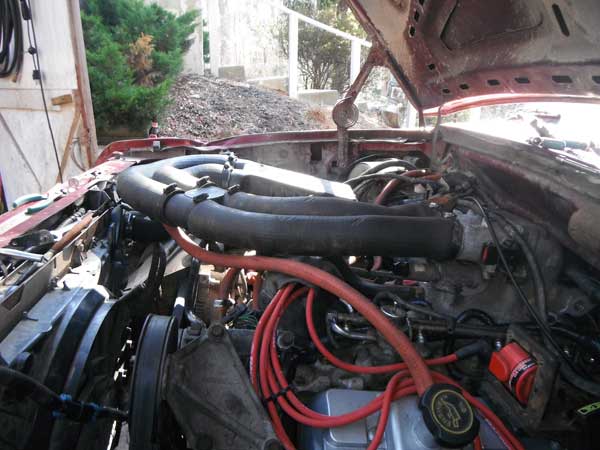 Plently of clearance under the hood 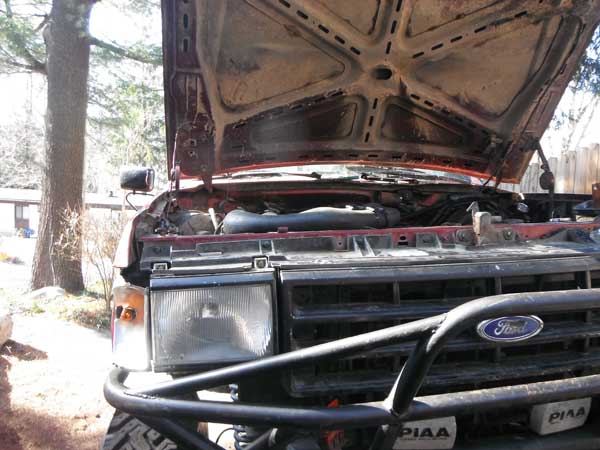 One set of freshly rebuilt injectors (just did this about 3 hours ago) 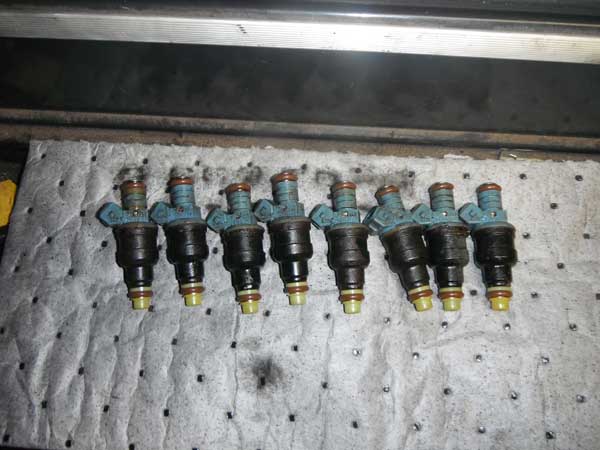 Also, its good to double check your firing order, to make sure the picture you looked at was right. The truck is now running 100%!! Items left to do:
So with the help of an easy out, i got the oil filter adapter out of the 351 block, and screwed it into the 460 block. Then it was just a matter of installing the remote oil filter adapter. I went with one from Summit Racing, because you can rotate it to aim whichever direction you want. Made it a ton easier to figure out the routing. Remote filter bracket on block. There are crimp-on AN hose fittings on it so i could see which way i wanted to angle it on the block.  Bracket for the oil filter housing 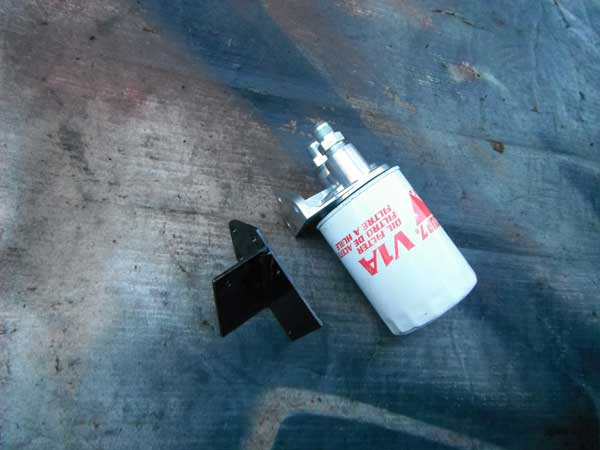 Where its located 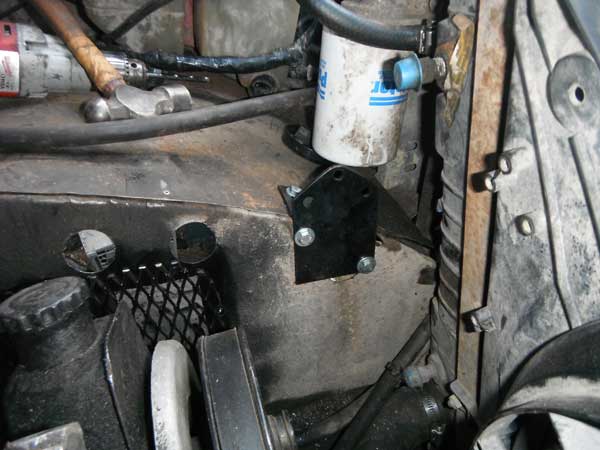 ...and installed  Fits there nicely, with plenty of room to get to the filter. And its nice & stable too. I have my AN lines half-made- i put a 90º on one end so i could run them under the truck and measure for length. Now that i have that figured, all i have to do is crimp the other end on and theyre done. Then tomorrow morning ill just have to put em in, add oil, and (hopefully) start the truck! Once i know it runs, ill continue working on the airbox. Not a whole lot of progress has been made. Transmission is done & filled, so is radiator & power steering. I think i figured out my airbox, seems it will just clear the hood (the stock box) so im ok with it where it is. But i have to get it just right so the ductwork will clear a York, which is proving to be difficult. I had to remove my overflow bottle so i could make room, and also had to move my line lock, which meant i also had to re-do my OBA manifold as well. Now its looking like my remote oil filter will have to go behind the headlight, not sure where else it will fit. At this time i have absolutely no idea where my overflow bottle will go, i think im gonna try to get a small one that hangs off the radiator (wasnt that Taurus or Mark IV or something?) If it stops raining im going to try to get the oil filter set in place so i can get lines made to atleast fire it up, but its supposed to rain all day today and tomorrow so i might not get anything done. After that, im guessing another full week of work atleast before i figure out where everything else will fit, and how to install them in those places. So here was the plan: 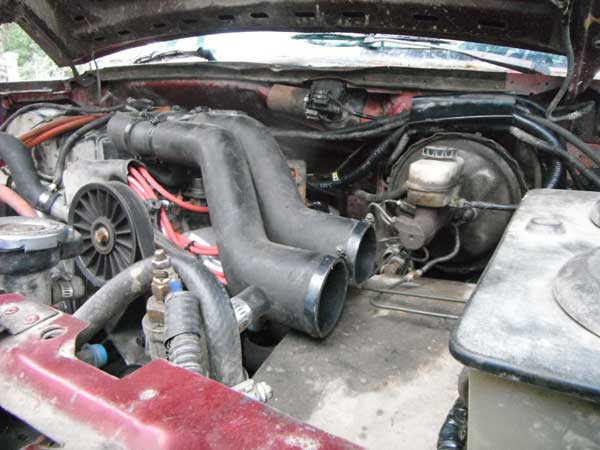 The airbox would fit there. I even moved the line lock towards the firewall, and replumbed the OBA manifold to do it. But, i realized today that wasnt going to work, and here's why: 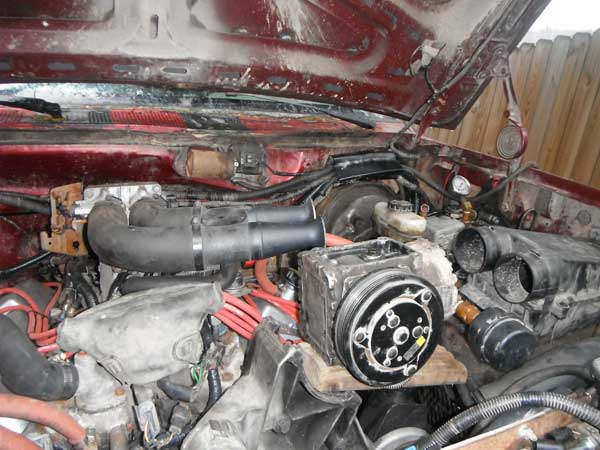 There is no way i can fit the York there. The York has got to go there, and its got to lay down in that position, its the only way to get it to clear the hood with any room to spare. 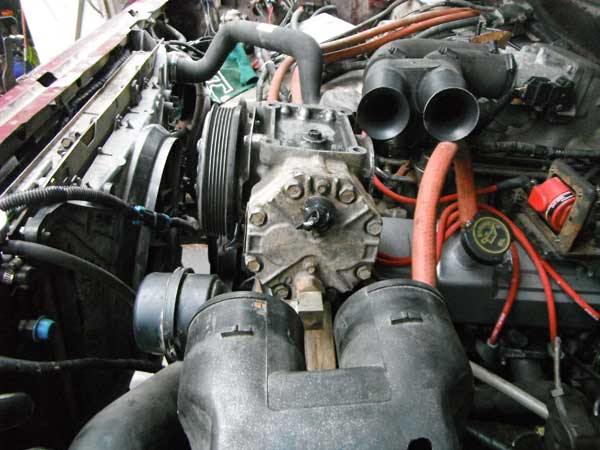 So i devised this idea today: 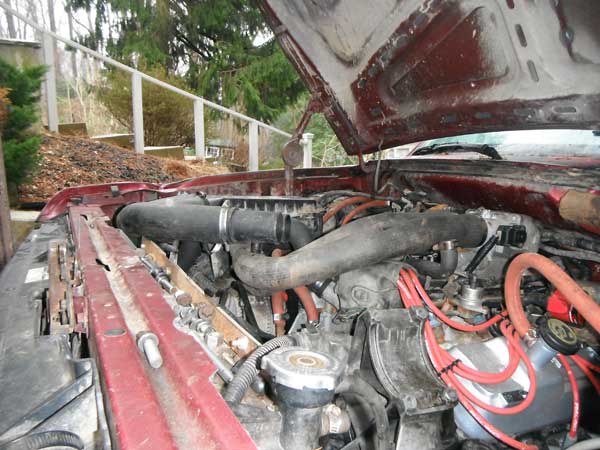 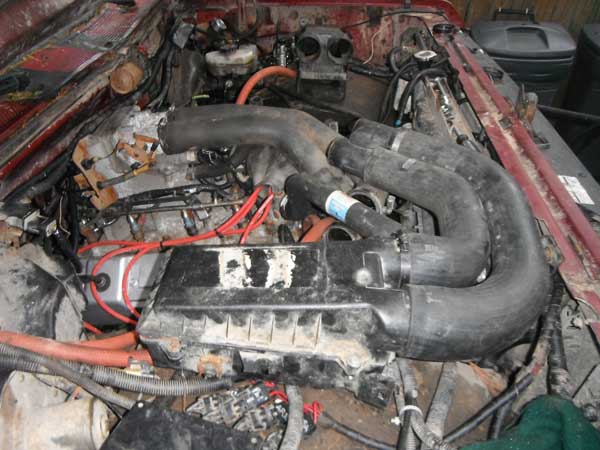 Here's what youre looking at. 86 302 intake tubes coming off throttle body, to OEM 460 plastic intake crossover pipe thing which then goes to econoline 460 airbox tubing, and then the factory bronco/F-series airbox. Its a little longer than the factory design, but its the same diameter as stock & clears everything, including the hood. The charge cable for the alternator was already barely long enough, with the airbox there i will definitely need to lengthen it, but putting the airbox here will solve all my other problems. 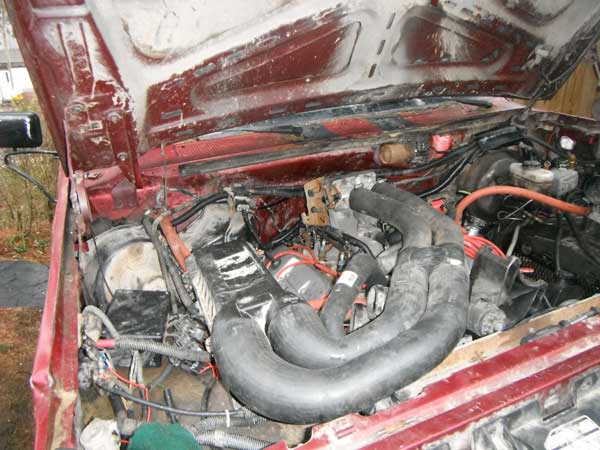 Hopefully i can get that to work, but i probably wont mess with it till monday. If it does work though, it frees up all the room i lost on the other side, meaning i can put my overflow/washer fluid reservoir back, as well as leaving me room for my oil filter housing, and should leave enough room for when i eventually add a line lock to the front brakes too. So im really hoping i can make this work. As for the oil filter, my remote filter brackets came. What i did not realize though, is that i need an oil filter adapter from an engine that did NOT have an oil cooler. Fortunately, the 302/351/460 all use the same one (the nipple threaded into the block), so if i can unscrew the one out of the 351, i can use that. If not, ill order one from Summit. Im hoping i can get mine out, because as soon as the oil filter is plumbed, i can start it! Got a little bit done yesterday. Reinstalled the doubler shifters, and added a tab to help keep the bolt from working loose Fenderwells reinstalled, with a little mod for more airflow 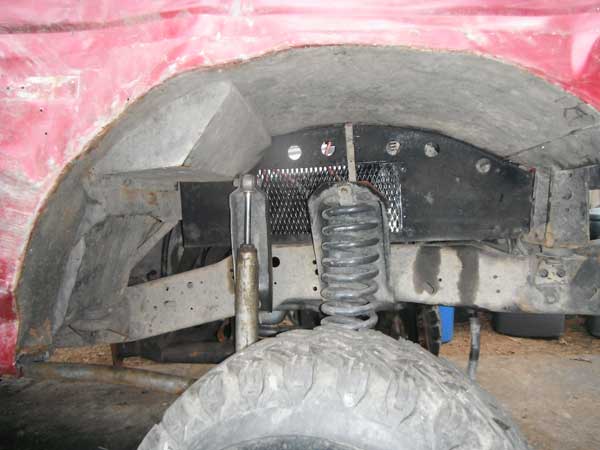 99% of the wiring done, just got to hook up the electric fan & OBA  My airbox situation. Cant reuse the stock box, no room for it with the wheel wells tubbed. Still working on this one.  Today im going to drop the trans pan & change the filter, then i can fill it up. Hook up lower rad hose, and fill that up too. Have to add fluid to the power steering too. I need to lay my York over to clear the hood but i have the wrong one, so i need to go junkyard hopping for one. I can whip a bracket up for it using mine as a template, but cant use mine so in the meantime im running the a/c idler pulley in its place. I need to put the manifold back in, thatll happen today too. Had to order remote oil filter brackets, wont be here till friday. Once they arrive and i set that up, i can start the truck! Small block starter on left, big block on right 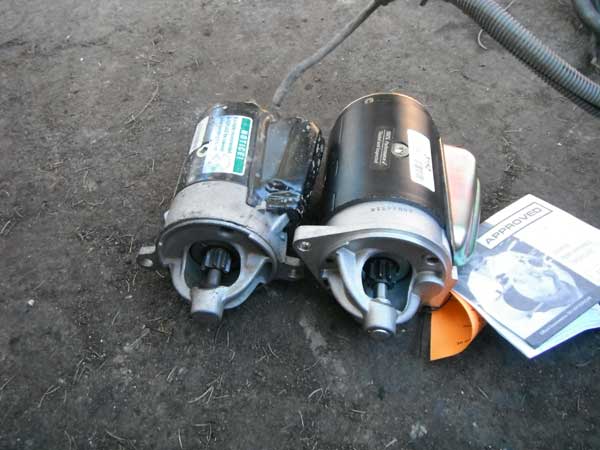 Ford Racing 9mm wires 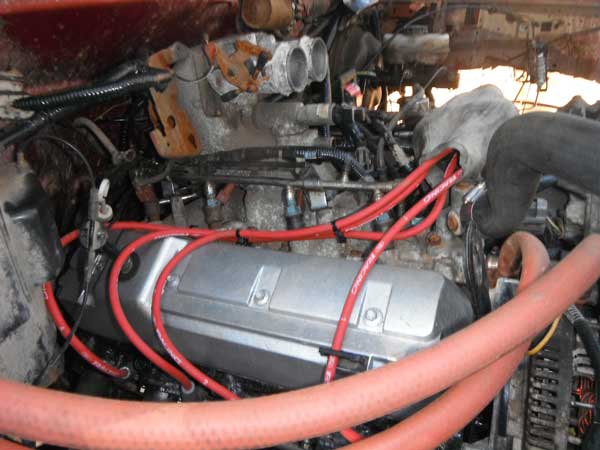 Ok, this was a WTF? moment. This is the wire for the 02 sensor. Instead of running down the bellhousing, Ford wanted the wire to run down the wheel well, inside the same loom that the starter's power cable runs through. So, in order to get there, this is the path it had to take: 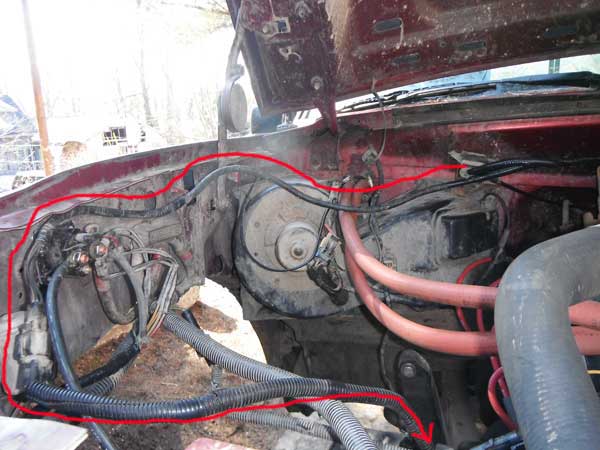 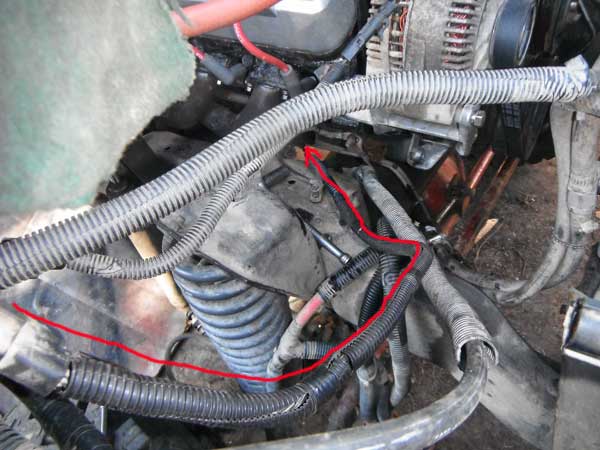 Heres the full length of it. Stupid long! 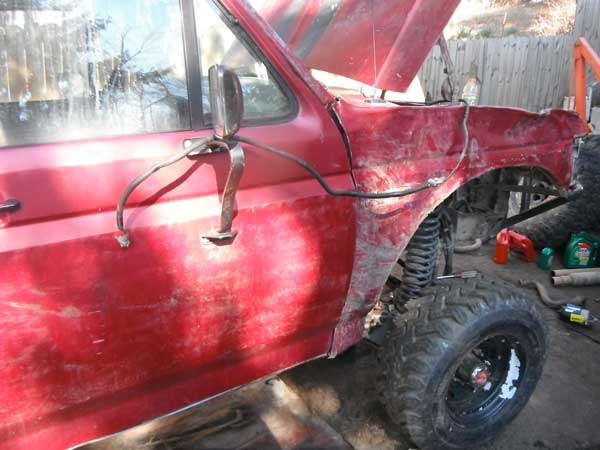 Ford actually added an extension to the wire to make it longer, but both ends of it are female, meaning if you remove it, you cant plug in the O2 sensor. SO the obvious thing to do, is splice a female plug onto the end of the first harness, and delete the extension. 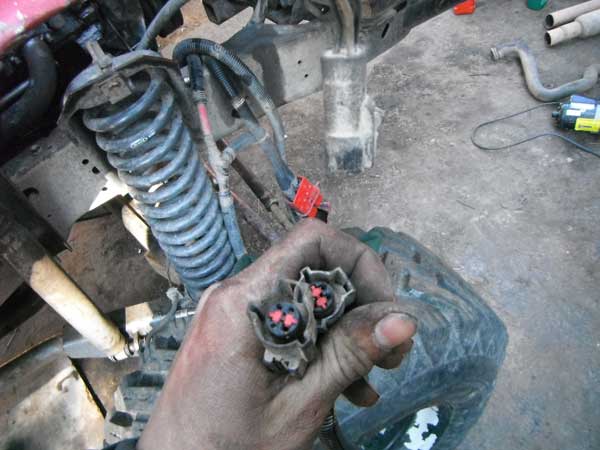 That was a simple one. I chose to keep the main cable the same length it was before.  Heres why: the first cable all by itself was the perfect length. Dunno what Ford was thinking when they laid it out the other way. 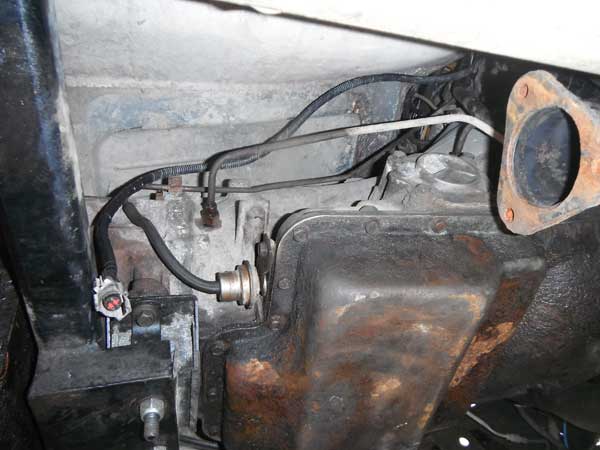 I also hooked up the radiator, trans cooler & power steering cooler. Got a shorter belt for the alt since the smog pump is gone, and put the a/c delete pulley on so i could put the orig belt back on there. I have to get a different York, i have a left hand suction and need a right hand suction so i can lay the York over in the horizontal position so it will clear the hood. I rerouted the ARB & axle vent lines so theyre not so close to the header, and reinstalled a ton more wiring. Also hooked up the trans vent since i forgot to do that. My neighbor came came over today to help, so lots of progress!!! I quickly whipped up a half ass carriage for the floor jack, that ended up working really well to put the doubler back in:  (Before you ask, yes its welded to the yellow cup, that was an extra one i had for the floorjack) 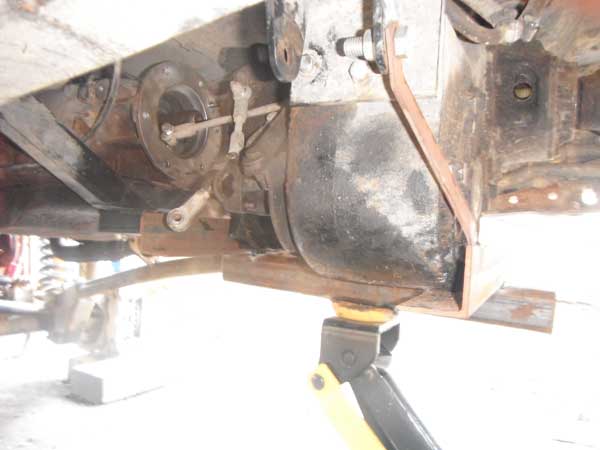 Then while he was installing the doubler mounts, i did some wiring harness work. The 'secondary' harness, which is for the injectors, TPS, ECT & IAC: 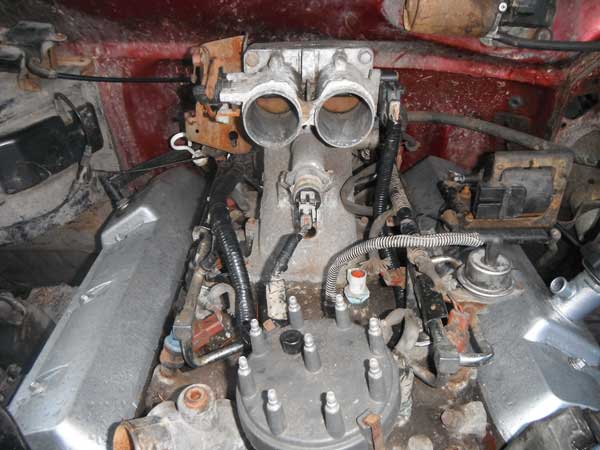 and the main control harness + ECM installed: 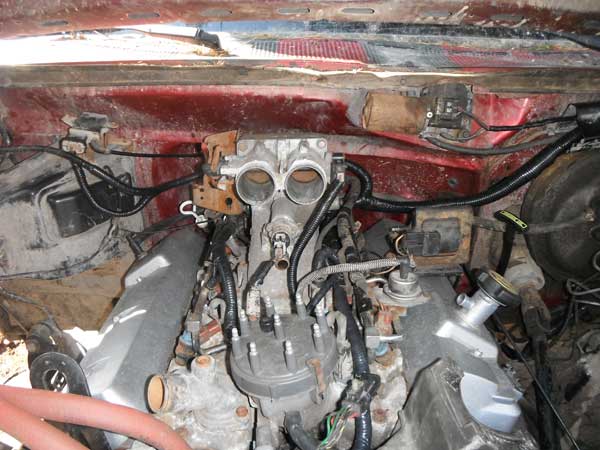  then we installed the anti-wrap bar + xmember, and both driveshafts. So we got lots done today! Things left to do:
progress pics! My 200 amp 3G installed. Fits with no mods. 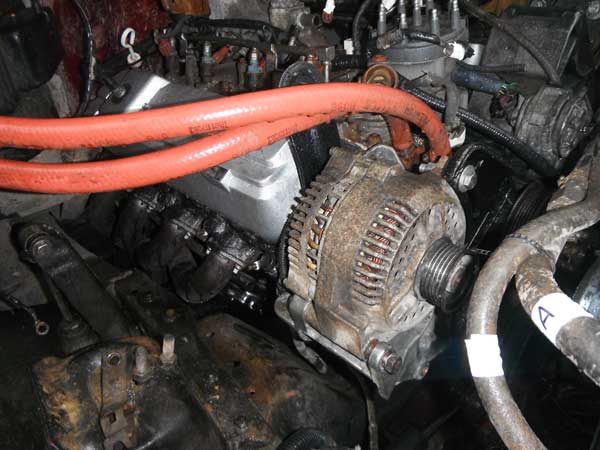 Saginaw pump, and my York setup off the 351. 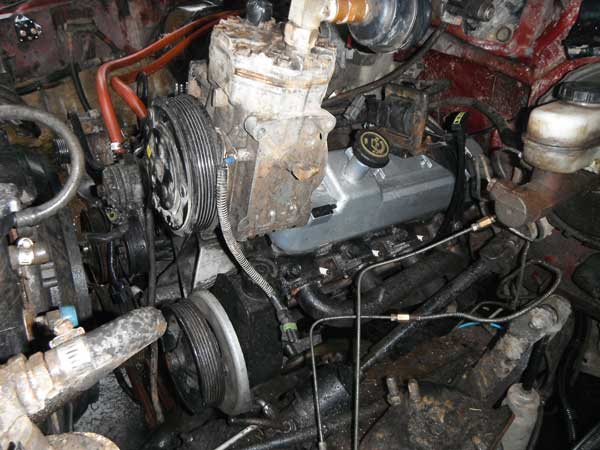 Front clip! 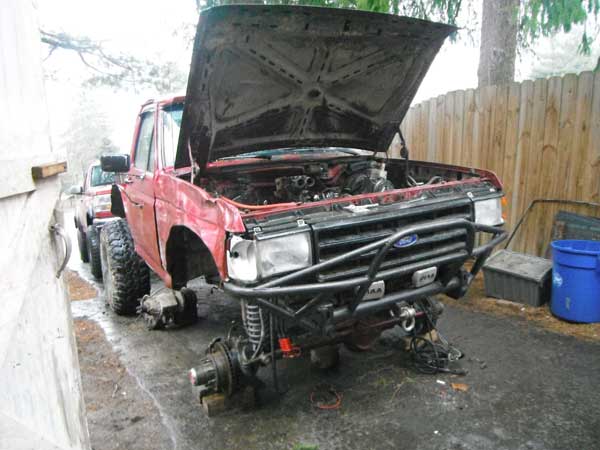 ...but wait, whats this?  The intake just touches the hood when its closed. However, it looks like i can drop the pump a ½" just by redrilling my bracket. Might be able to go ¾". Im gonna drop it as much as i can, and if i dont like it, make a new bracket. 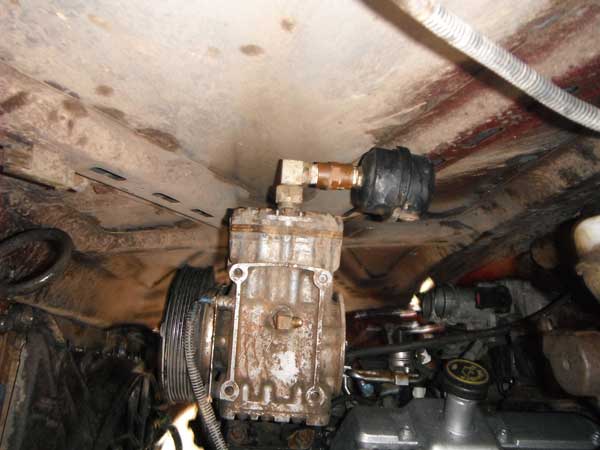 Starting to look like a truck again! 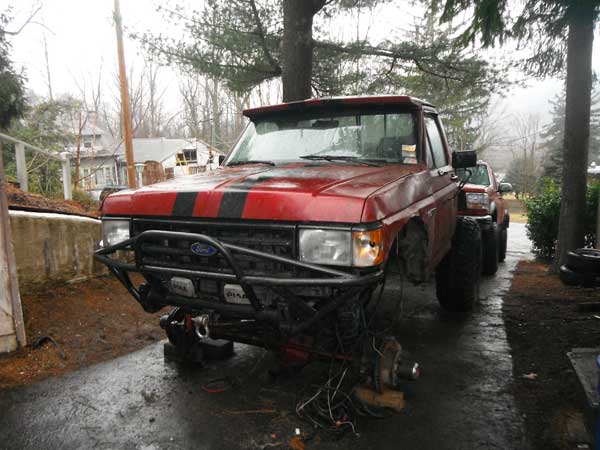 I didnt think i was gonna get the front clip on today. It was raining pretty hard, but it slowed down a bit, right when a buddy stopped by. So he helped me set it in place before leaving. After i got the clip bolted up, i put the hood on by myself, which isnt easy! Fortunately, the body is so thrashed that i dont need to have everything aligned perfectly, just 'good enough'! Tomorrow im going to modify the York bracket, and then probably start installing the wiring, and hooking up the radiator & coolers. Theres still tons of stuff to do under the hood, plus i need to reinstall the doubler + mounts, dshafts, & my anti-wrap bar + xmember. Also want to throw in new shocks & bump stops up front. So lots to do just yet! |