|
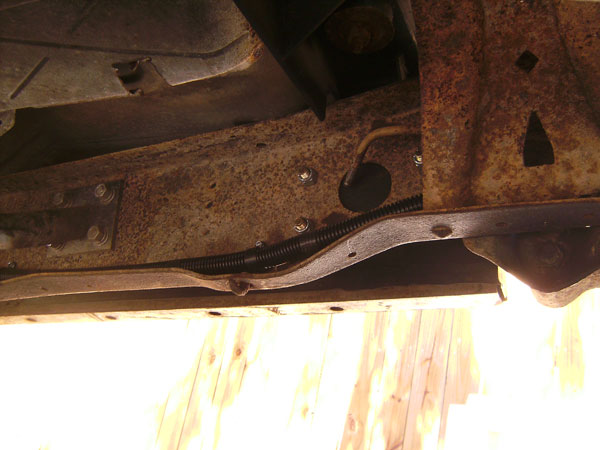
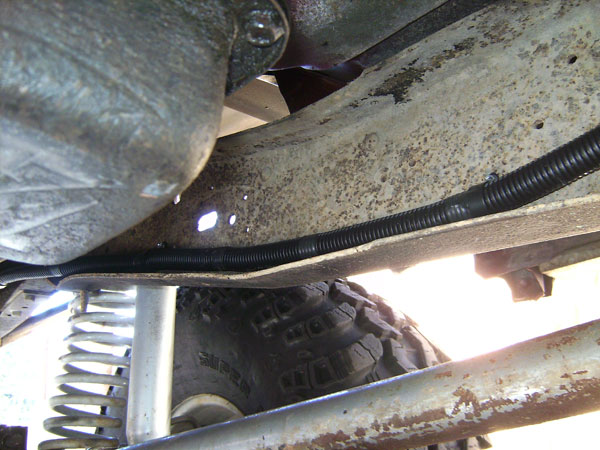
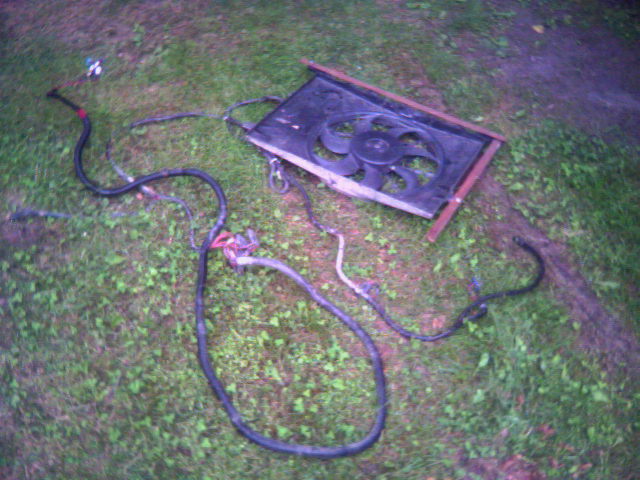
OBA air tank reinstalled in roughly the same place it was before:  Couldnt put the rear air chuck back where it was, so i decided to try this out. Never got a rock up there before... 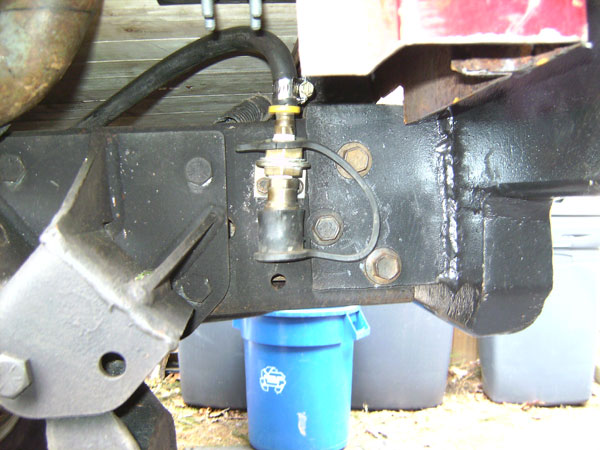 I also reconnected the ARB. No pics of that, just imagine a typical install. Still need to build a new mount for the York, but the rest of the OBA system is complete. From there i moved to the batteries. Plan is for dual batteries in the bed. I am using the same battery the diesel has, for the sake of simplicity. Here is the concept: 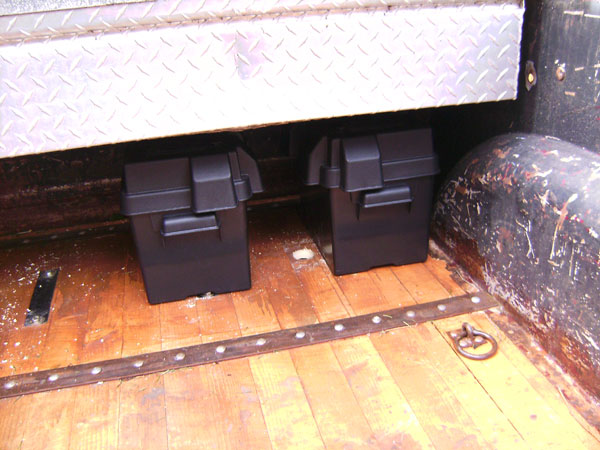 Made new Positive & Negative cables 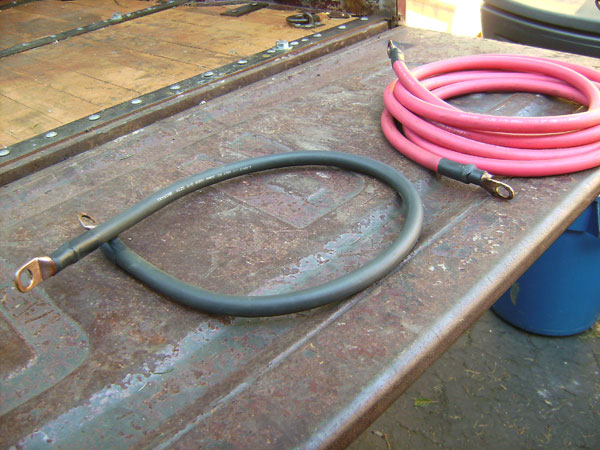 Negative grounds under bed, here: 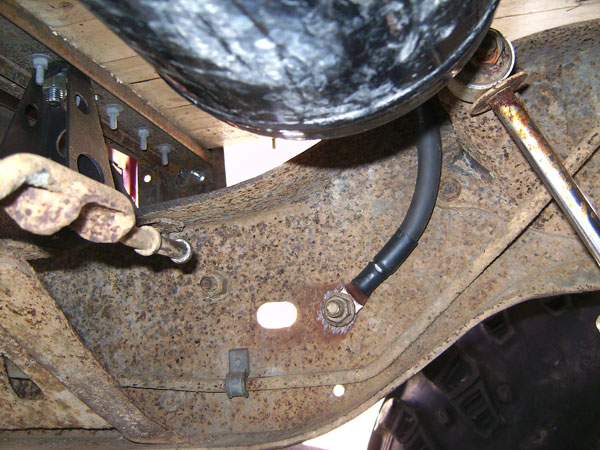 Positive, wrapped in Nylon Wire loom (has a higher temp rating than standard polyethylene wire loom) and run along the pass side frame rail:
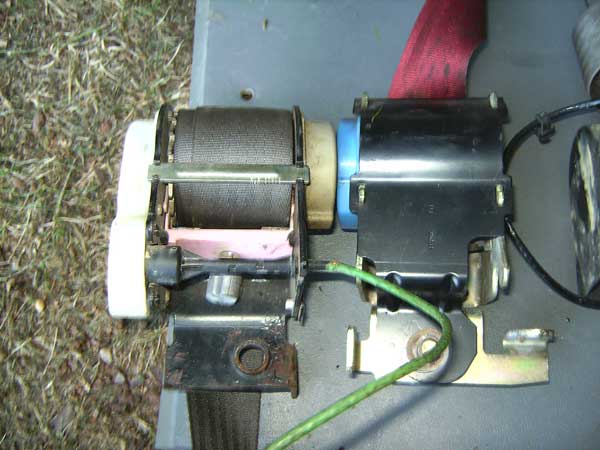
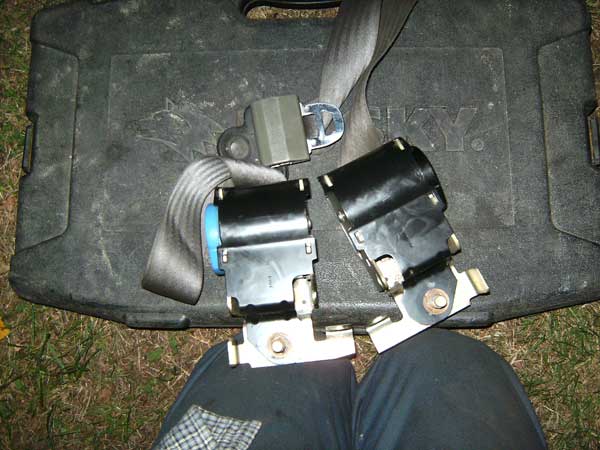
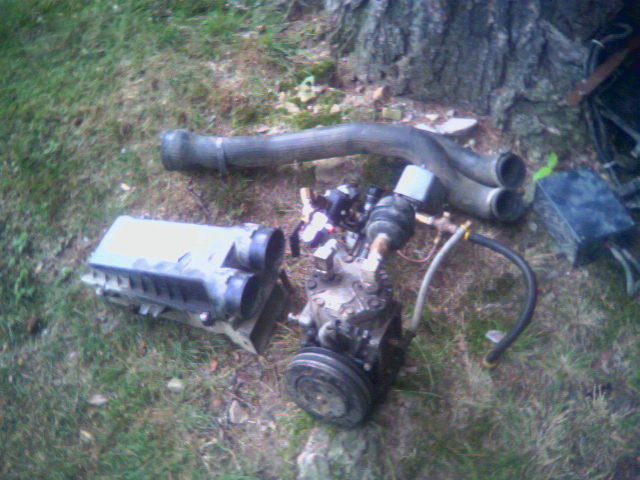
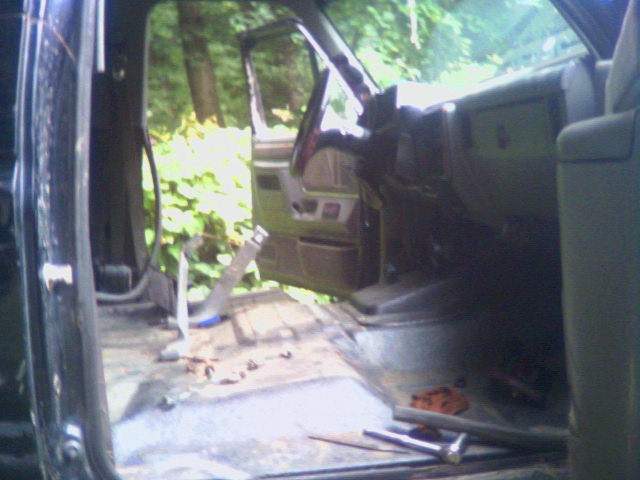
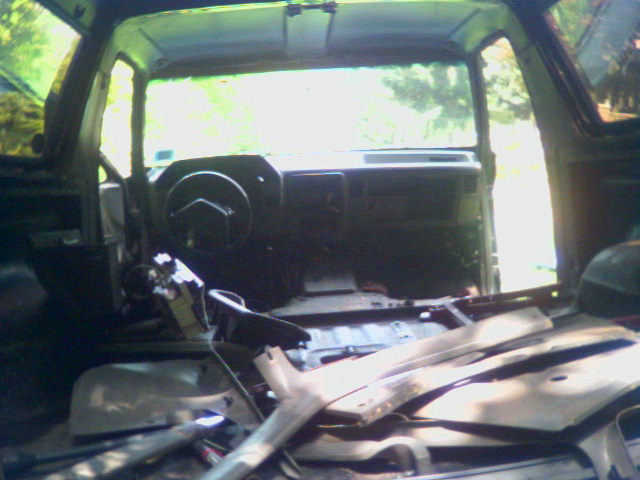
One battery box, wired with a battery from the diesel. The angle iron keeps the boxes from sliding around, and then they get strapped down to the bed. One box removed so you can see better: 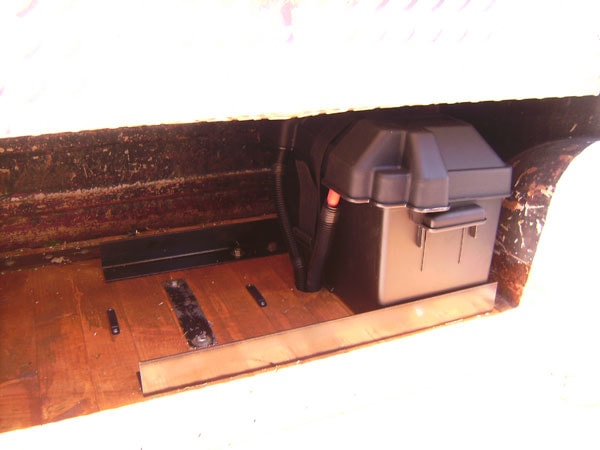 And here are the 'jumper cables' to piggyback the two batteries together: 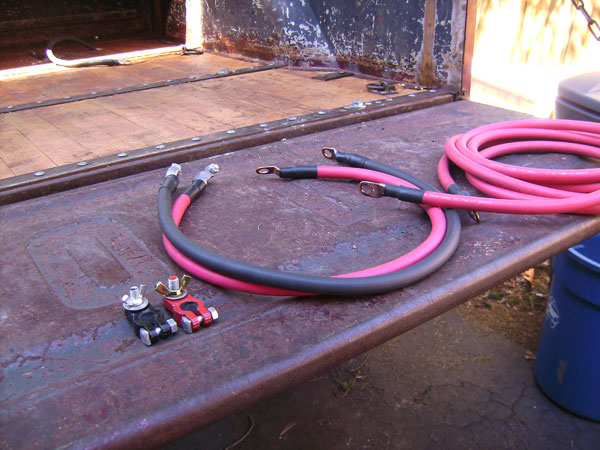 Up front i re-mounted the original battery ground so the engine & harness was still grounded to the frame. So with that done i decided to remount my CB antenna. Mounted it the same way the diesel's is: 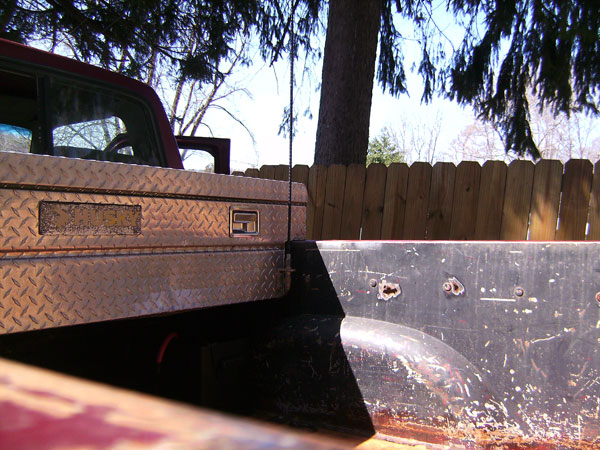 I then snaked the wire up through a grommet in the floor and hid it neatly behind the interior paneling (pic missing) Monday im going to try to get the exhaust done, and then, while not totally finished, she technically will be wheelable again! I considered building a flatbed. Really, i did. But, in the end, I wanted something with style. And for that, you just cant beat a stepside! Enter the secret weapon!  I removed the busted fiberglass fenders,and the rotted out xmembers, and took what was left of the bed & got it up on the frame. Well, its a tad too long: 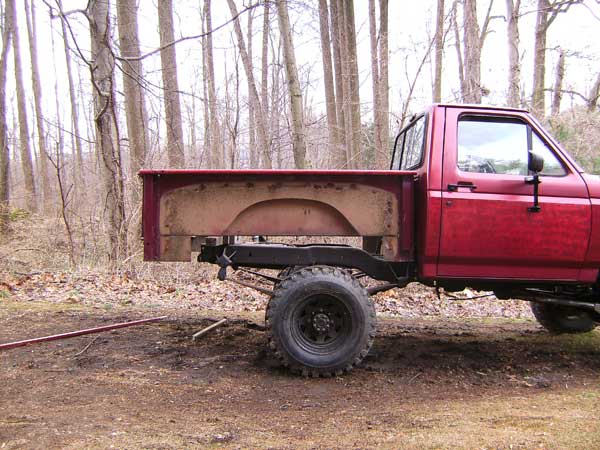 But man if that aint a sexy tailgate!  So after some careful measuring, i decided that the bed needed to be 15" shorter. Specifically, 8" from the front, and 7"from the back. So i busted out the sawzall (again) and went to town! The shortened passenger fender in front of the d.side, shows the difference in length: 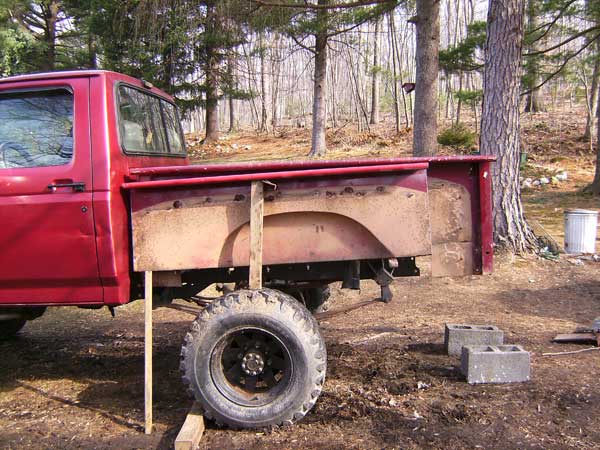 The next step was to take the stake pockets, cut the sheetmetal off the back of them and then re-spot-weld them to the newly shortened fenders. Fortunately, a buddy has a spotwelder that he lent me to do this job. And damn are they cool! 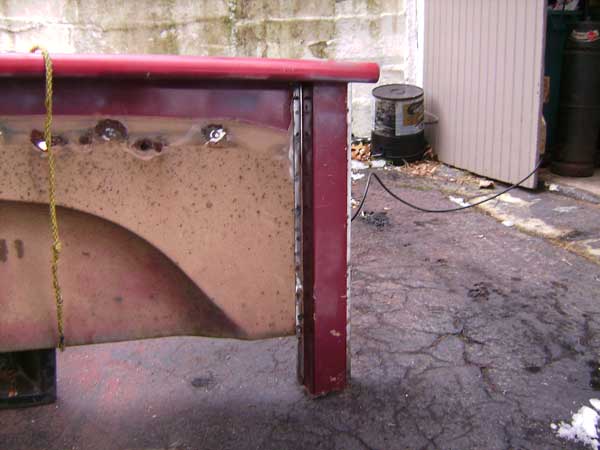 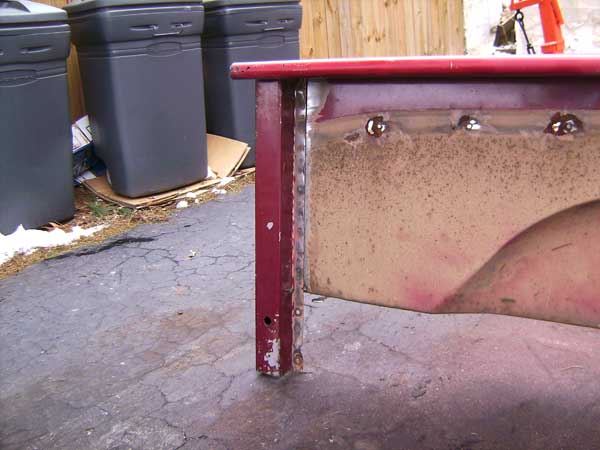 then i busted out the dremel, made some choice cuts, and viola, the stake pocket was usable again! 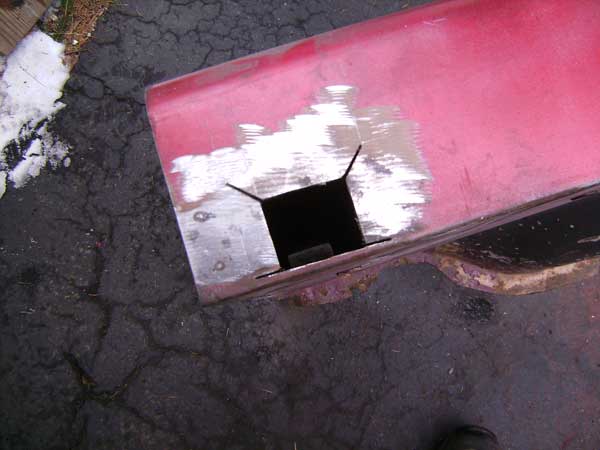 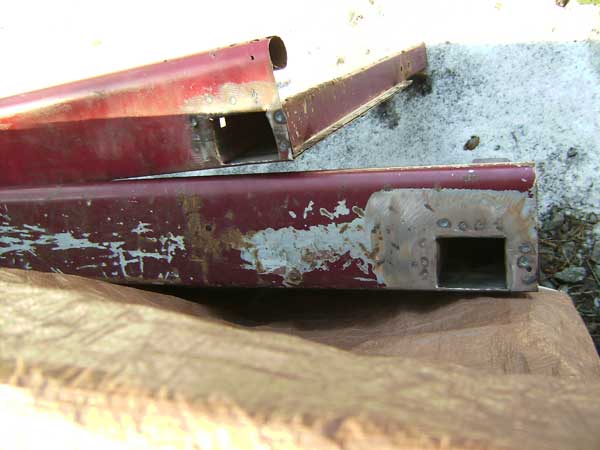 ...and that was basically all the fabwork for the fenders. Neat thing with these beds is, the fenders bolt to the header and the rear wall, so it was just as simple as redrilling the holes and the bed simply bolted back together, 15" shorter 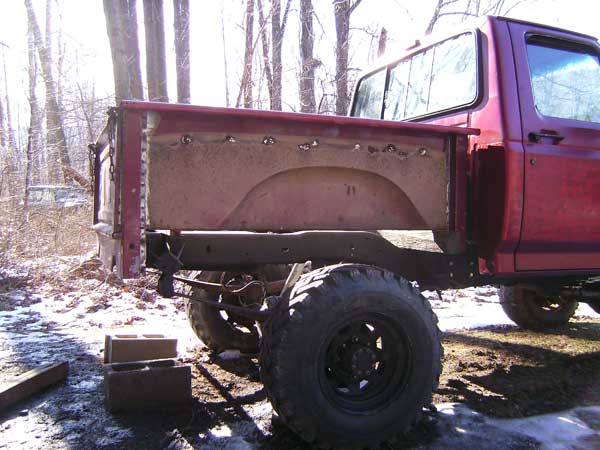 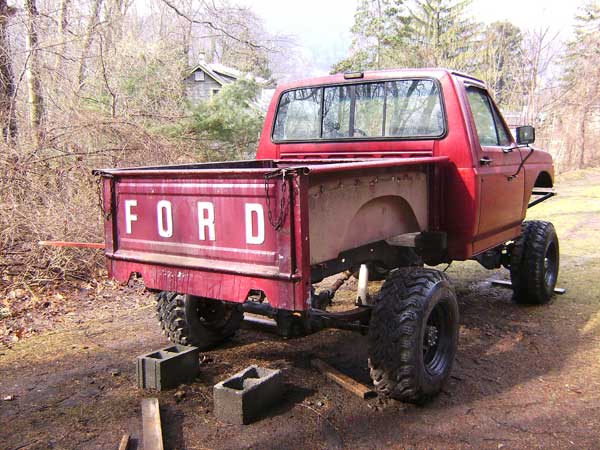 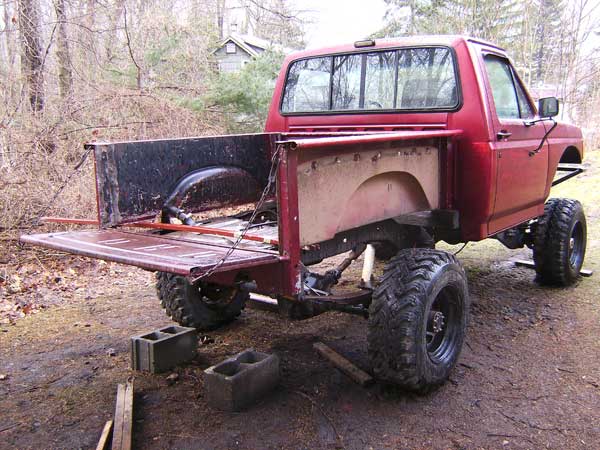 Ok, so next up was to make some new xmembers for the bed. Settled on 4, since stock the bed has 5 and this one is a good bit shorter. 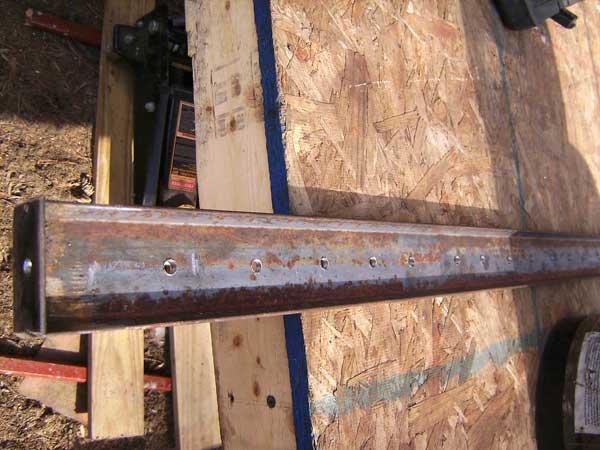 Then i bought a pile of 1*3s, and started making a new floor 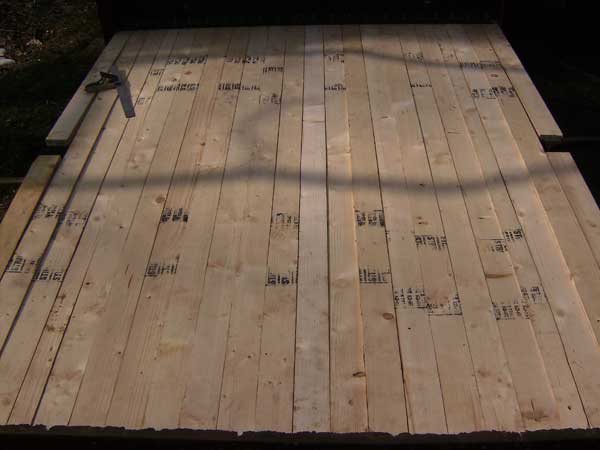 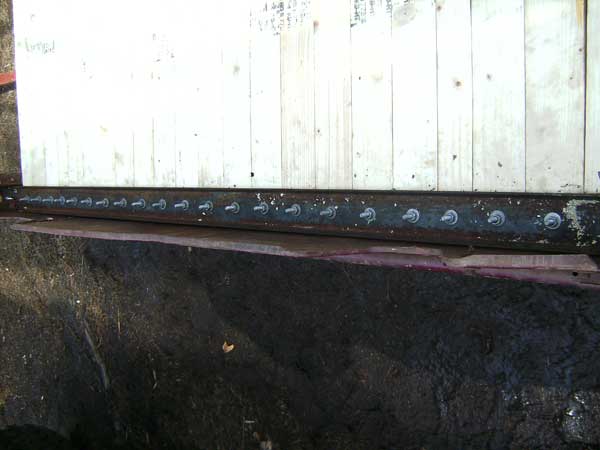 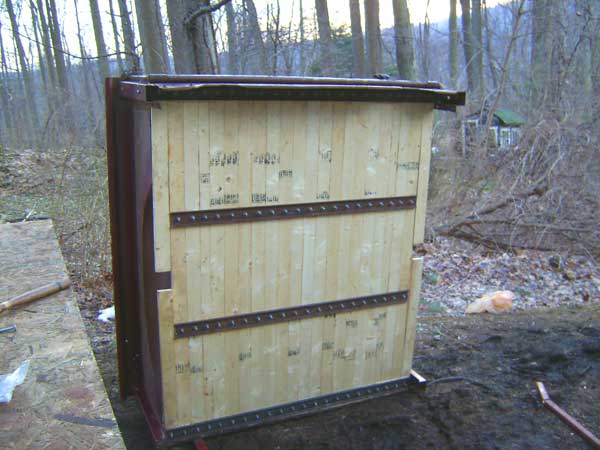 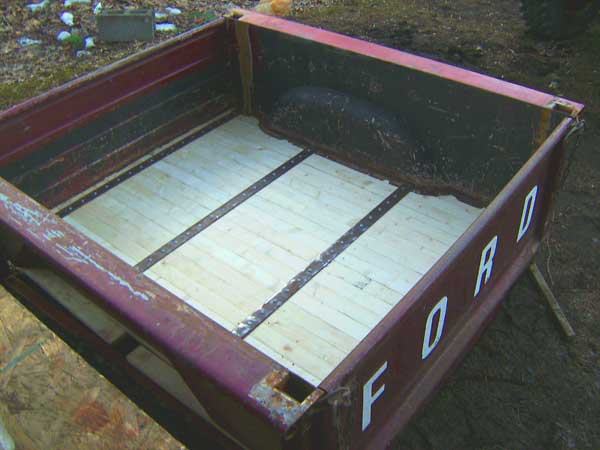 ...and heres something cool...put the toolbox on the rails, and slid a tire in. It *just* fits: 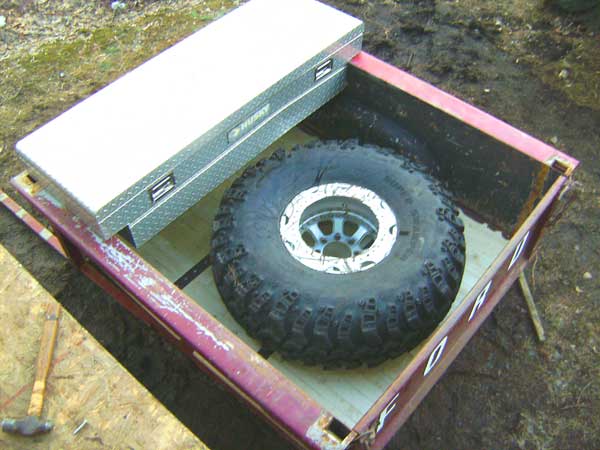 Ok so anyways......i trimmed the floor to match the fenderwells  and got the bed set up there, so i could move it to the driveway for some welding 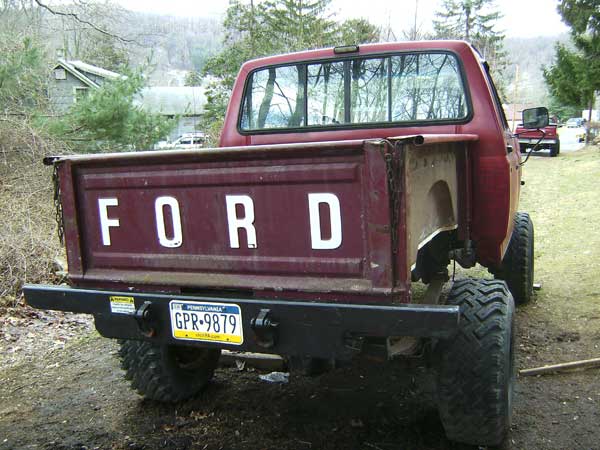 First things first: Narrow the bumper. Cut ~7" off each side, so figure the bumper is now roughly 18-20" narrower than a stock bronco bumper. Ill have to measure that tomorrow. 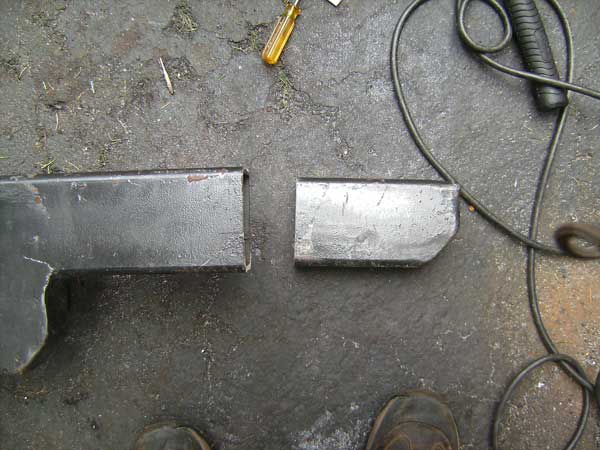 Then i cut the rear stake pockets, and then the flat panel in the back as well 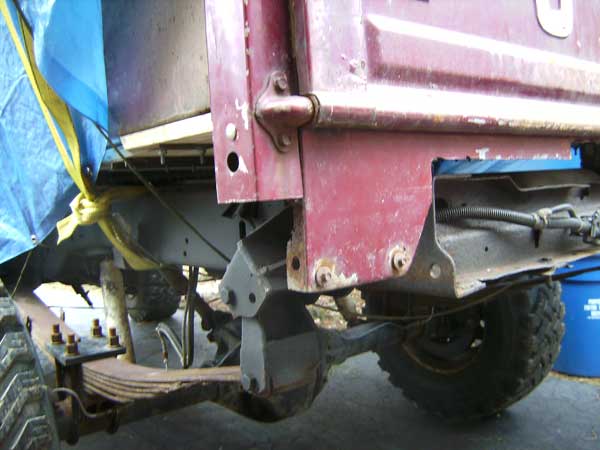 So that gets us here, but the bed still isnt bolted down:  I settled on 6 mounts for the bed. 4 in the back, and two up front. Out back they are short, only 2" tall, so i made em like this 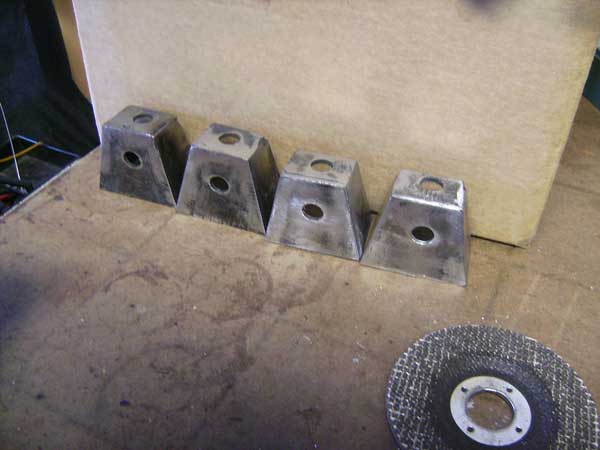 Theyre not perfect, but they work so im happy. Up front, the mounts had to be 5 3/16" tall, so i put a little more effort into them 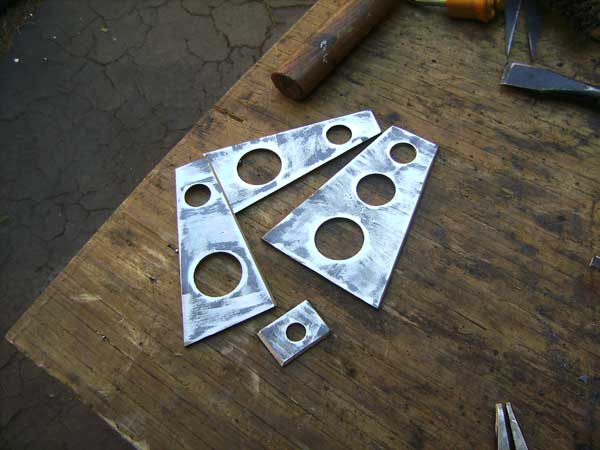 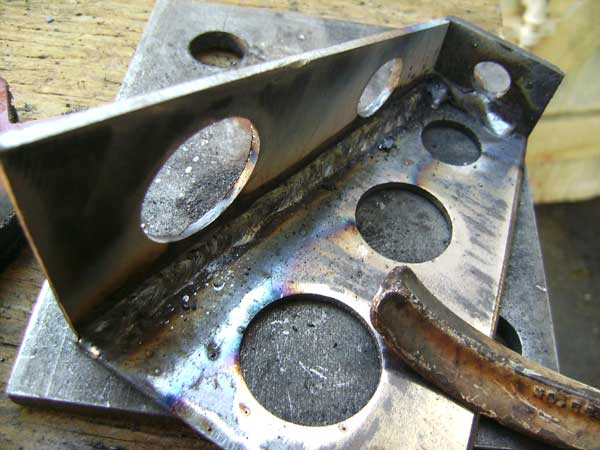 Heavy bead inside, light one outside, ground smooth, to make them appear as if they are on piece and not 4 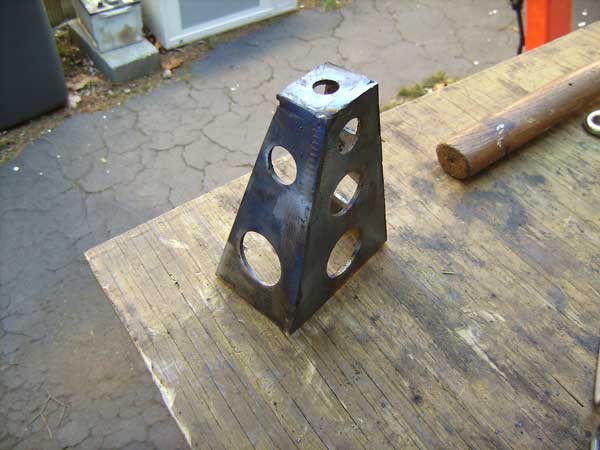 Coincidentally, they ended up being dead center on this xmember 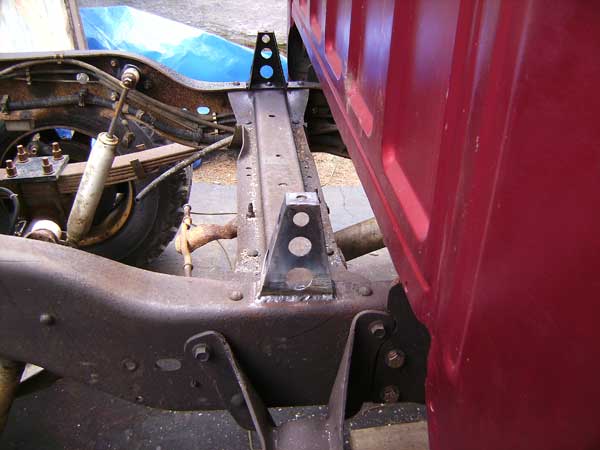 ...and the other 4 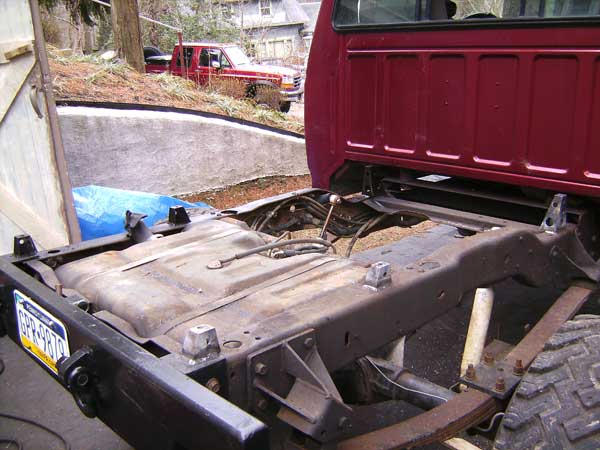 So with those done, they got painted, and the bed installed for the final time. From there i used a piece of 2" filler neck hose from national, plus a 1 7/8" 45º exhaust fitting, plus halfpof my stock filler neck, to get to the inside of the bed. This is still a work in progress. 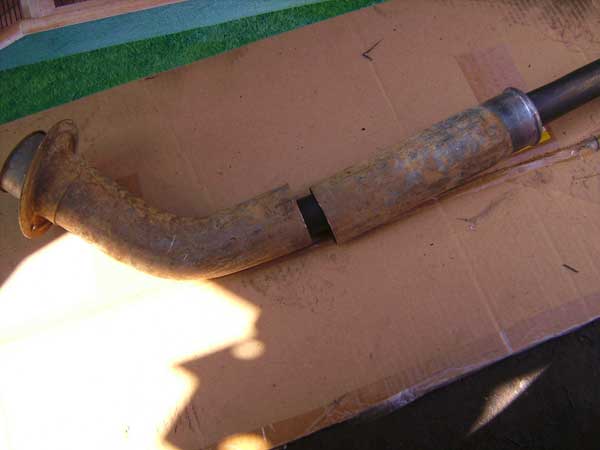  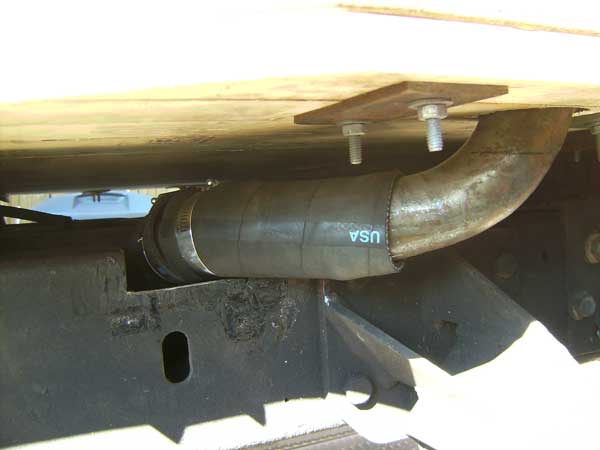 i intend to brace this up somehow, just not sure yet  So this gets me caught up to today, when the toolbox got bolted in 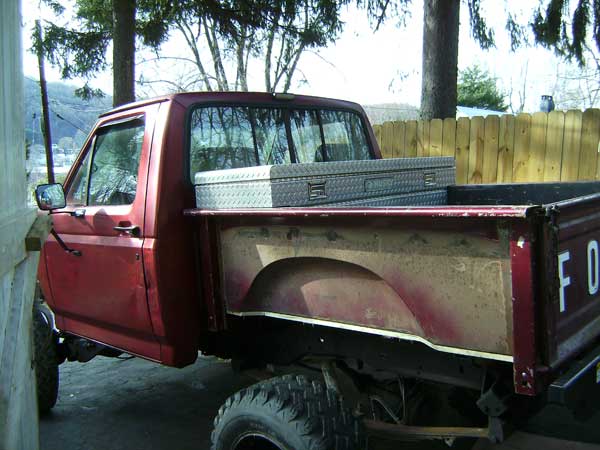 I also decided that there is nothing left to do that will be harder to do with the iroks on, so they finally made it back onto the truck 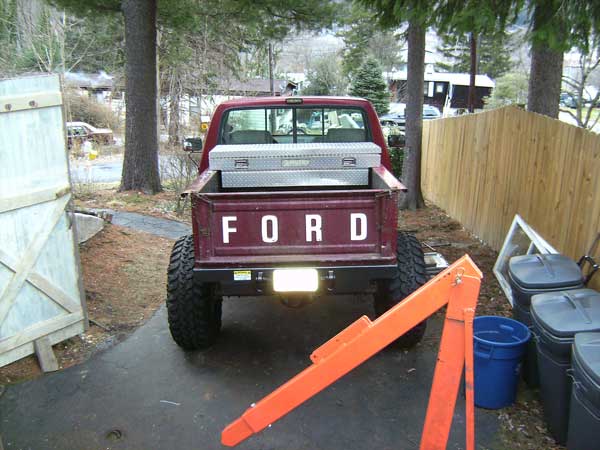 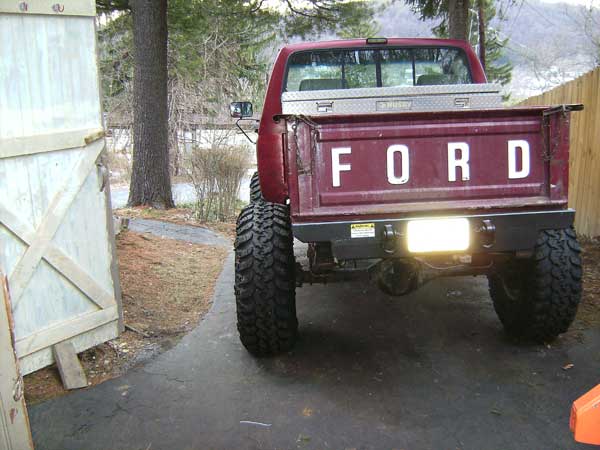  So this officially catches us up to today. Right now im in crunch mode....i need to relocate the batteries to the bed, re-finish the OBA and get a totally new exhaust system on it before FSB's NE Chapter Ride at Rausch Creek in 3 weeks. After that im going to go back and finish off whatevers left, and then i can start playing with the suspension again. OK, with the fenderwells gone and no way of ever going back in, i had to do something with the airbox. Well, the solution is the '86 box! Gets it tucked up over top of the d.side valve cover 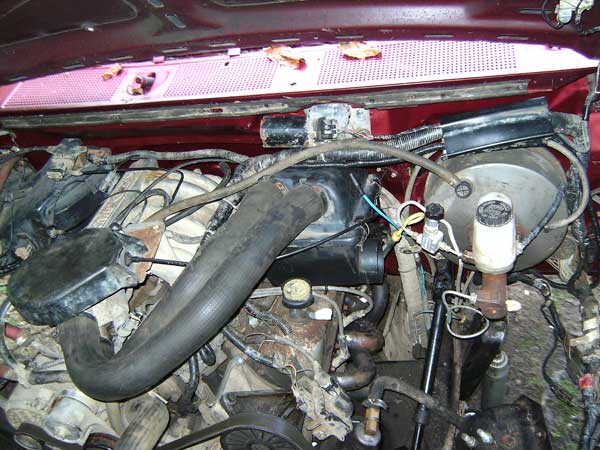 Later on i intend to make a snorkel for it that pops thru either the hood or cowl, but for now this will work fine. Then, while i had all that available room, i ditched my manifold for a set of shortys 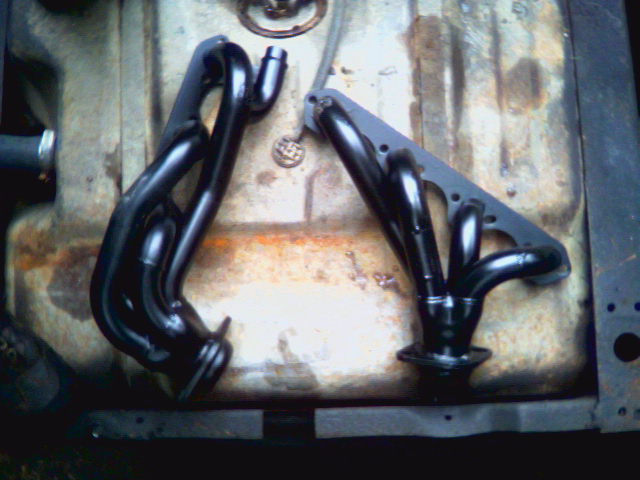 But that is just one of many problems solved. Take a look at this; i cut the fenders back so much the heater box sticks out! 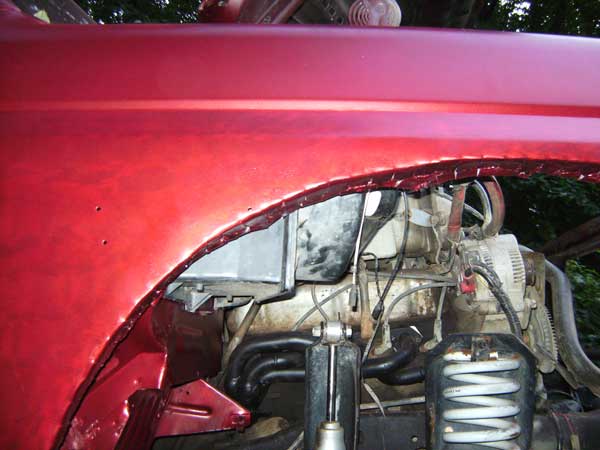 Since im not a whizz when it comes to bodywork, i ended up cheating, and going this route instead: 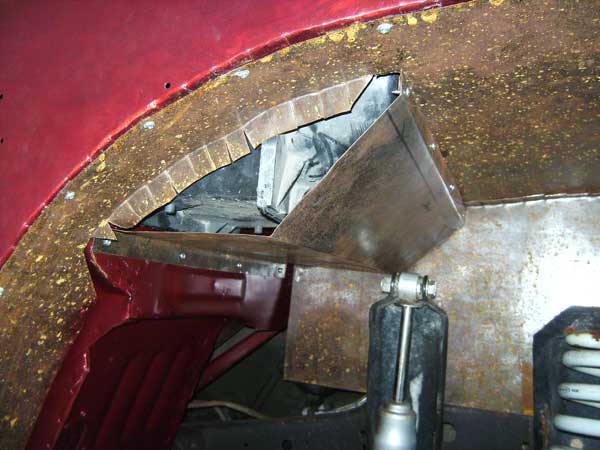 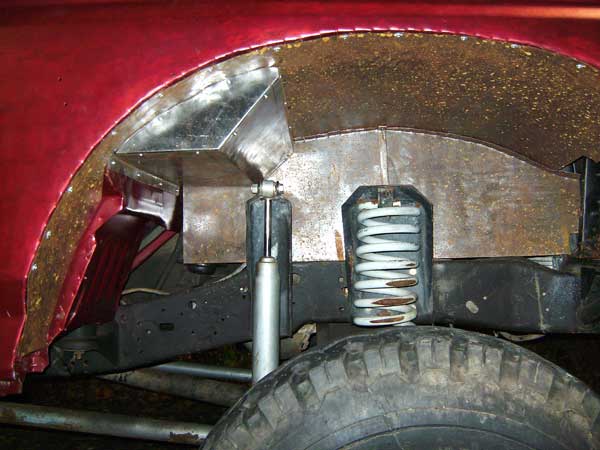 ...and a coat of paint. Hopefully it will work out in the long run, we shall see! 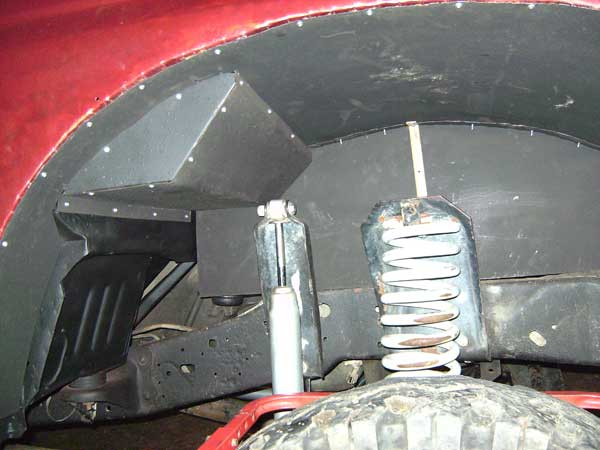 From the inside; not much room left for anything! 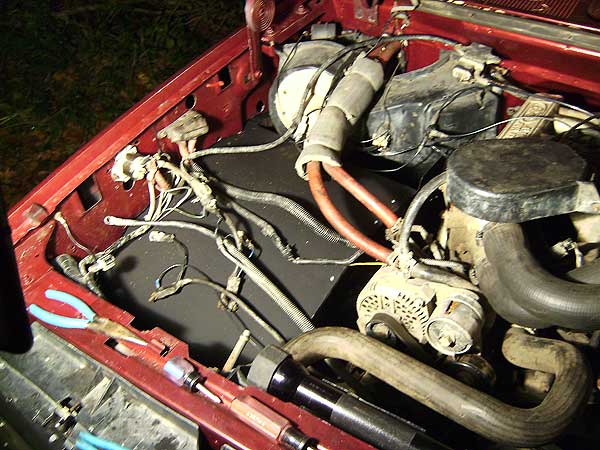 And the d.side....i had to make a panel to fit around the bulkhead fitting+the ECM connector. Down the road i might move the ECM and re-do this section. 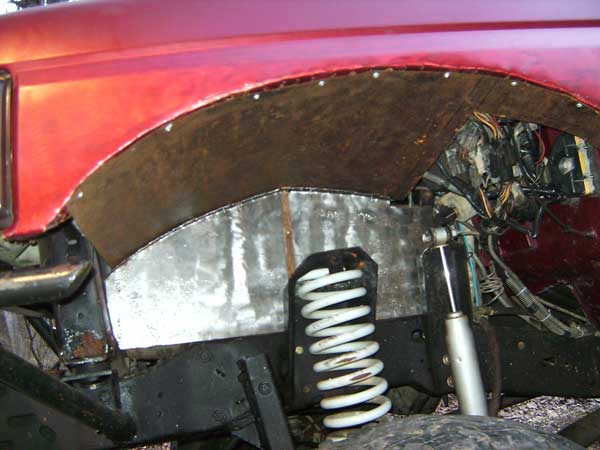 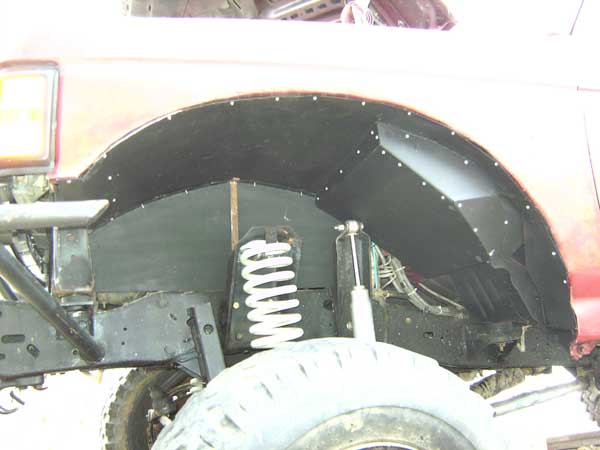 It looks like it sticks out, but youll notice it doesnt actually stick out any further than the firewall, so i think it will clear fine. So, with that done, i could start putting more stuff back under the hood. For starters, here is the new location for my overflow tank, and my remote trans filter: 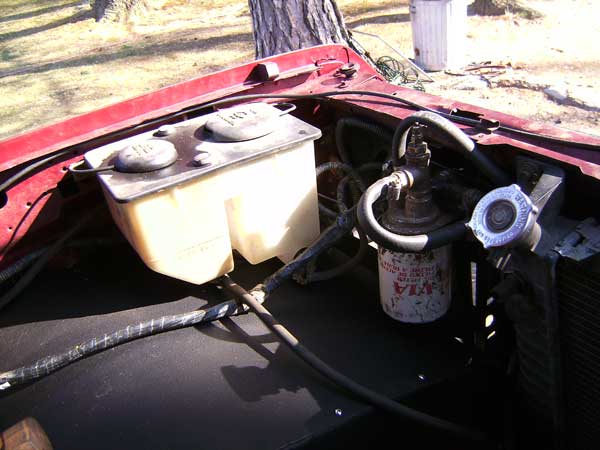 Got the electric fan reinstalled: 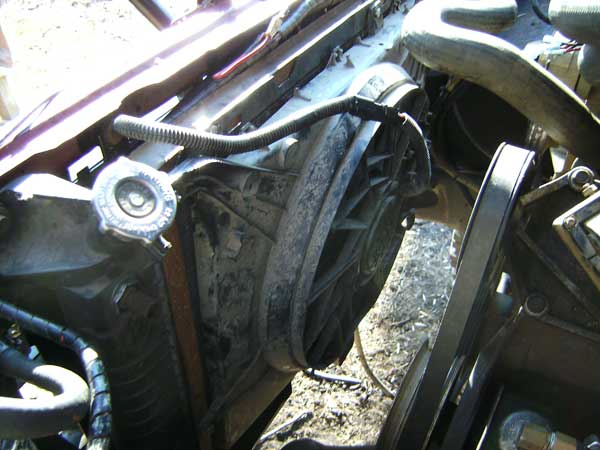 starter relay, mega-fuse for the 3G, and my relay box: 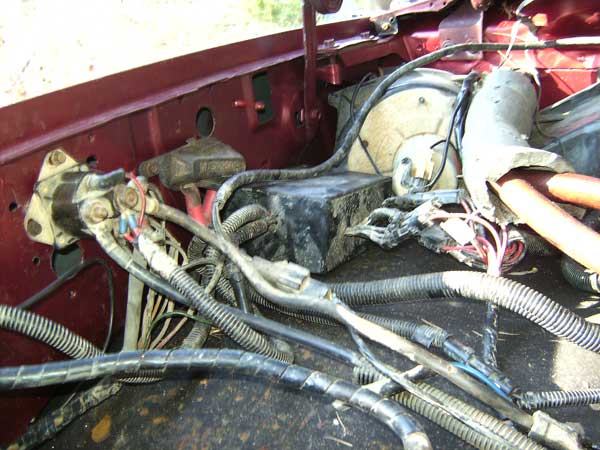 remote reservoir for the steering: 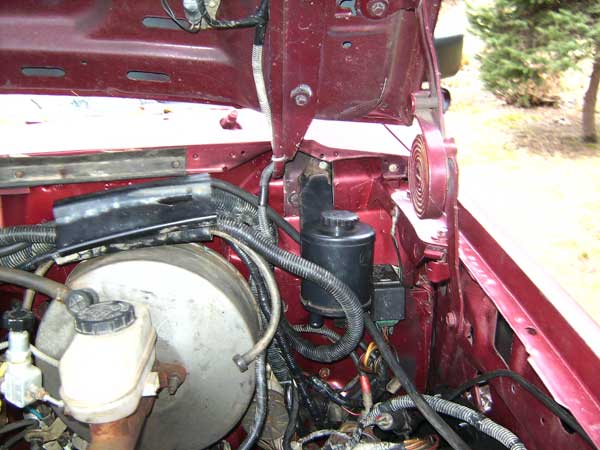 ...and the OBA manifold  This gets the cab 99% done. it runs & drives, so that means i can shift my focus to the back half of the frame. To be continued! Ok, next step: putting my interior in! The F250's harness was unusable (theres way too many differences to be worthwhile), so i had to put the bronco harness in. I took the opportunity to completely delete the ABS, cruise control, emissions & a/c, as well as some of the wiring for the bronco's tailgate. 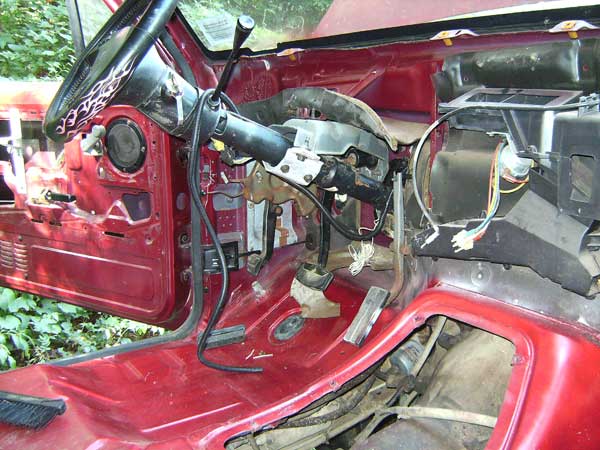 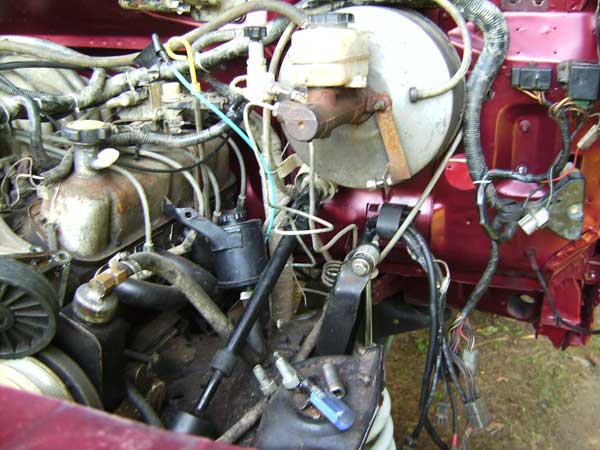 the hacked-up core support painted black; also the trans & p/s coolers reinstalled  painted my spare grill black, as well as the chrome XLT lights 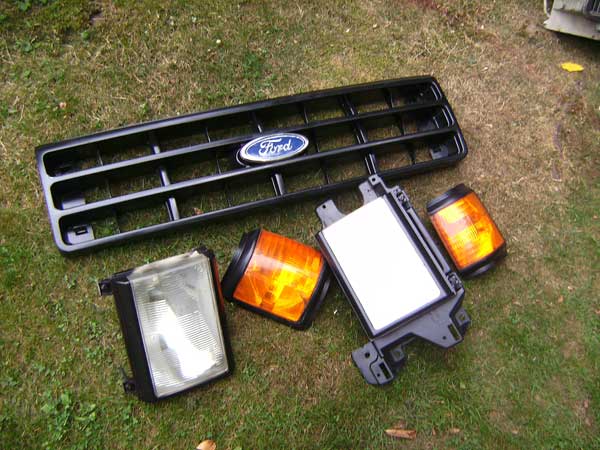 Now were getting somewhere! 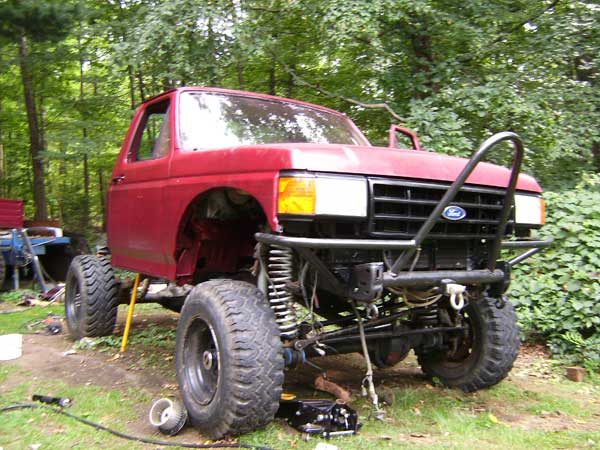 interior coming together 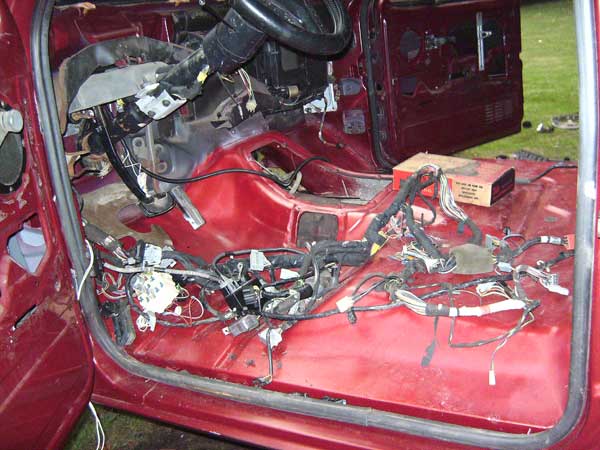 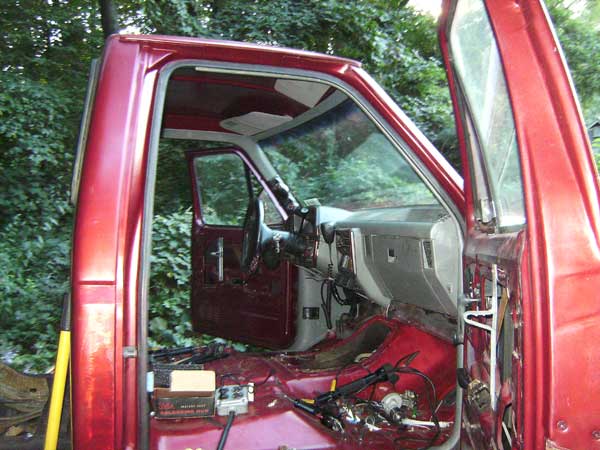 I took both seatbelts apart, to swap my grey belts into the F250's spools since they are not interchangeable.
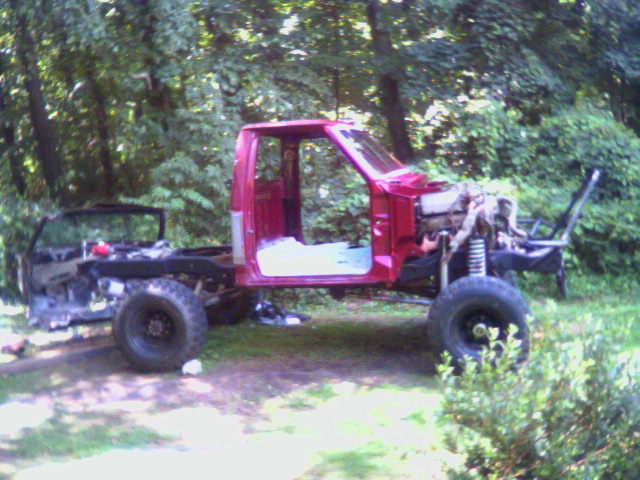
black dome light!  bronco buckets modified to work in the cab 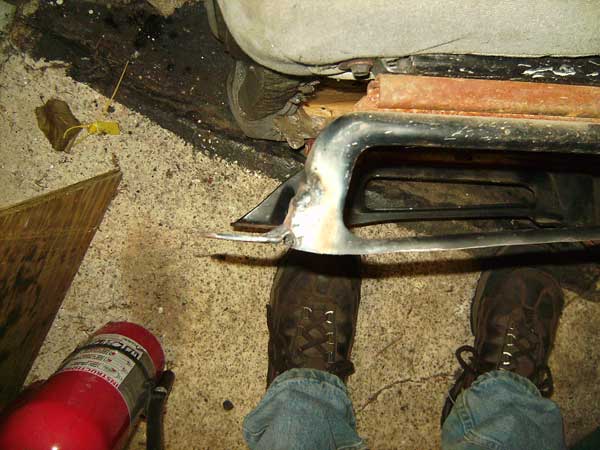 ...and the interior is 99% done! I even swapped in my power windows & doorlocks 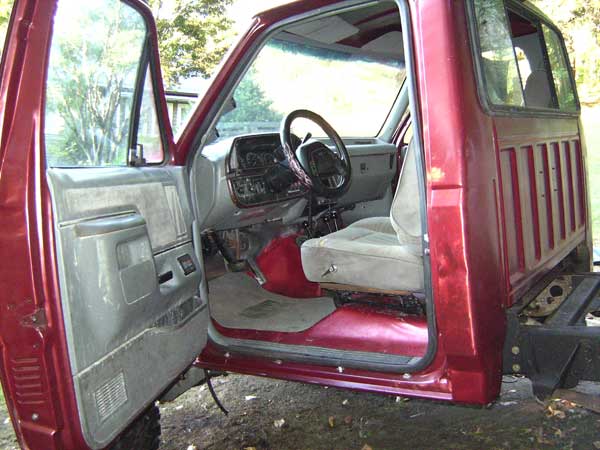 Ok, next up we're headed back under the hood! Ok, before we get carried away let me apologize for the crappy pics; i broke the digicam and didnt get anew one until much later on in the swap so some of the early pics aint so good. Anyways, moving on! Ok, so i got the neighbor to help me get the front clip up on the truck. Well, as it turns out, the bumper that i built around the 3"body lift no longer clears the fender! Well, im not one to sacrifice ground clearance, so i just cut the bottom of the fender off, and whatta ya know, it bolted right on! 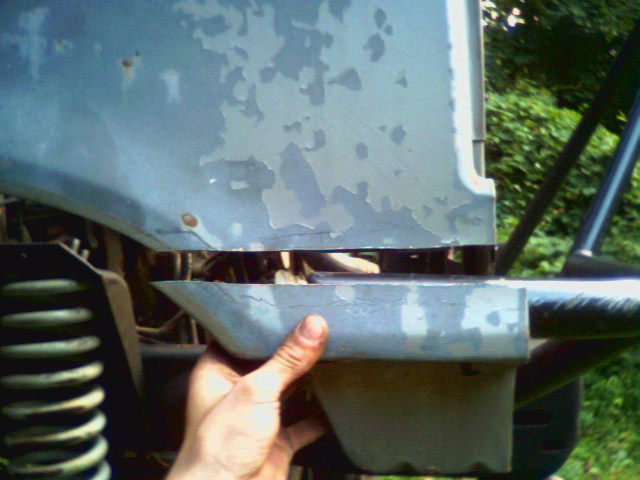 Movin on up! Now weve got this 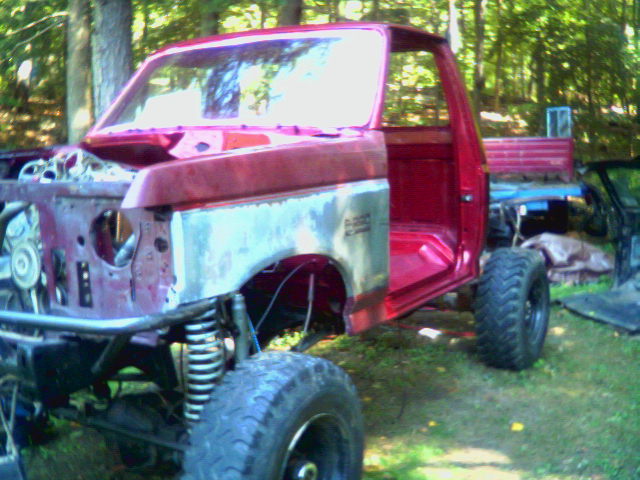 I figured at this point i could put the doors on, and get everything re-aligned 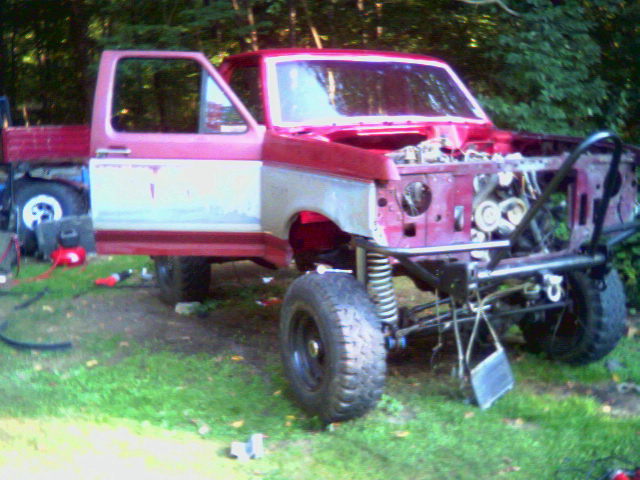 Looks kinda like a truck again, altho nowhere near what it used to be:
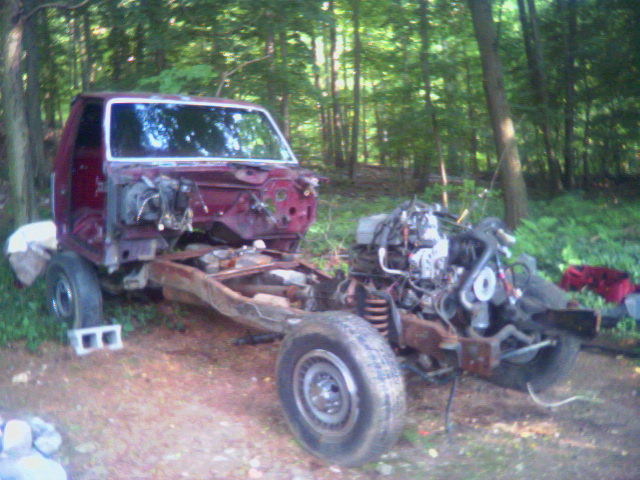
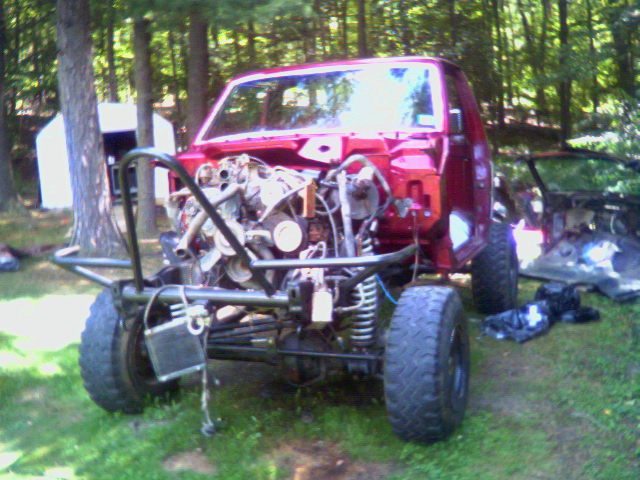
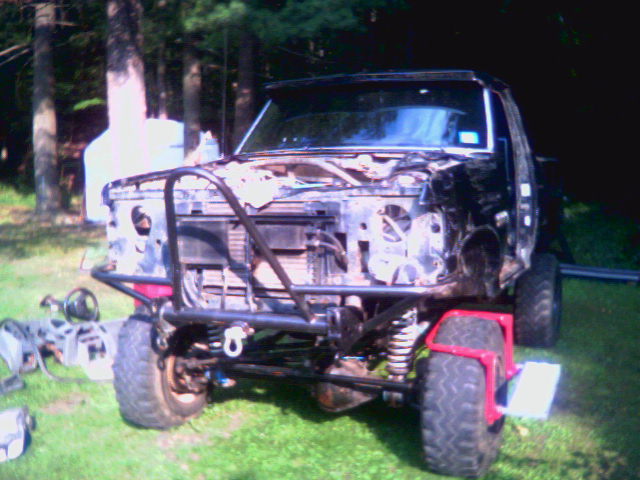
So, so previously i had moved the front-most body mount to the top of the frame rails, for tire clearance. Well this time i didnt want to hack up a nice clean core support, so i made a mini-body mount instead The concept: 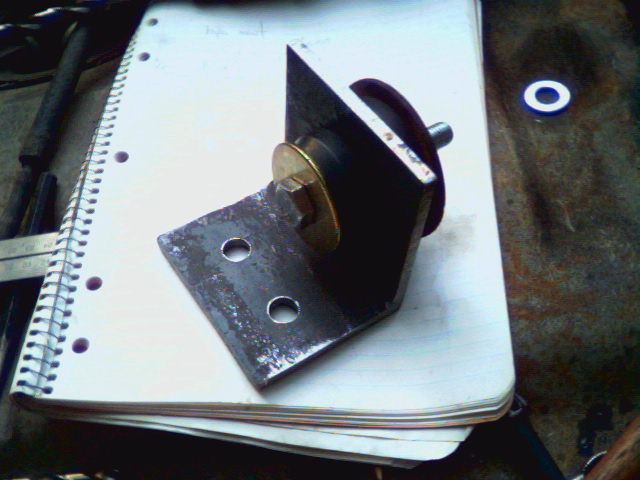 ...and the finished product: 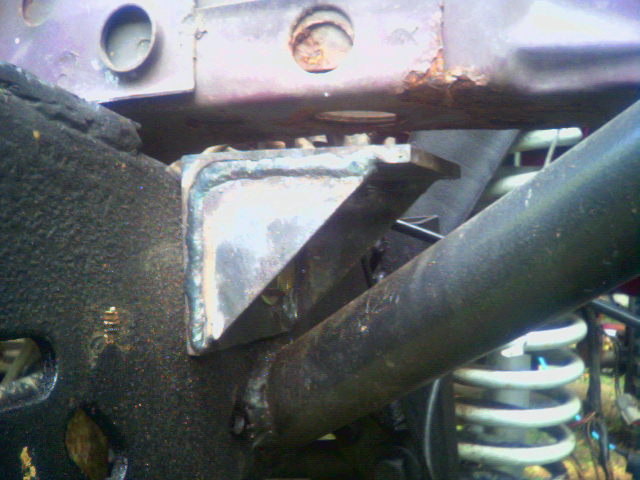 Ok, so now that the front-clip is firmly set inplace, it was time to move on to the fenderwells. I figured that since i had to cut them up to clear the 42s with 11" of lift, than now that i was down to 8", id have to cut another 3 or so inches out. Well, i was pretty close. Take a look at this: 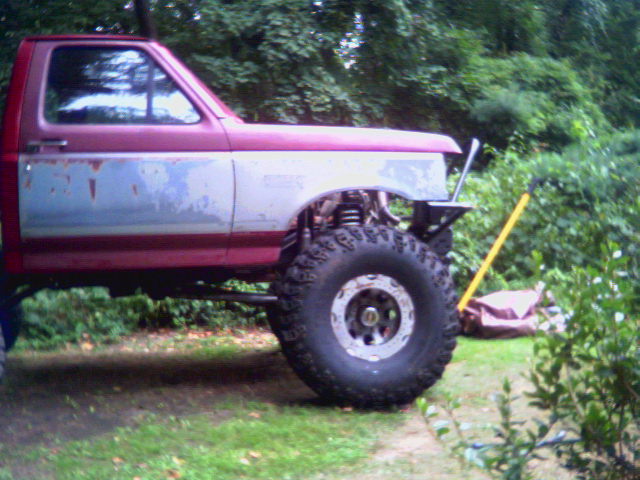 Not even close to fitting! 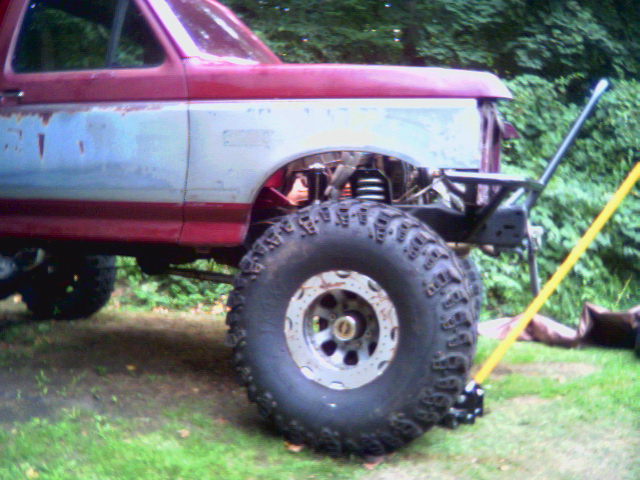 But, it helped me to figure out just where i needed to cut, so i made the first rough cut: 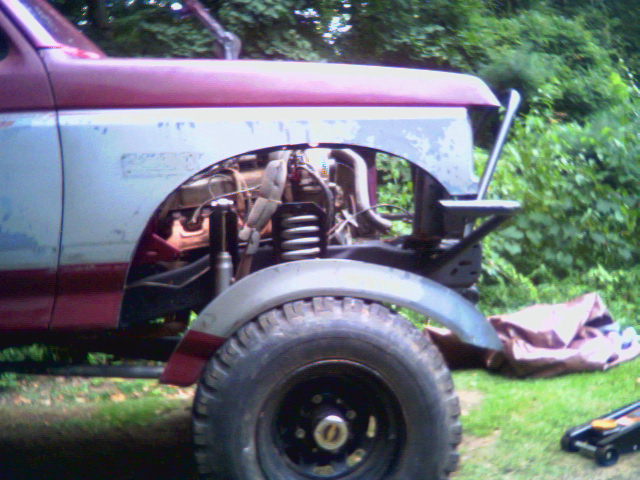 I also starting trimming the core support back a bit 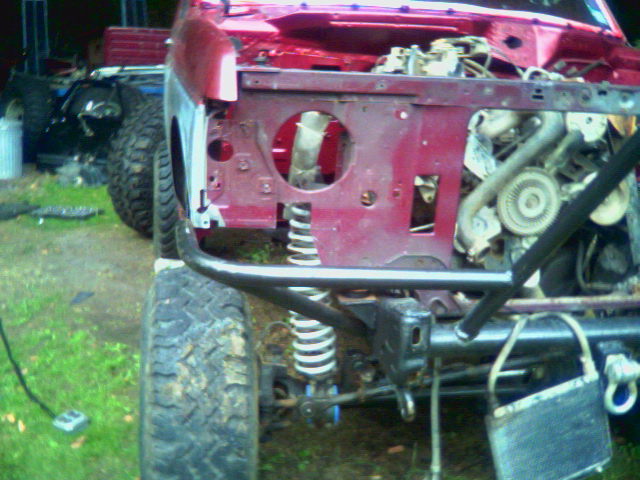 Ok, so the next step was to make tabs, so i could weld the two halves of the fender back together 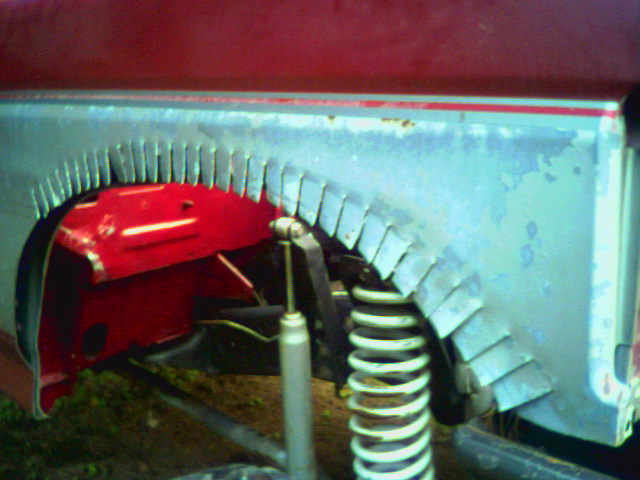 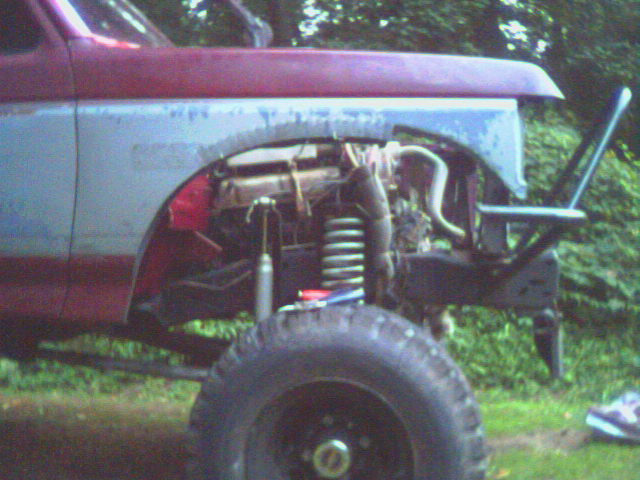 To say im 'trimming' the fenders is an understatement! So with that done, i yanked the clip again, and get all the tabs bent over to begin the welding 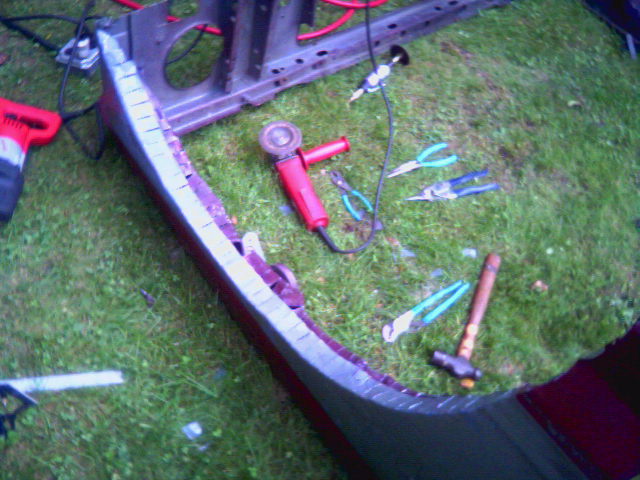 Bushwacker's aint got nothin on me! 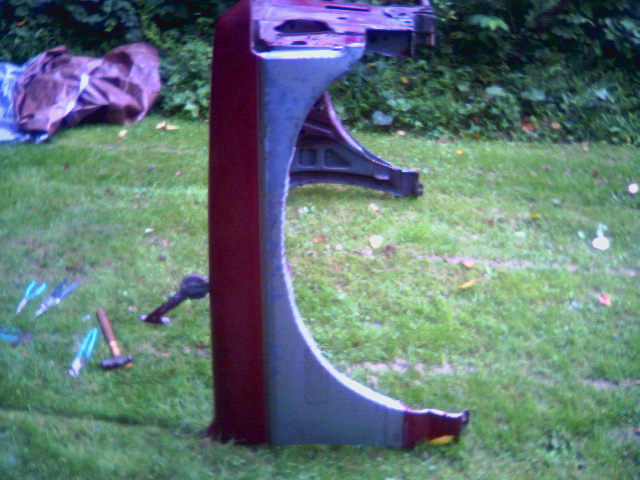 Cut back so far the badge will have to be moved!  Ok, to the driveway! Now, i dont own a mig or tig, so i had to do this the only way i could....with 1/16 6013 rod: 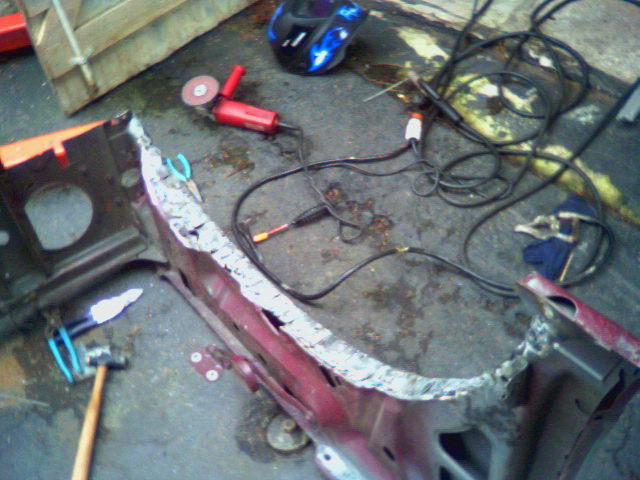 Wasnt real pretty, but it got the job done 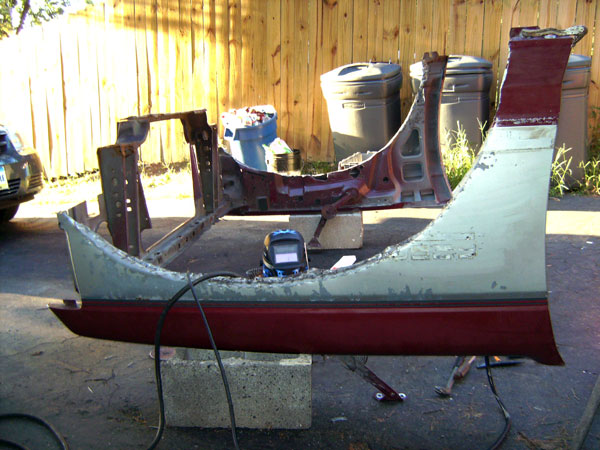 So then i grabbed a couple cans of paint, and rattled it one color so it didnt look so damn bad 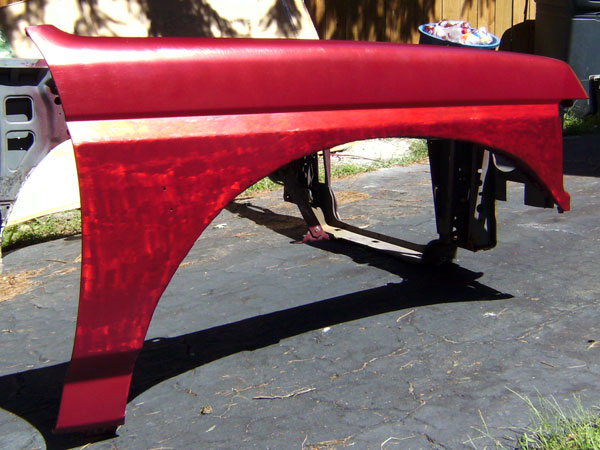 ...and the 'finished' product, reinstalled on the truck: 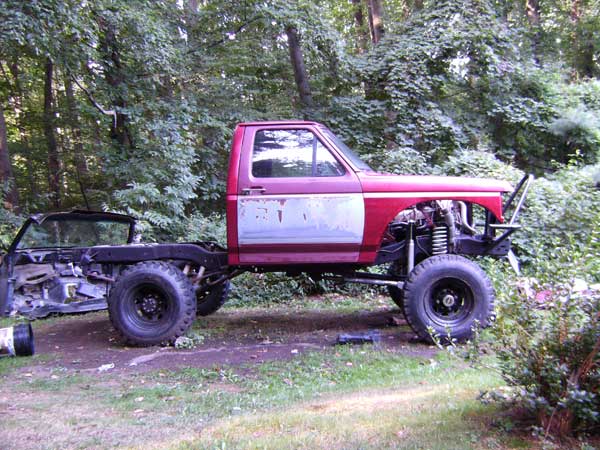 From there i rattled the rest of it, so now i have a single-color cab again! Stay tuned because theres more coming! Ok, Phase Two. I need a cab! Im not into being exposed to the elements 24/7, nor do i have any place indoors to store this thing, so building a buggy is out. Im not really into the Ranger cab idea (not yet, anyway), and i got this for free, so this is what im running! 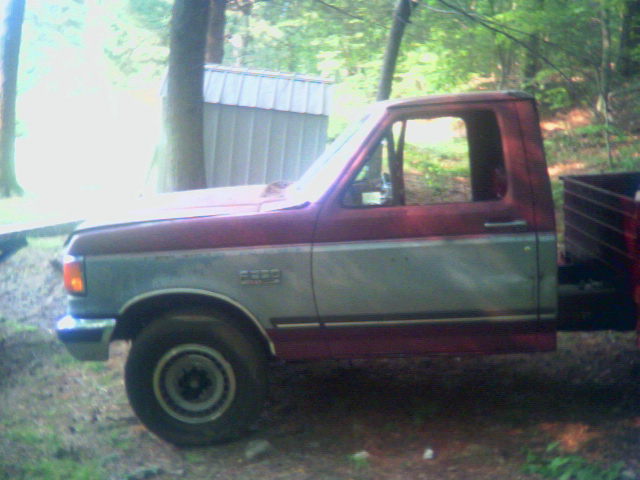 1990 F250, 2wd, 302, 5spd. The wiring harness couldnt possibly be any more different from mine than it already is! So, the red interior and the wiring harness has got to go, so i stripped this one down to bare metal, too.
Ok, so now, i need to get this thing from this frame, over to mine. Well, with it stripped down this far, two of us were able to pick it up, carry it over, and set it down right where it needed to go! So that gets us here:
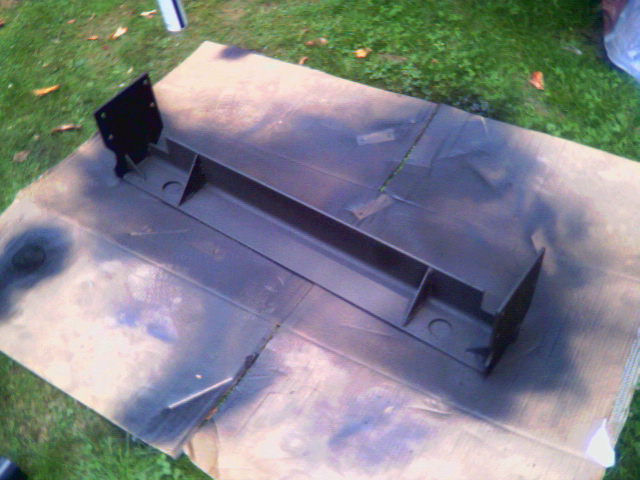
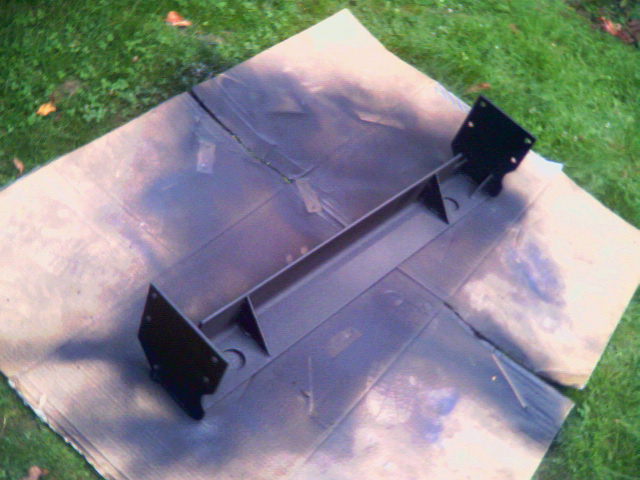
So while the a-pillar body mount bolts right up, the b-pillar mount does not. On the broncos the mount is outboarded, but on the f-series it is inboarded. I considered making the stock F-series xmember work, but decided it would require too much work to adapt it, so instead i just made a whole new one. After taking a whole bunch of measurements a whole bunch of times, i ended up with this:
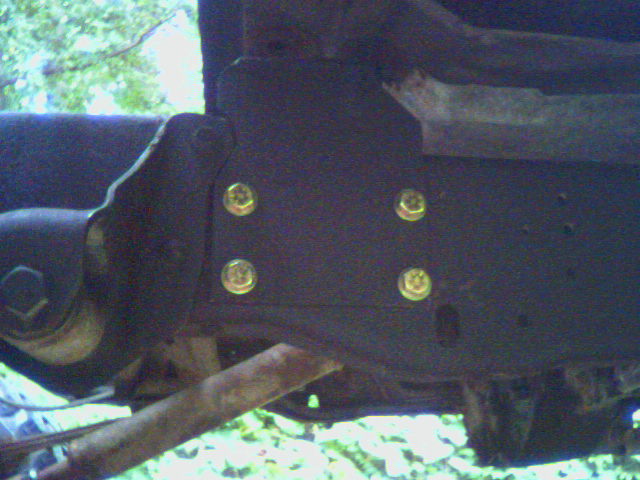
I removed the stock body mount bracket, drilled the holes out to 1/2", and bolted it up in the same spot
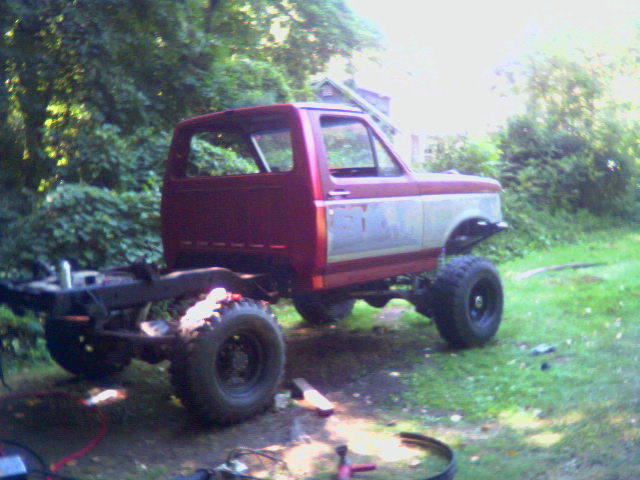
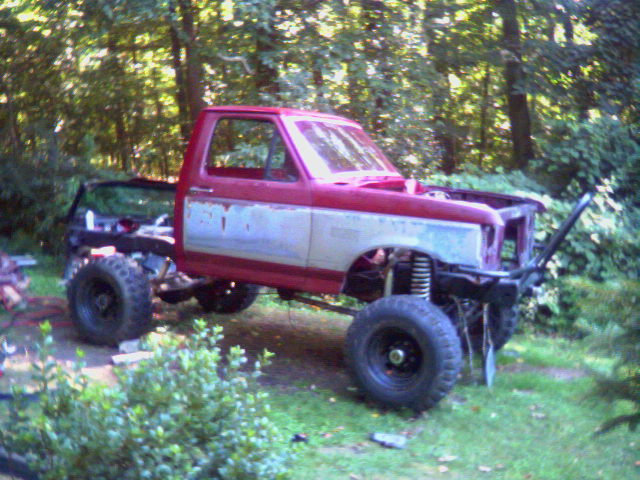
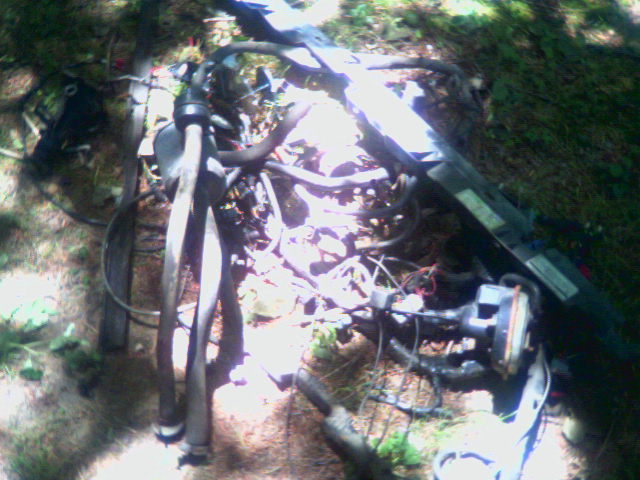
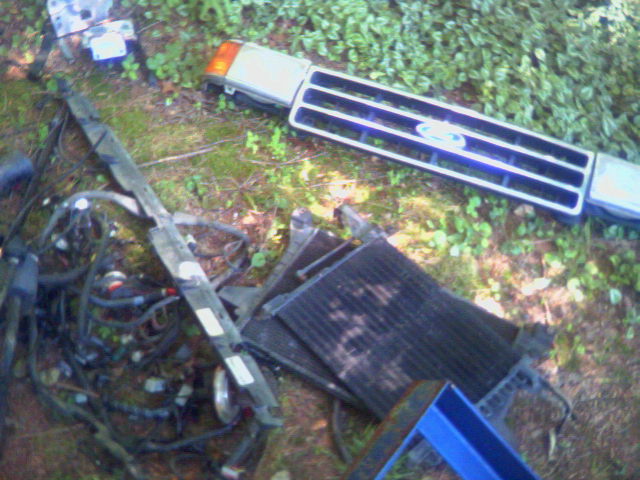
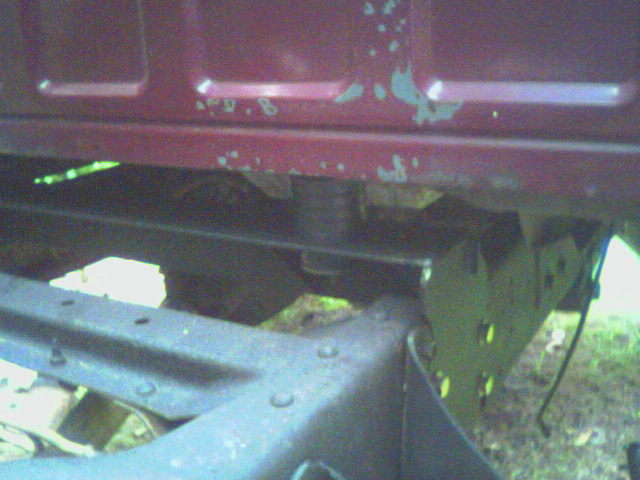
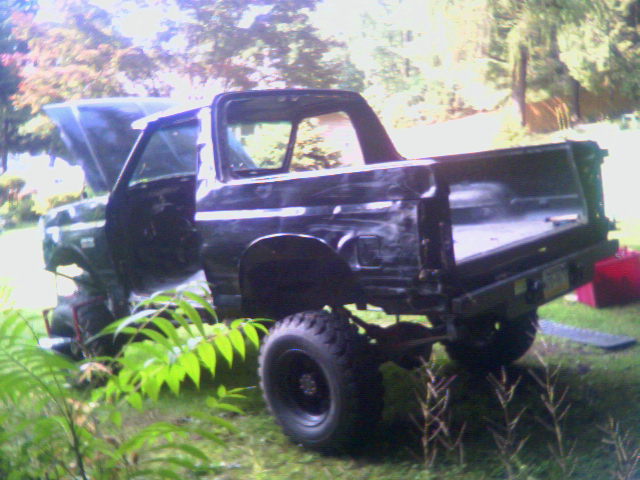
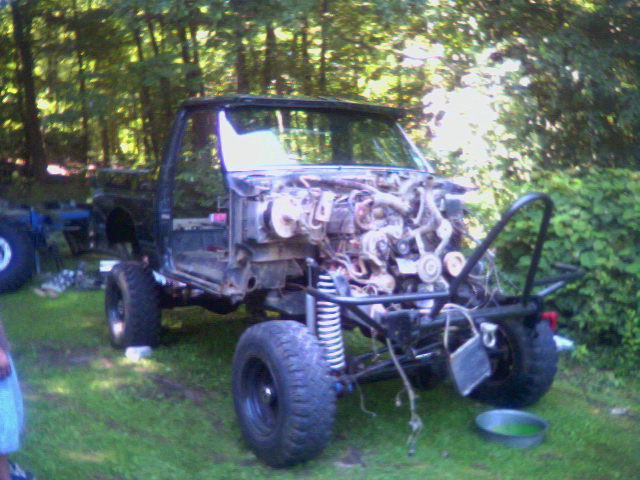
So this gets the cab right at stock height. Thats right, i ditched the 3" body lift that ive had for years now. So the cab is officially bolted to the frame!  Stay tuned, more coming! Well, with FSB's NE Chapter's trail ride only 3 weeks away, i figure now is a good time to spill the beans, since everyone's gonna find out soon anyway. I might have accidentally chopped up my bronco! Ok, so it goes like this. Pay attention! This is gonna be a long one :toothless Started out back in July with this: 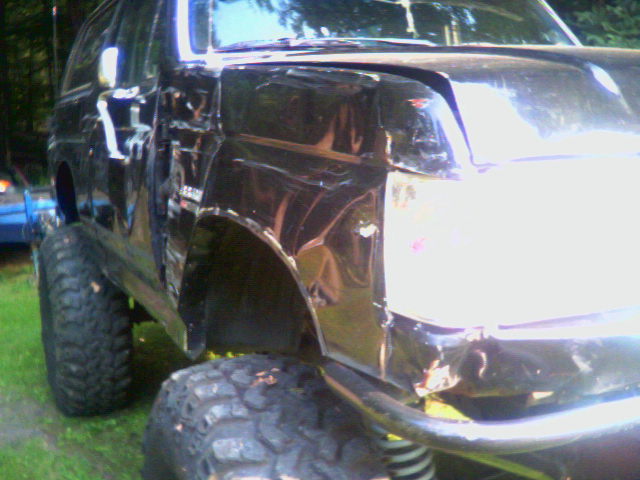 thats typical of every panel. Not quite as smashed up as some other rigs ive seen, but close. The only thing left straight was the cowl! I found tears in the firewall, and even all the seams in the b-pillar were split open. It was pretty ugly. I decided she was worth giving a facelift, so here we go! Step One: Disassembly I swapped down to the 31s; its easier to work on it this way, even if it looks ridiculous 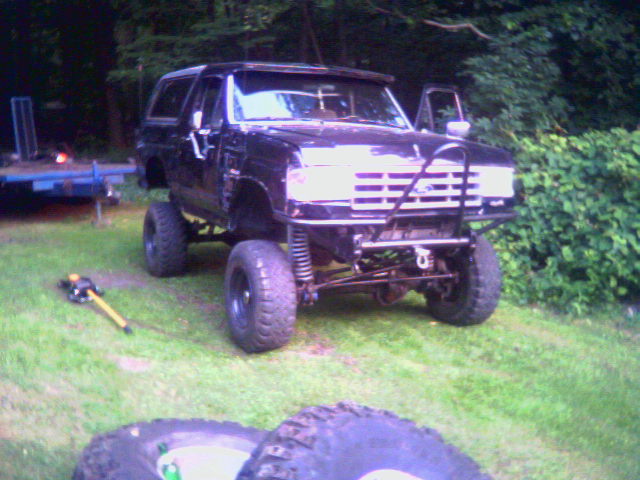 Started labeling wires, and then began removing the accessories
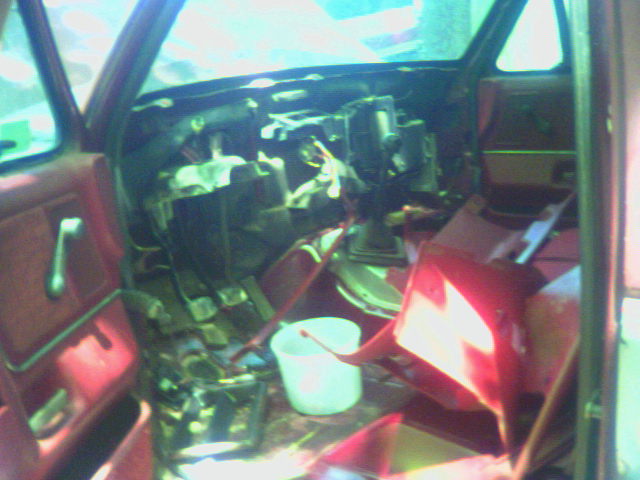
the poor man's rock sliders  ...and then the interior!
 mah bro takin a sawzall to the roof! 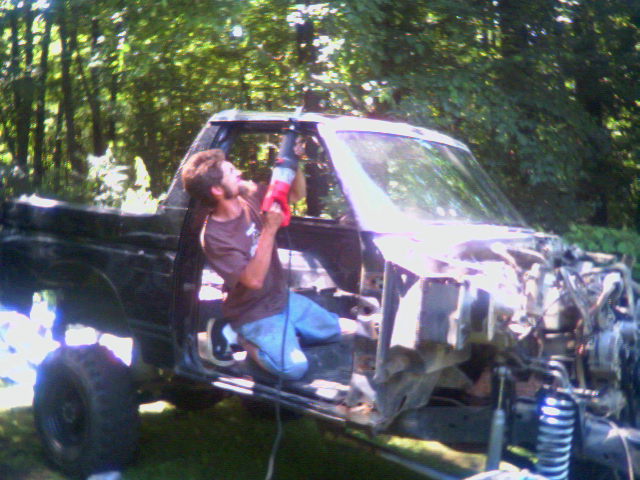 Convertible? 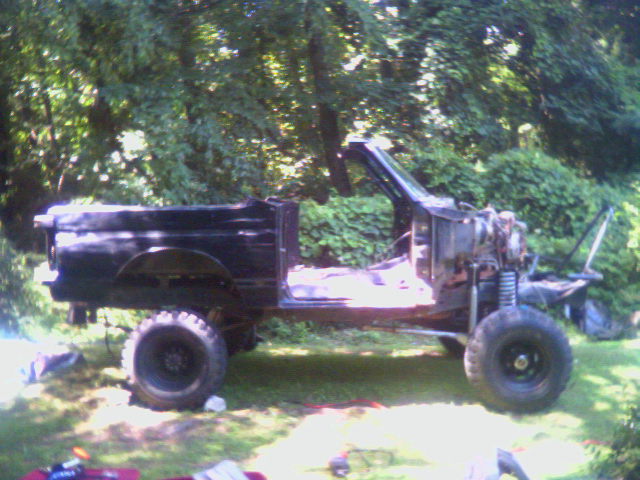 Truggy? 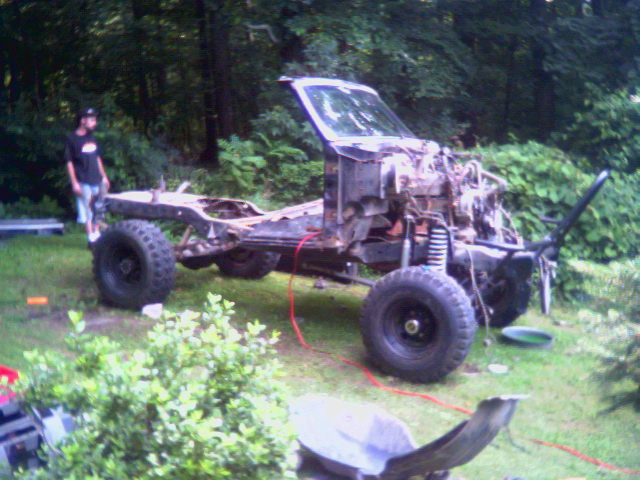 parts truck? 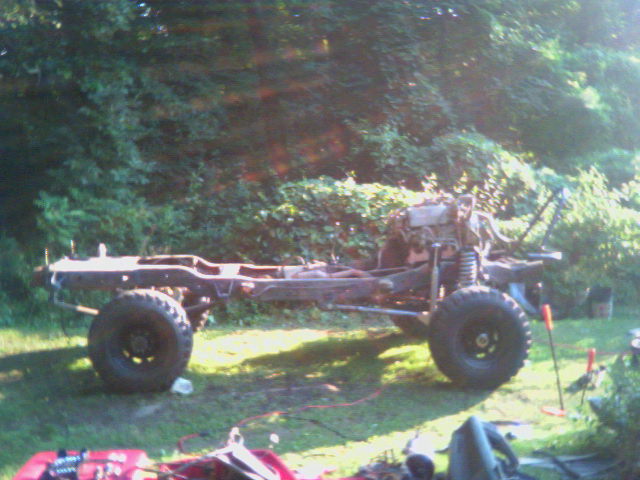 More coming, dont go anywhere! |