|
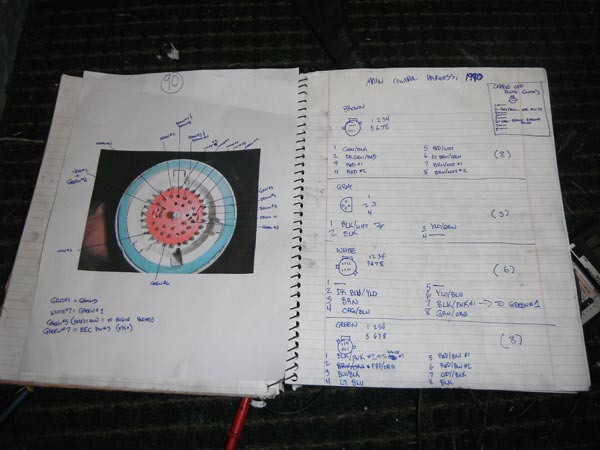
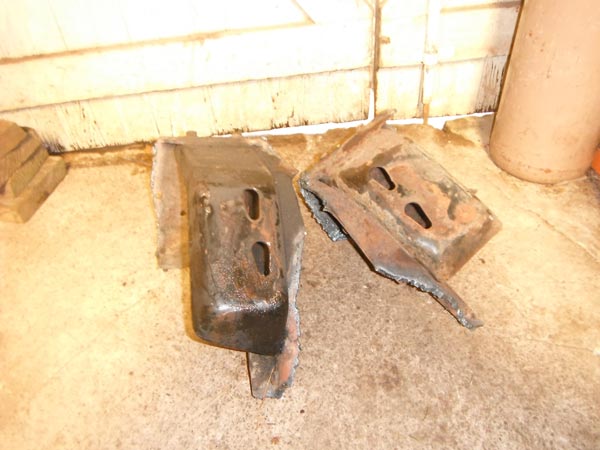
frame mounted pump removed 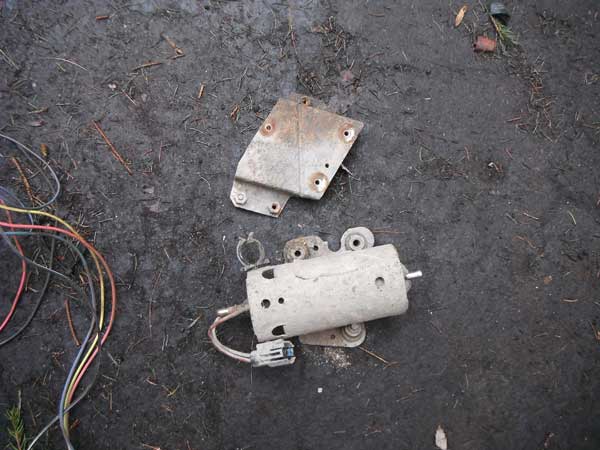 While the frame was exposed, i took the opportunity to properly remove some wires, specifically for the original tcase, the HCU for the ABS, and the second fuel pump 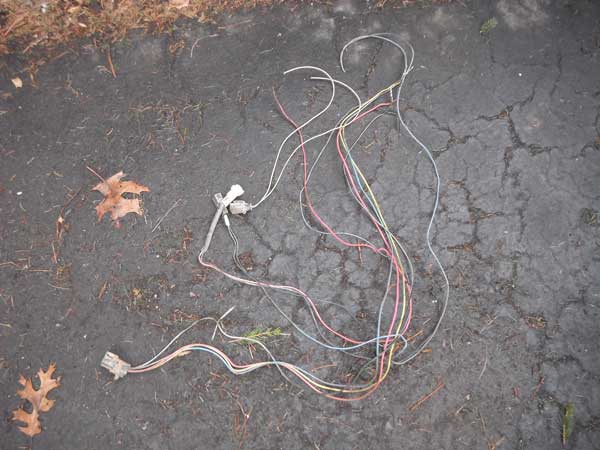 fuel filter relocated back where the pump used to be 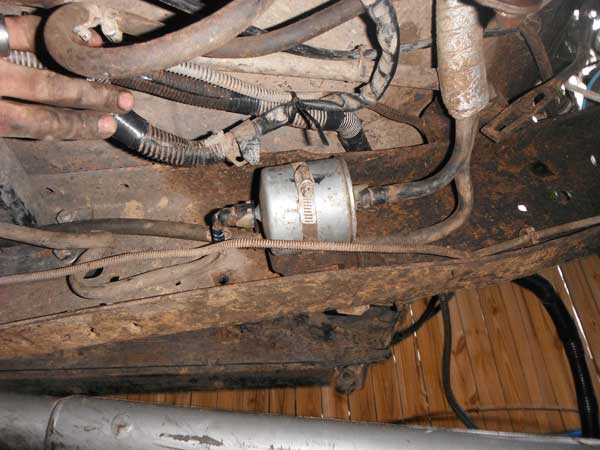 I reused the original fuel feed line to the rail (from the pump). The original return line was ~8" too long, so i had to cut it down, but now it all fits up there nicely, and its all far far away from the exhaust. Getting ready. A buddy of mine came by to lend a hand getting this beast in! We had to drop down to wood blocks to get it low enough, and then we ended up having to unbolt the cab mounts and jack it up 4" to get it to clear. 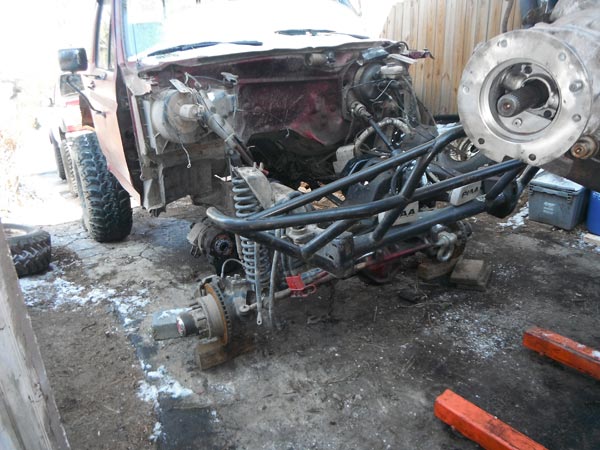 After a couple hours, the motor & transmission are now in! 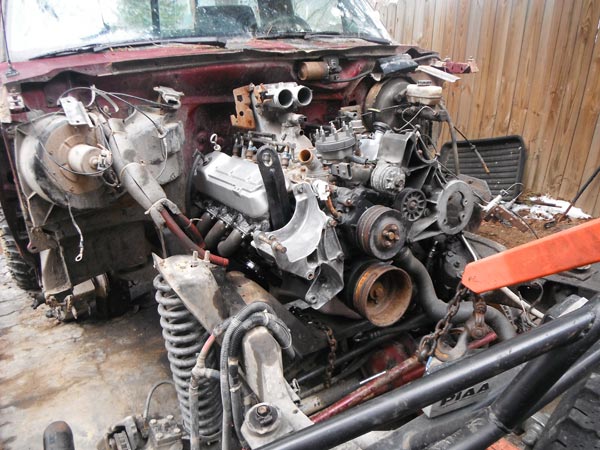 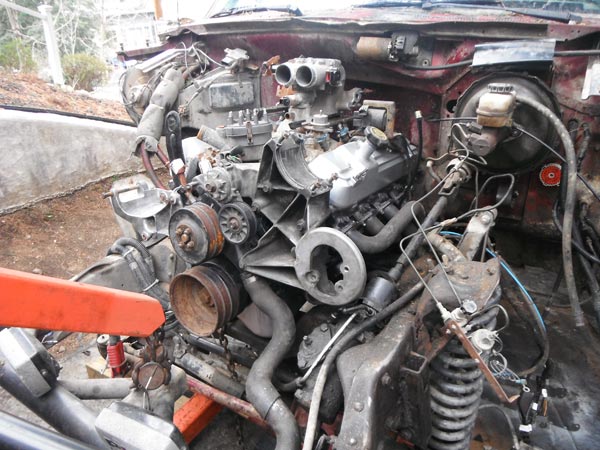 Nice beefy motor mounts 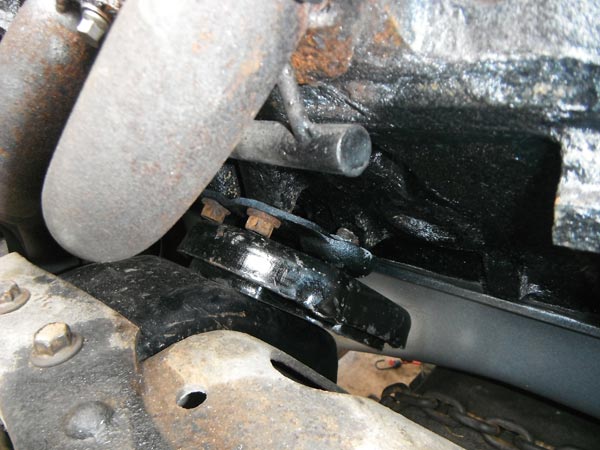 Some clearance issues. Header is pushing on fuel filter heat shield & fuel lines. Heat shield is pushing on trans shift linkage. I have temporarily removed the heat shield, ill deal with everything else soon.  Remote oil filter/oil cooler bracket. Does not clear frame. Apparently the big block trucks have a bigass hole in the frame to clear the bracket & filter. There is no good way i can clock this thing, where the filter & the oil cooler lines will be free of obstruction, so im going to replace it with an aftermarket remote filter housing and not run the oil cooler. Or, cut a big hole in the engine xmember, which i dont really want to do. 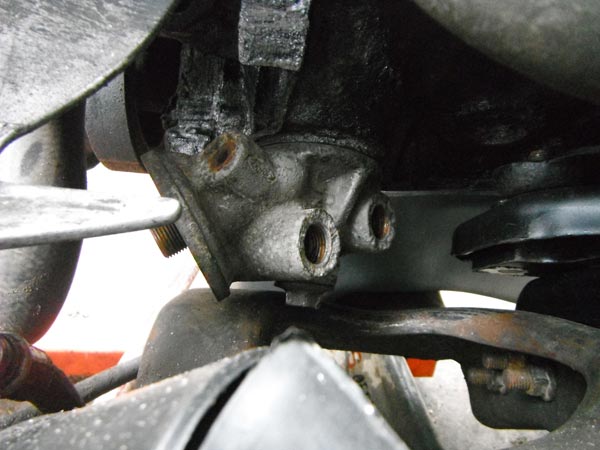 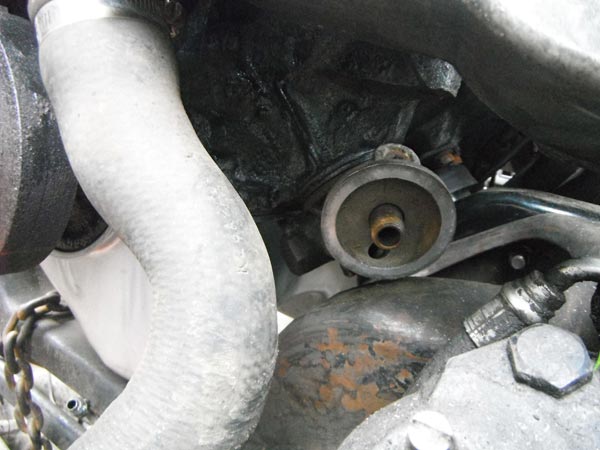 I tapped the port for the EGR, and screwed a plug in to seal it off. 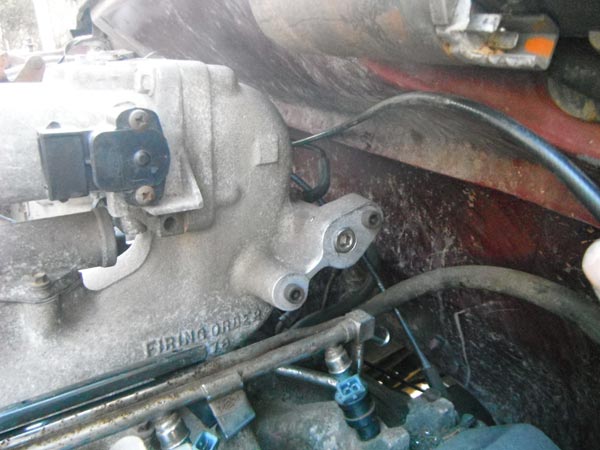 I also got the cab bolted back down, trans shift linkages done, trans lines re-installed, vacuum line for the modulator, kickdown cable, throttle cable, and all the vacuum for the motor done (except for the FPR) So, my truck, being an 88, has the dual fuel pump system. Well, the 90 p/u tank i have been running out back for the last several years, is from the single pump system so its already a high pressure pump. So the plan is to eliminate the rail mounted pump. Then i can move the filter down where that currently is and reroute the fuel lines, which will get everything far away from the header. Ok, so before the motor can go in, i need to address the motor mount issue. Well, Everyone says the conversion mounts are junk, and after seeing how beefy the OEM 460 mounts are i have to agree. So i went to the junkyard and got a pair of motor mount towers torched out of a truck. Only cost me $30 for the pair! Before you ask, yes the towers are discontinued by Ford, i looked into it. There are a couple passenger side mounts left scattered in random dealers across the US, but thats it. They also cost more than what i got my pair for. Towers, fresh from the junkyard:  Excess frame removed, and wire-wheeled in preparation for paint 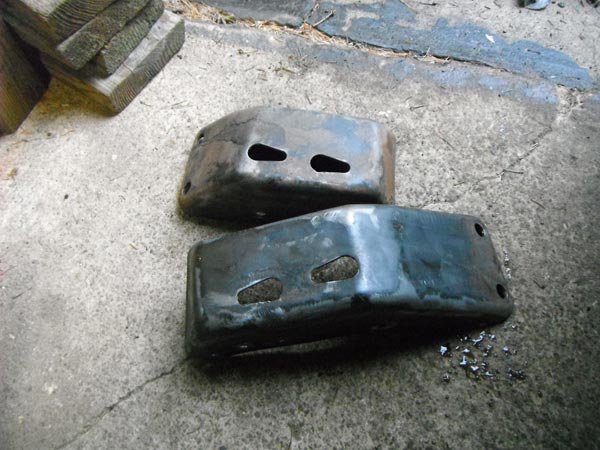 My frame, with the small block mounts still installed 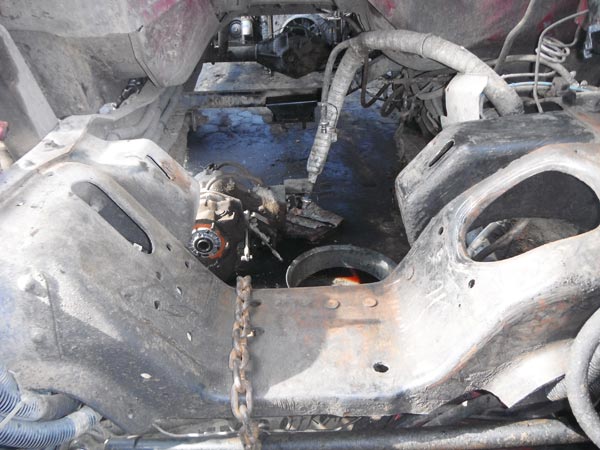 Just like the big block towers, passenger side is 4 bolts, driver side is bolt (2) & rivet (4). Passenger side towers, big block in front 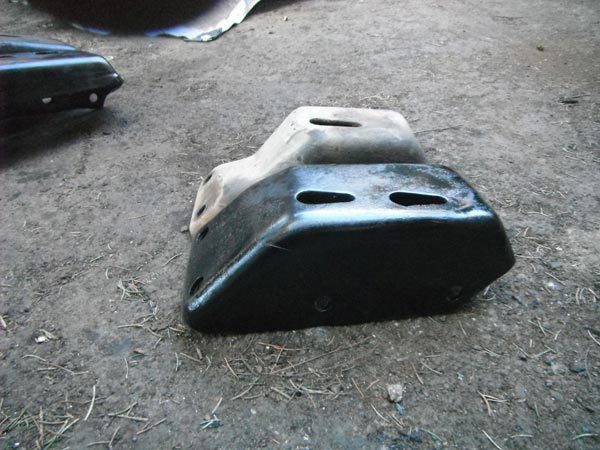 Driver side towers, big block in front  ...and installed in my frame. 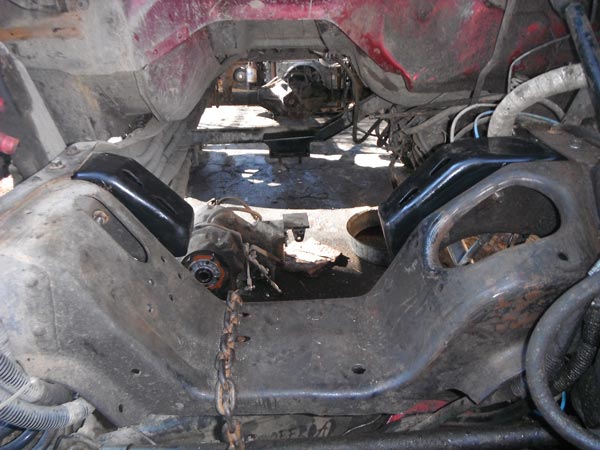 I saved the bolts from all 4 towers because they were all in great shape, which left me with more than enough bolts to replace all the rivets i knocked out. With this done, theres really not much left for me to do before the 460 goes in! My notes from the 88 harness. 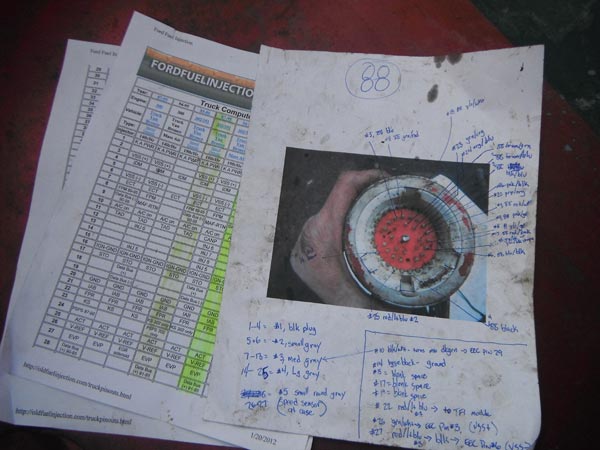 But now i have a big problem. the bulkhead fitting for the '90 harness has pins in different places. looking at the two, i see 5 pins that are not in the right spot. Comnparing the 89 & 90 harnesses, they are pinned almost identical. (the 89 harness came w/ the motor, but is butchered by previous owner, the 90 harness came with my cab) This is a huge problem. I need it pinned like the 88, for it to work with the dash harness. I see myself as having three options. #1, i rewire my 88 chassis harness to plug into the 90 control harness, and then re-pin the bulkhead connector to plug into the 88 dash harness. This seems to be the easier of the two, but now i have a custom harness so if anything happens to it ill be ****ed. #2, completely rewire the motor harness to plug into the 88 main control harness. This is gonna be a huge project because it will require grafting the 351 harness onto the 460 since the ECM connector is on the 88s engine harness. This will make it kind of like a 88 F350 harness, but is not something i want to do because it will be crazy hard to do. #3, find a engine harness from a 1988 F350 w/ 460. Somehow i dont see this as very feasible. My father has the complete Ford wiring diagrams book for a 1990 which he is going to mail to me, so thats half the battle right there. Here is what i need. I need to know the color code for all the wires that go to the tailgate on a 1988 bronco, so i can eliminate those wires from the bulkhead fitting. Those could very well be the wires that dont match up with the main control harness im using. At this point i dont know what too many of the wires are for, only where they go. I know the parts guys at the local Ford dealer, so im going to see if i can get these diagrams tomorrow. Notes on the '90:
Some interesting info. Both harnesses have 24 wires. All of the similar pins in the bulkhead connectors go to the same places, and most are the same colors. The 88 has 7 wires the 90 does NOT have. The pins arent even in the 90's bulkhead connector. I suspect 4 of these are for the tailgate. The other 3 i have no idea, as of yet. Possible they have to do with the dual vs. single fuel pump setup in 88 vs. 90? I dont know yet. The 90 has ~8 wires that, while they have corresponding pins on the 88's bulkhead connector, they dont go to the chassis in the 88 harness. Tomorrow i need to ohm out these pins on the 88 harness, to see where they go (maybe to the engine or elsewhere? or possible for the dual tank setup the 90 had?) The wiring for the O2 sensor is different too. Rock Auto lists a different O2 sensor for each year, but the Ford p/ns seem to be the same? Not sure yet. The 88 has a 3-wire O2 sensor, the plug on the 90 harness has 4 wires. I think the difference is that the 90 has a ground wire in the plug, i dont think the 88 did. Wiring harness is done. 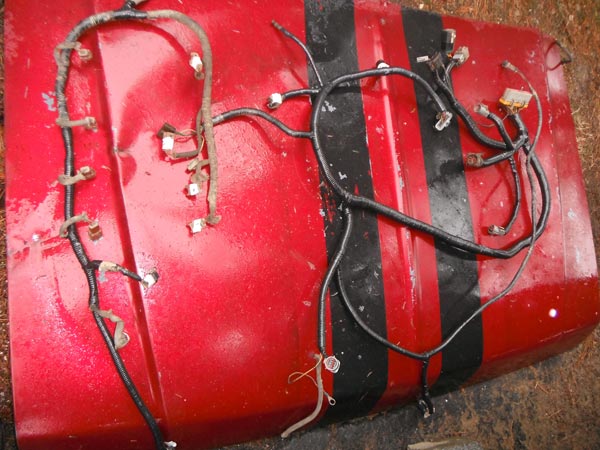 Once i lay it out on the motor for good, i will put all those push-in fasteners back on the loom so it stays in place. Also as you may have noticed, the hood is off. Thats cuz the front-clip is off too: 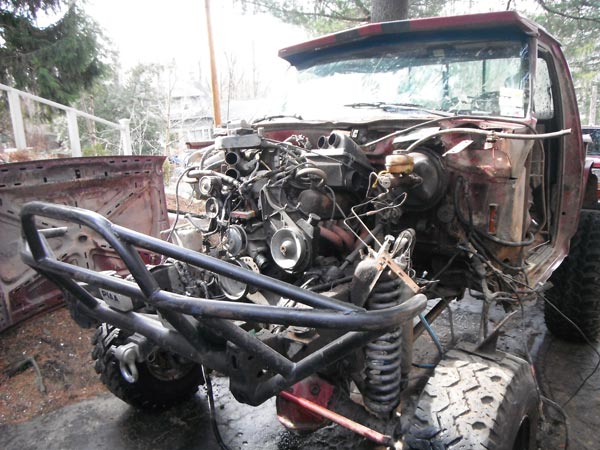 Doubler removed 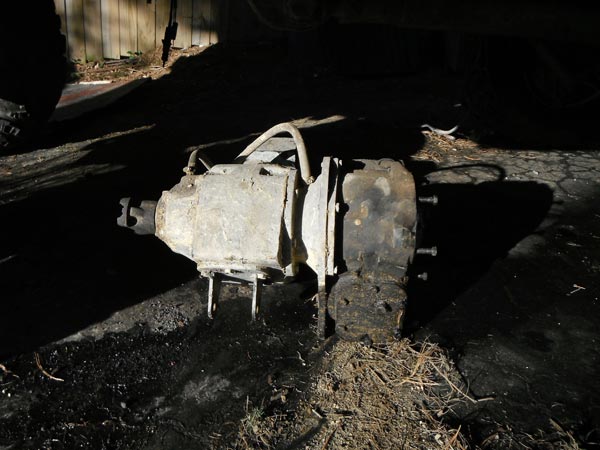 351/C6 coming out 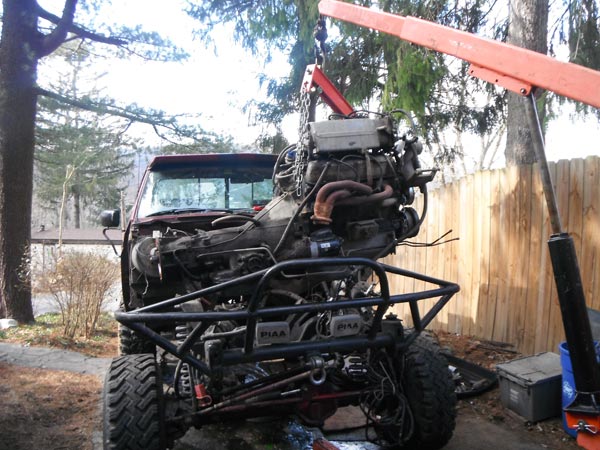 Ok, ive got this wiring thing figured out. Heres how it goes. Trying to repin both the engine harness & the main control harness, just so i can then splice it into my chassis harness, is a waste of time. Ive got a simpler, wayyyyyy better solution: grafting the 351w harness onto the 460. I know it sounds crazy, but it will totally work, and its actually not that hard to do. It is not a bolt-in swap, so to speak, as there is some wiring that must be done. So here we go. First up, remove the engine harness. Of note is the 89 fuel rail, and how the fuel lines connect to it right behind where the a/c compressor would be 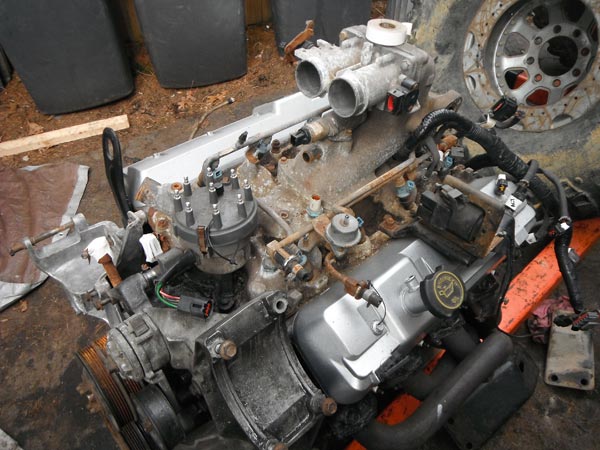 Here is my junkyard rail swapped in place, with the fuel lines connecting in the back like the 351 does 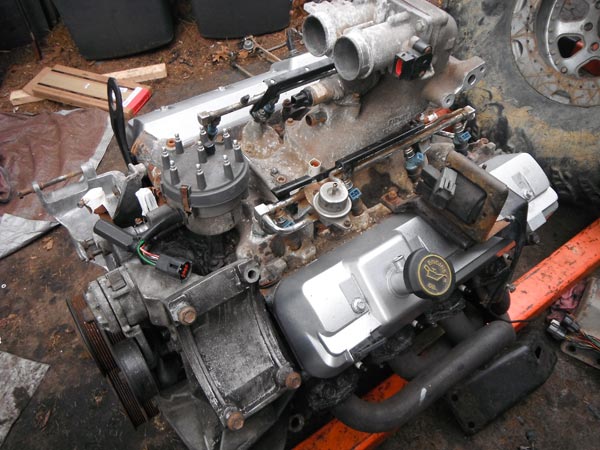 And here is where i began exploring the electrical. It seems both engines use pretty much the same sensors. The TPS is different; on the small blocks the sensor has a pigtail, on the 460 the wiring harness plugs right into it. So that connector must be changed. Aside from that, the only other difference is the distributor. 88 351w 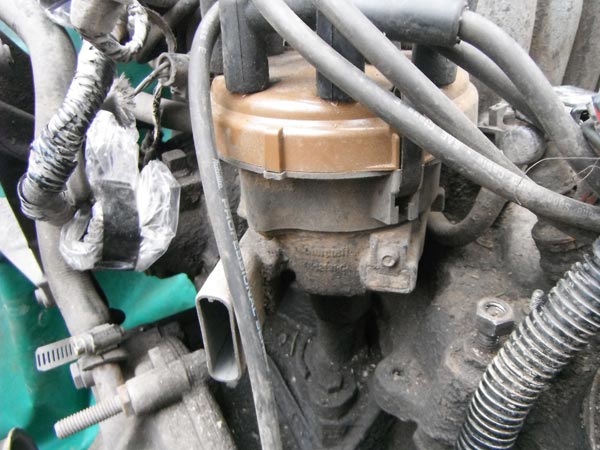 89 460  Im not really sure why the difference, but after looking at the wiring, i see it just intersects the PIP & the Signal Return, on their way to the TFI. The third is in parallel w/ the TFI. So unless somebody tells me not to, tomorrow im going to splice that plug into the 88's harness. It will be easy enough to do. 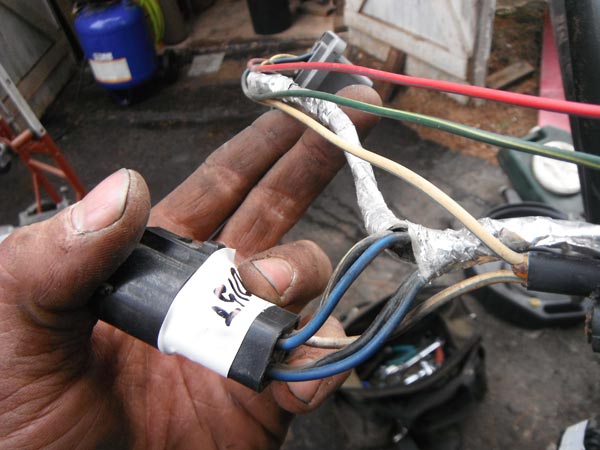 Ok, so the 88's harness has a 'secondary' harness. It goes to all 8 injectors, the ECT, TPS & the IAC. The wires are also all way too long, which means i can shorten them all up, and have a nice neat engine harness: 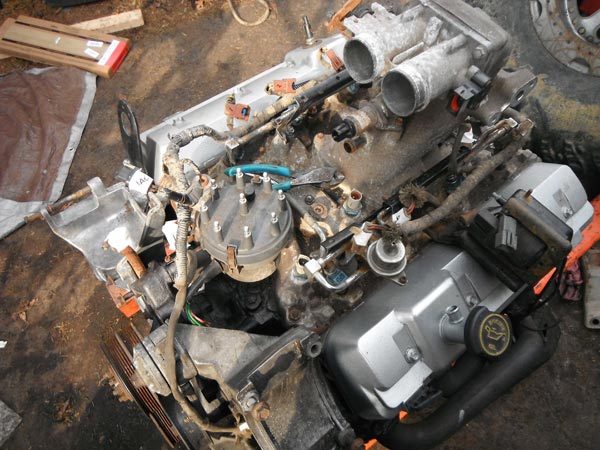 Before i cut anything. You can see how much extra wire i have to work with: 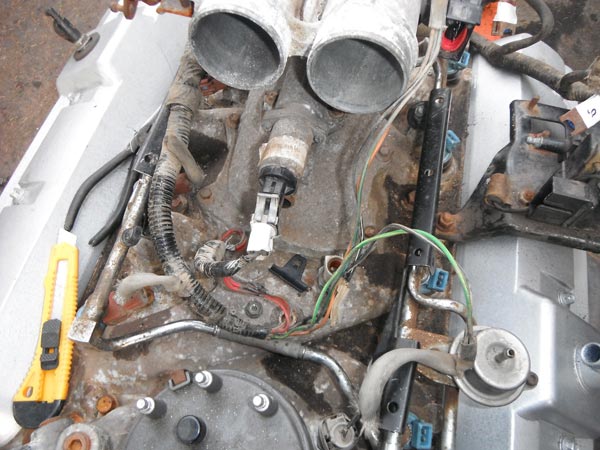 This is where im at right now. That secondary harness is done, ill get a pic of it tomorrow. The 'main' harness runs from the EEC connector up the firewall and to the back of the motor where it plugs into the secondary harness. But it also goes to the TFI/Distributor, TAD, TAB, EVR, EGR, A/C, the oil pressure sender, that other stupid little sensor (i forget what it is), the MAP sensor, and a few grounds. At this point i have this entire harness de-loomed. I have completely removed the TAD, TAB, EVR, EGR & A/C circuits. I have added an EGR Eliminator up at the EEC connector to take care of the EGR. I am also re-routing several of the wires, because i think the 88 harness looks like crap with wires run haphazardly across the motor. Ive got about 8 hours into all this today, but all thats left now is to modify the TFI/Dist connections, organize a few wires and then re-loom everything. So if it doesnt snow, and i get to work on the truck tomorrow, then i should have no problem finishing the wiring harness. Popped the valve covers off. Its pretty clean under there!  Covers cleaned up & primed 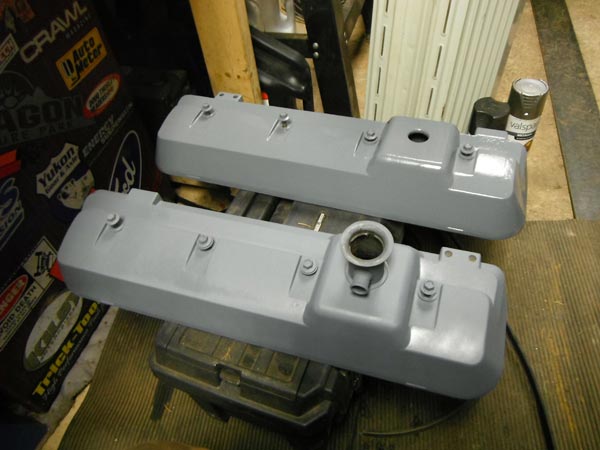 Ok, i was at the junkyard all day today, scored some sweet stuff 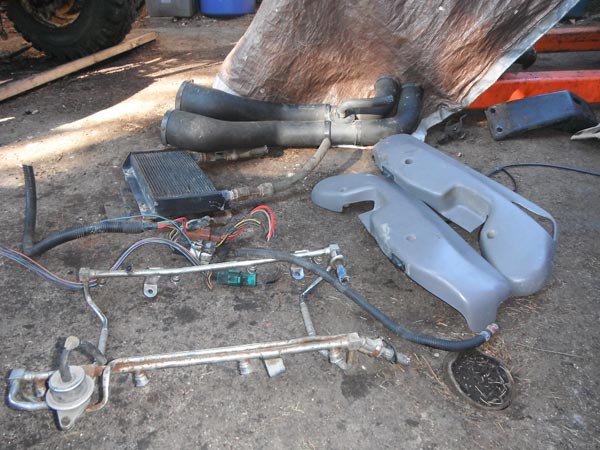 Up top, new intake hoses because that gray plastic piece in mine is busted. New oil cooler since i didnt get mine with the motor. All the wires/connectors i need to update my chassis harness. Different fuel rails for the 460. The plastic panels for the sides of the 40/20 bench in my F250. All for $30! Tomorrow im going to start working on the wiring harness. I need to pin out the 88 & the 90 harnesses to figure out which wire goes where, and then i can splice the connectors in. As for the fuel rails, i found this interesting. My 88 351, has both fuel lines connect to the rail at the back of the motor. My 89 460 has the fuel lines connect at the front of the motor, meaning i would have needed new fuel lines. Well, i found this rail in a ~96ish truck, and it has the fuel lines connect at the back of the motor just like my 351, so i should be able to just connect my stock lines to it and be done! Yeah, looks like its happening. Been looking on/off for a 351 for my dad's truck since he needs a motor, and ended up finding a 460/C6 combo (w/ harness & ECM), so i bought that instead. Plan is to drop the 460/C6 in my truck, then put my 351 in his truck, and i guess sell my small block C6. Mess of stuff in the bed of my truck 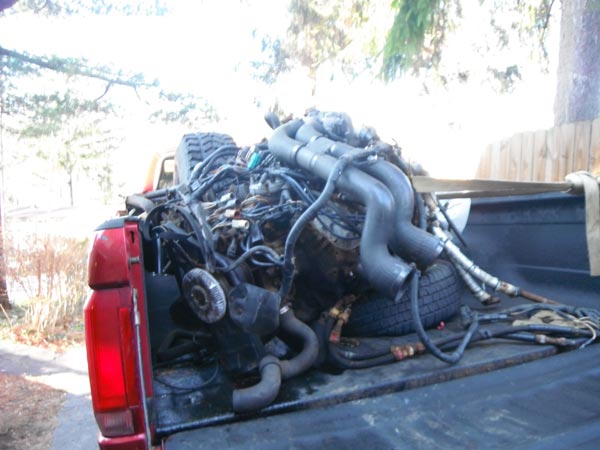 Stainless headers, w/stainless ARP bolts holding them in place. 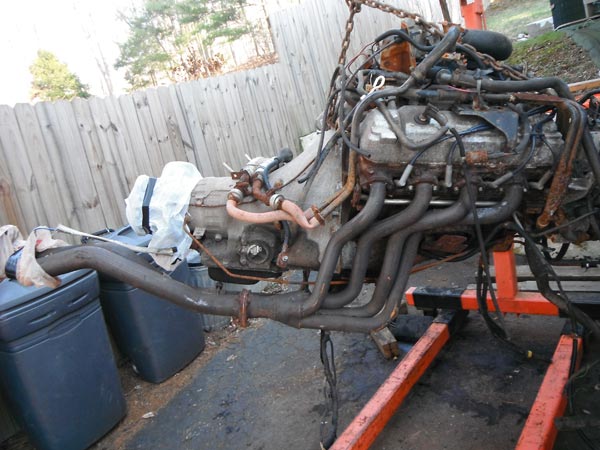 Ive never seen headers like this before, the d.side wraps down under the engine behind the pan. Its designed to bolt up the factory dual-inlet cat. 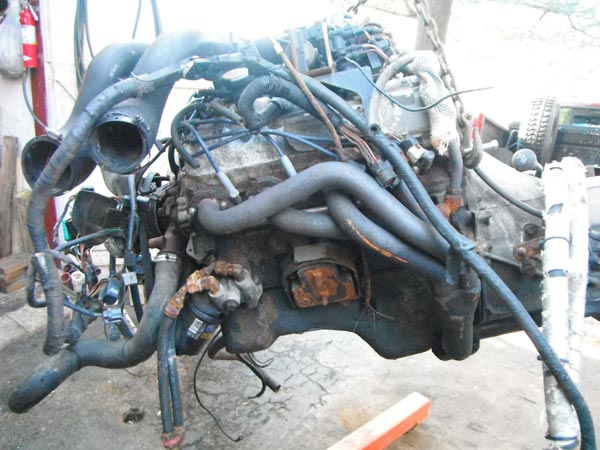  Extra crap i dont need (egr, alt, smog pump, all other emissions crap) 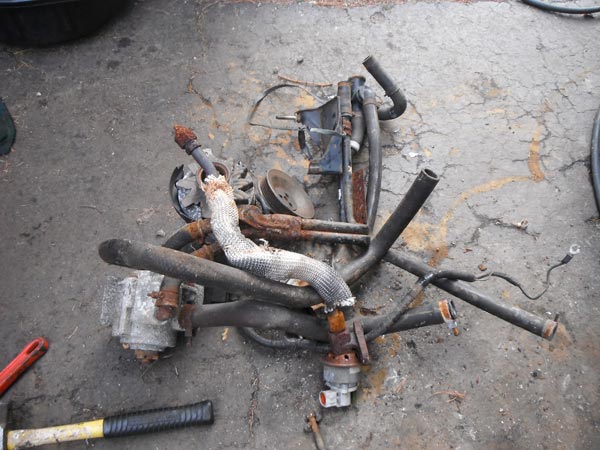 I got a set of towers out of a junkyard so i can run stock motor mounts.
 Also got a saginaw off a 460 van, thought i had a pic of that but i guess not. Ill get one when i put it on the motor. So heres the plan. the motor ran strong when the truck was cut up so im not going to do anything to it other than change a couple seals, and clean up the valve covers & pan. Swap my 3G on, add a Saginaw, and eliminate the emissions. Heres the fun part. My truck is an 88, and the engine is an 89. Unfortunately, 88 has a bastard harness, the 89-91 harness is different. So i have a lot of wiring to do. The engine harness is in good shape, the main control harness (the harness that connects the motor to the ECM, and connects to the lights/ starter relay etc) was butchered when the motor/tranms was pulled. Now, i saved the control harness from my p/u cab since it wasnt compatible with my truck (cab is a 90), so it looks like ill be using that harness instead of my 88. But this means i must change all the connectors that go from the control harness to the chassis harness. This is the easiest way to make it all work i think. So tomorrow im going to the junkyard to either find a 88 460 to steal the engine harness off of (what are the odds of that?), or im chopping up a junkyard 89-91 harness to get the connectors i need to retrofit mine. At the junkyard; check out this awesome bucket van we found!  ...and a p/u with a pretty cool rattle can paint job   |