|
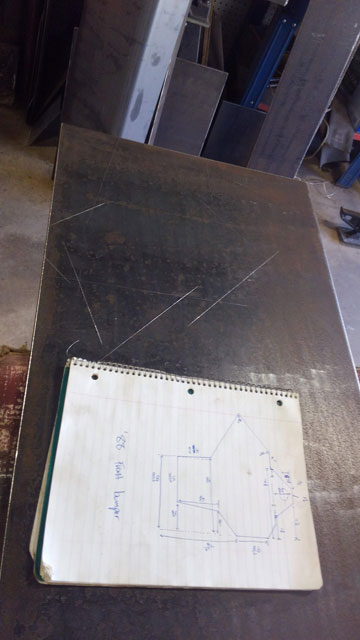
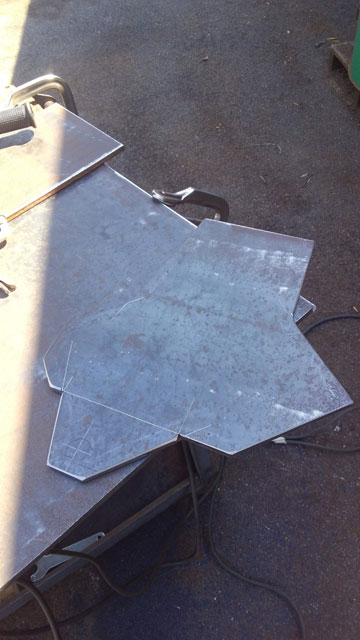
So i did some minor grinding with the bumper on the truck, just enough so i could fit and tack the smaller tubes in place. Then, off she came! 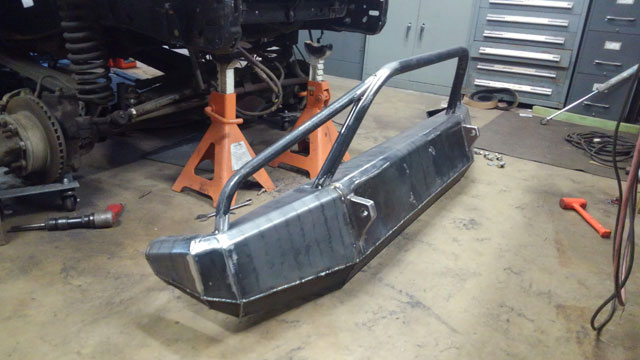 Set up on my cart, outside in the sun, grinding away! 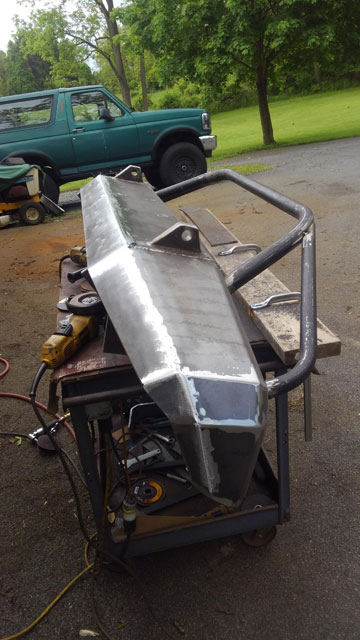 This part is gonna take a while! Gussets for the bumper brackets: 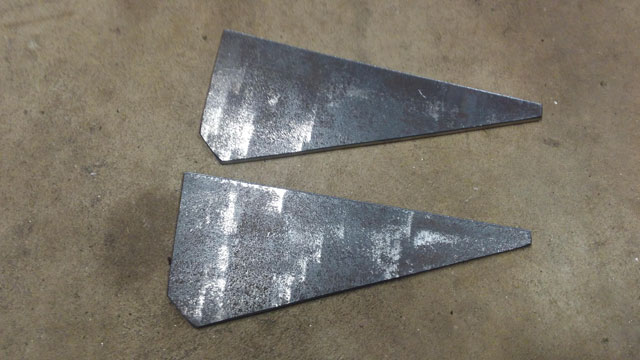 I decided on two for each side. While im sure one would probably be sufficient, it just looked out of place with one, and i figure a second cant hurt. 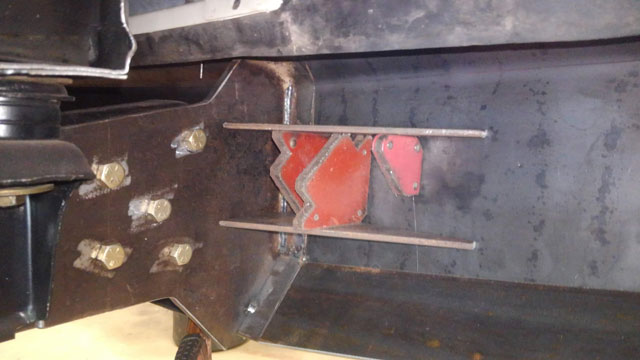 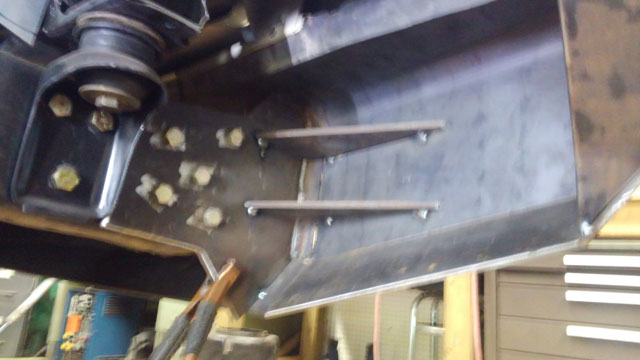 Time to weld those seams! 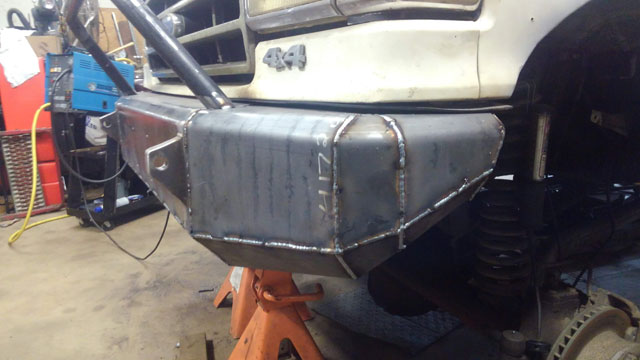 ...and more welding.... 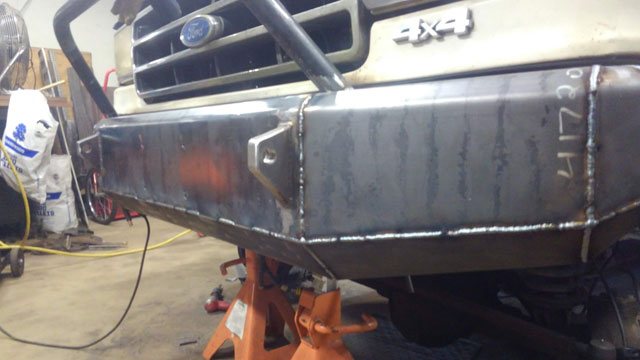 ...and more welding! 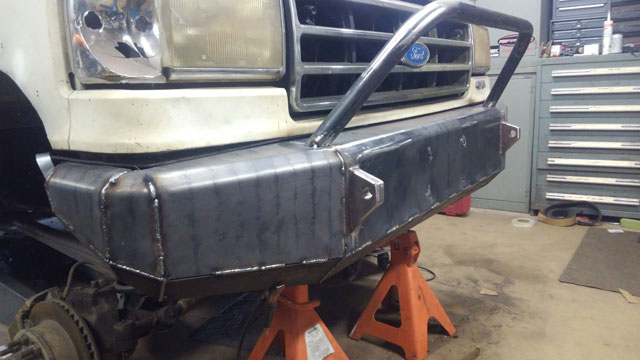 So if all goes well, ill be removing the bumper wednesday to begin grinding all the seams and getting them cleaned up, then lots more welding & grinding after that. I got the driver corner finished: 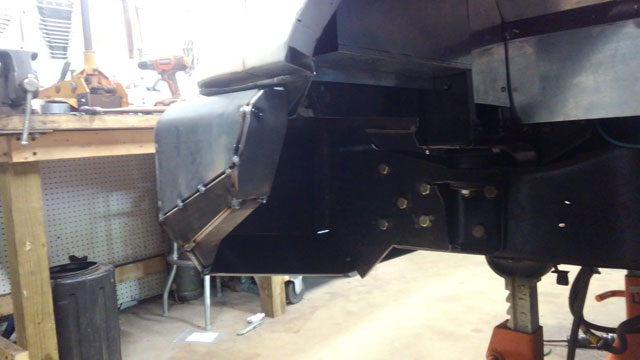 I knew i was going to be doing some tube work, so i ordered some stuff, and took a couple days to upgrade the bender: 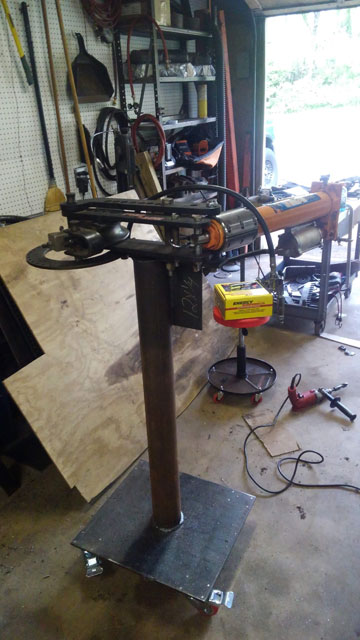 New base with swiveling locking castors, and a hydraulic conversion courtesy of SWAG Offroad. Just in case i might ever want to switch back to manual for some dumb reason, i added 1/2" holes to bolt it to the floor, and the castors are bolted in place via tapped holes in the base plate. It is soo much easier to use than by hand! Wish i did this years ago, makes bending tube so much easier to do by myself. No spring-back on the bends either, which is a huge plus over manual bending. So with that done, lets bend some tube! Monday i took some measurements and got the main hoop bent and tacked in place: 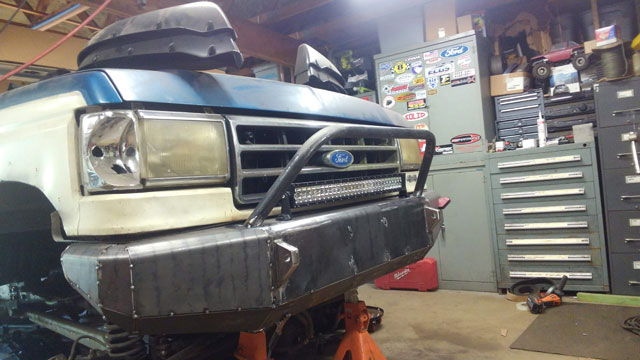 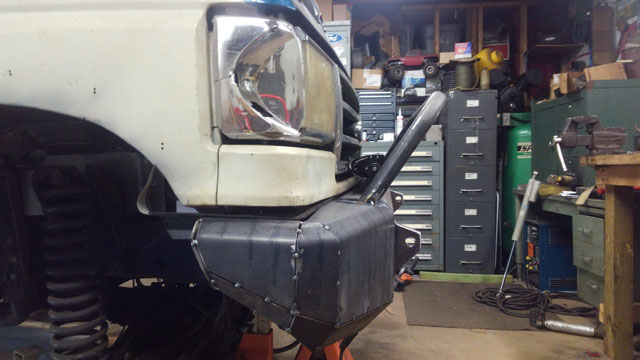 ..and then bent up some side bars yesterday: 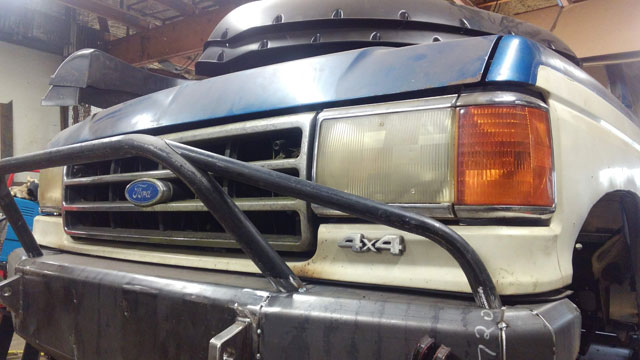 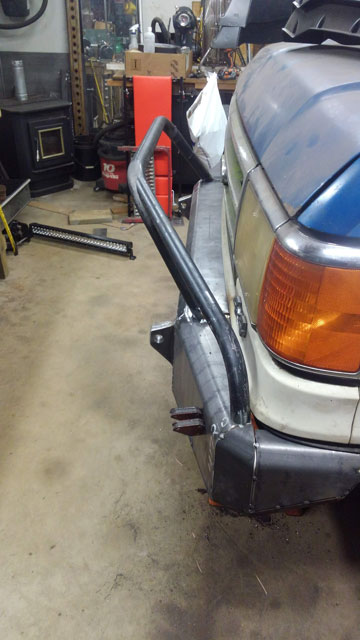 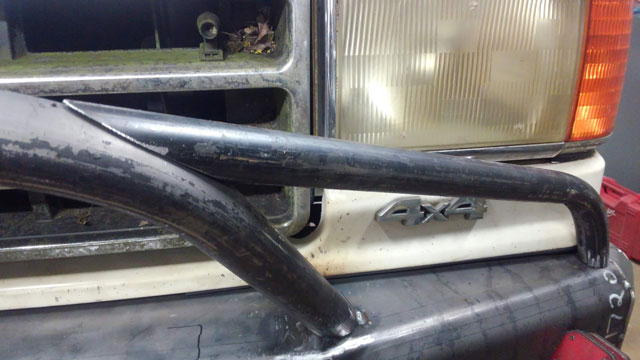 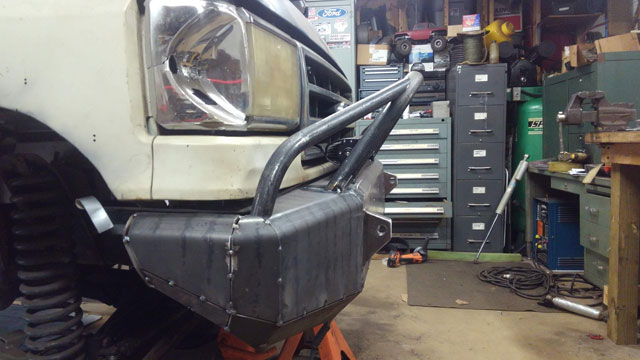  Man, i am super excited with how this thing is coming out!! Hopefully tomorrow ill be out there working on it again; i want to add some gussets to the bumper brackets, and then im going to start welding up all the seams. At some point, the bumper needs to come off so i can mount the winch, and then lay out the window ill need to cut for the cable to come thru. We're getting close to completion on this thing!!! So i tinkered a bit, this is what i came up with. Its very similar to what i had originally, just some minor changes to the corner to tighten it up a bit: 4" across the bottom, the angled pieces taper up to 3" 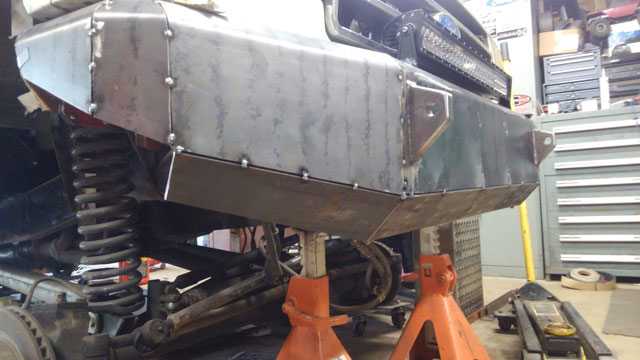 ...and from there tapers again... 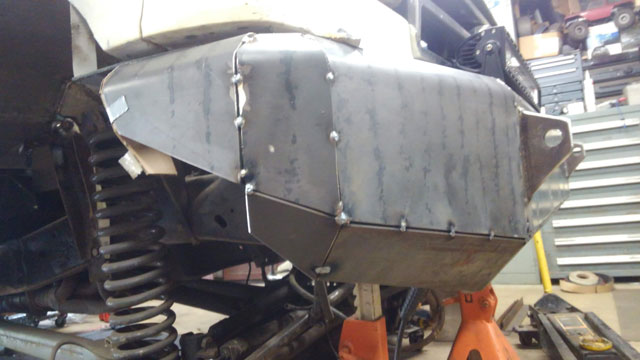 ...until the corner, which ends at 1". 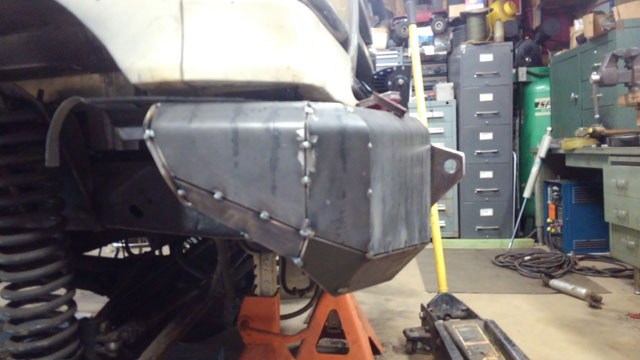 Pretty tight to the body: 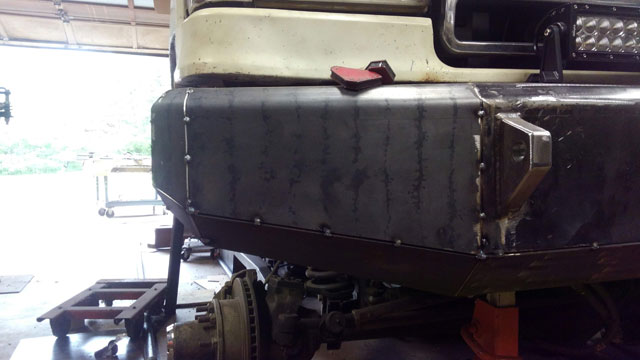 The end is capped, and i added a bent piece in the bottom to add rigidity to the corner. 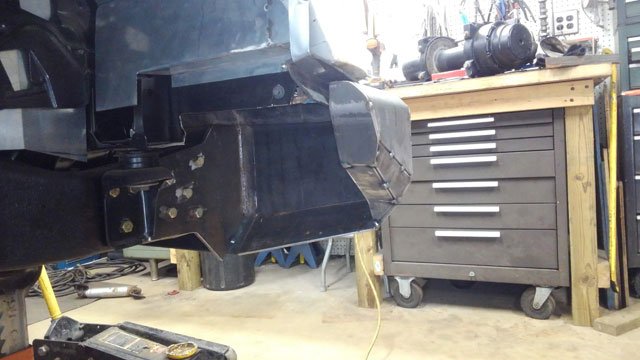 Im pretty happy with this, i think its going to work out well. Now i need to duplicate it on the other side! I still need to add gussets from the bumper brackets, add a tubular brush guard, mount the light bar, cut the opening for the winch fairlead, and then do an absolute ton of welding! An old friend stopped by to catch up today, so not much progress. But thats ok, because i dont have the steel to continue. So i did some mockups in cardboard, this is what im thinking: 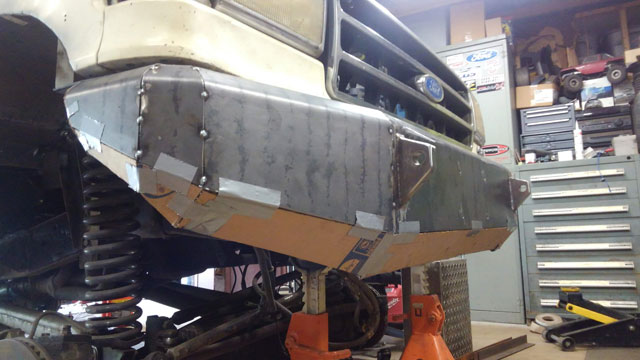 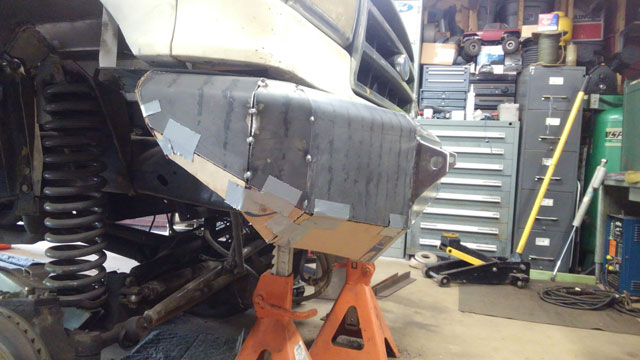 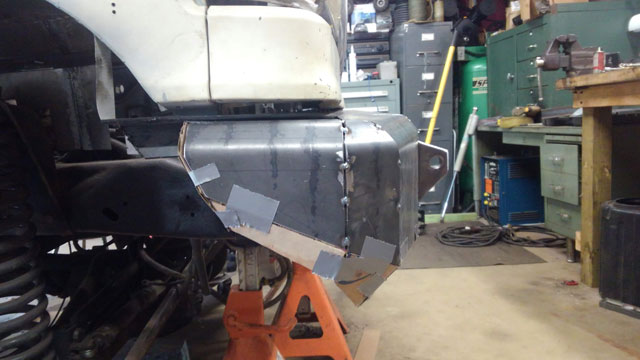 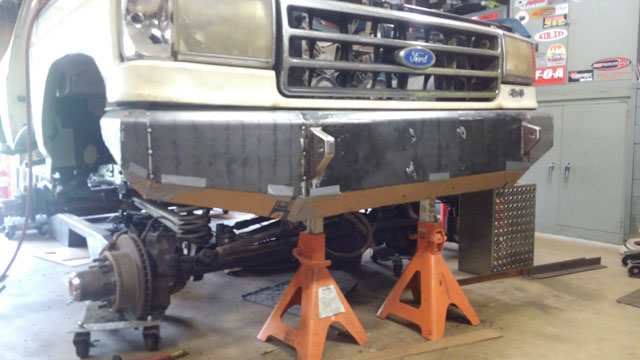 So i got some work done to the driver side: 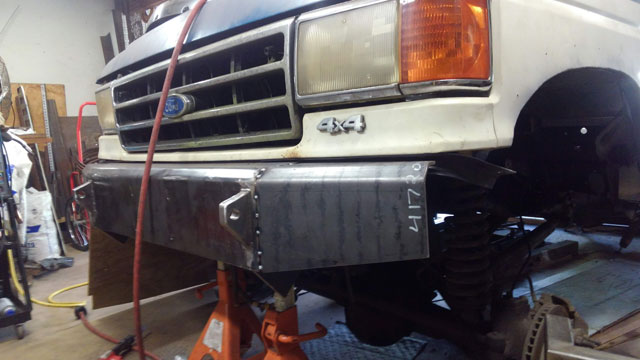 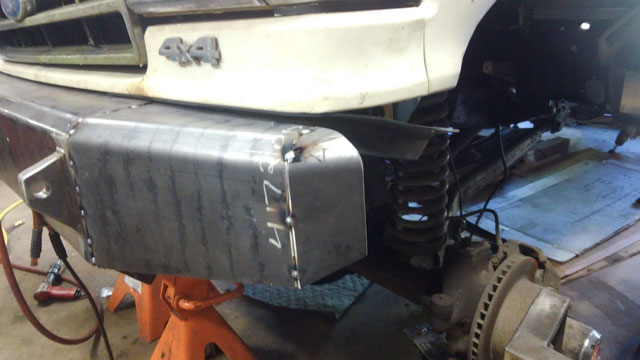 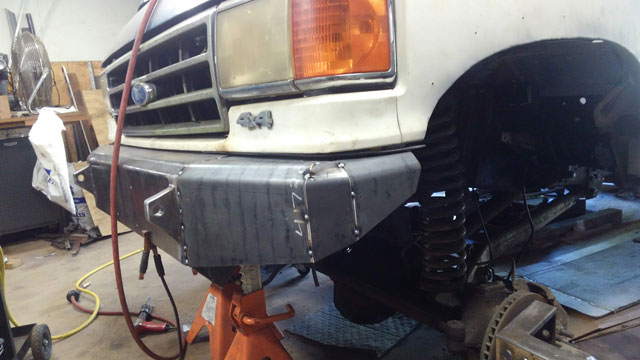 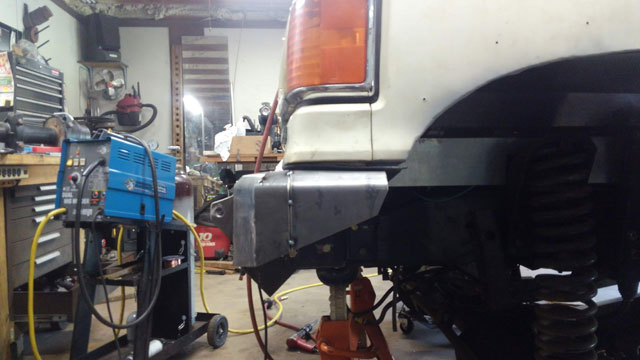 Finally, its all tacked together! In case you were wondering, this is all thats left of that 8' piece: 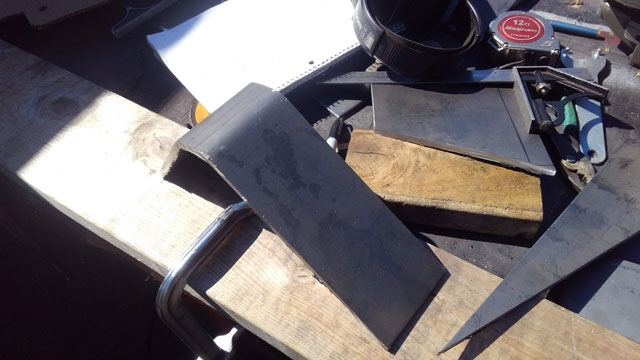 3¼". Just made it! Got the corners pieces cut & tacked into place: 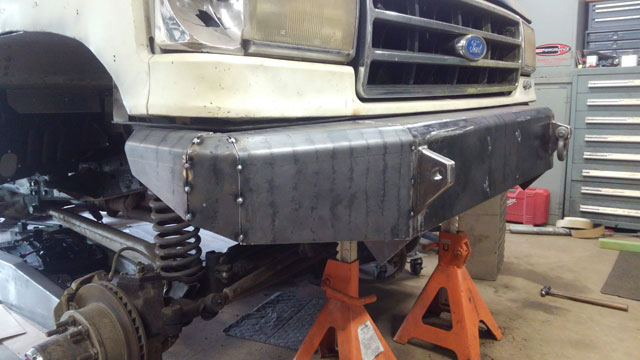 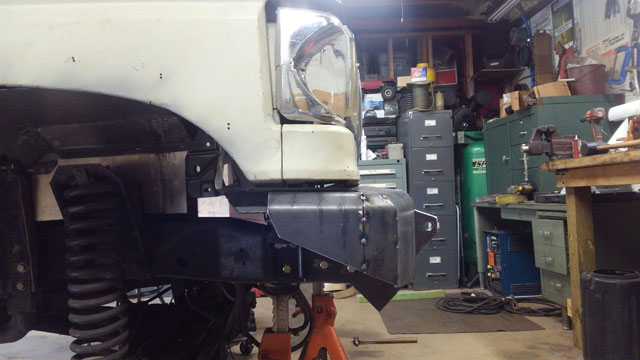 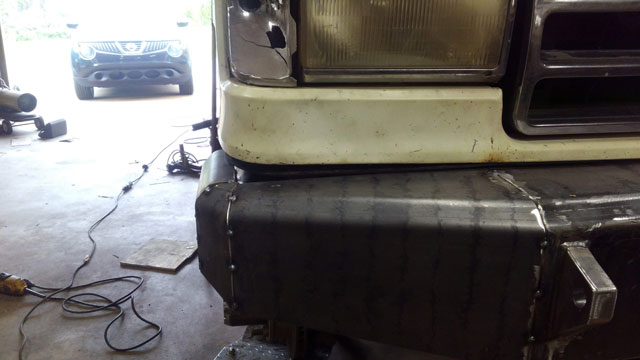 Everything is straight, except for the sheetmetal! Ill have to adjust it a bit once i get the bumper 100% done. We both got the flu, so really only got the shackle tabs done, nothing else. Its still progress though! 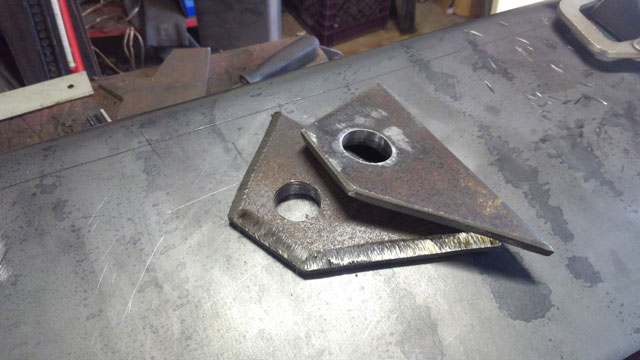 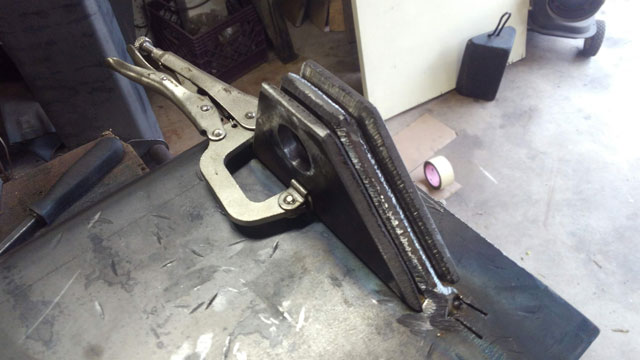 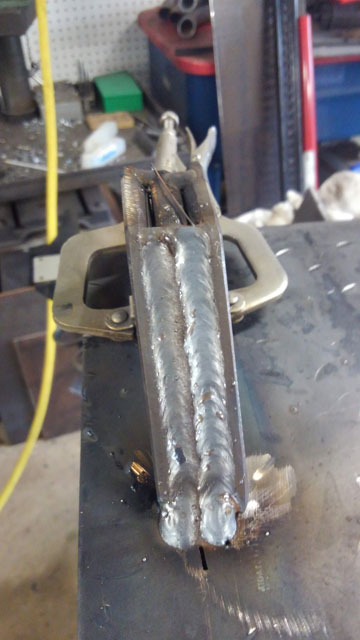 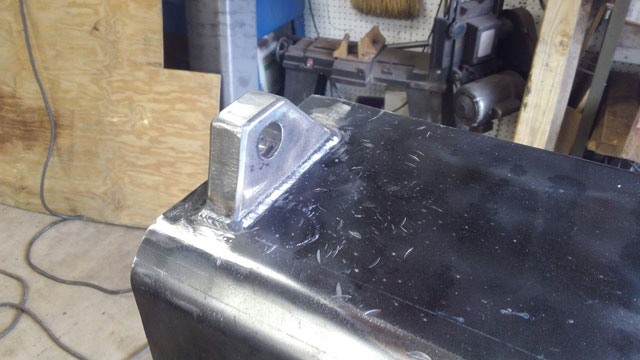 Both are done now, so ill start working on the corners again on Monday. I think it needs to be narrowed a bit, i guess we'll find out soon enough! So Friday i got a little bit of work done. Made all 4 tabs to laminate the shackle mounts. 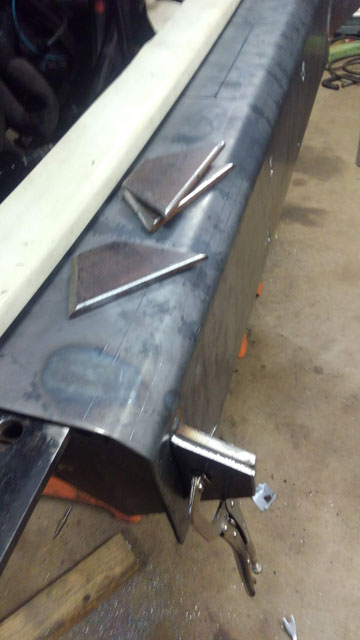 I need to pilot them, and then they can be welded up like i did the rears; hopefully Monday. Apparently a month or so ago i forgot to turn the gas bottle off on the mig, so i gotta go get gas tomorrow morning first! Heres a teaser for the corner: There will be two more pieces to wrap around the corner , and i think im going to change the shape of this one a bit, as im afraid its going to end up too wide. It does give you a good idea of the look im going for though! 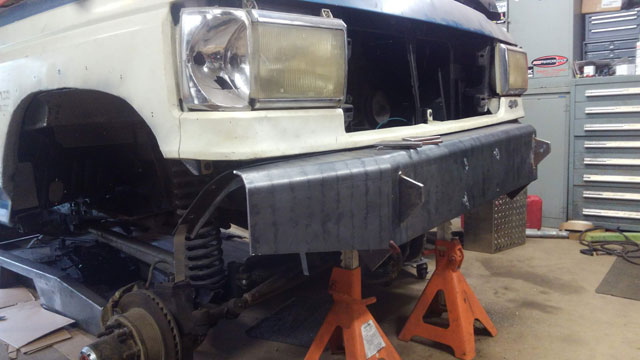 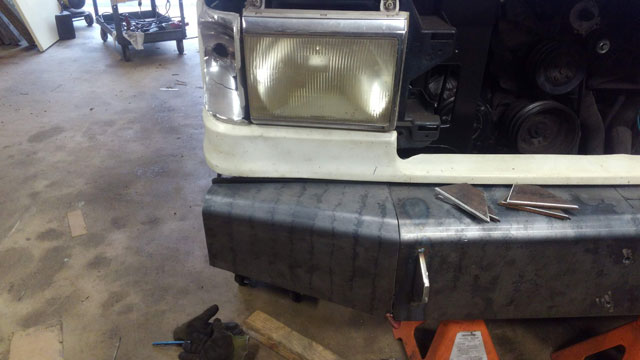 Mocked up a bumper bracket in cardboard: 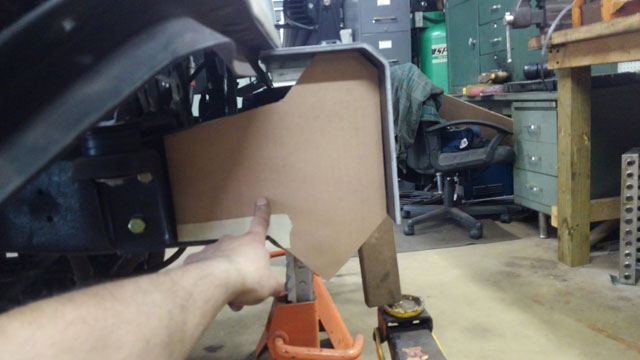 Plan is to have a shackle mount part of the bracket and pass thru the front plate, like i did on the rear: 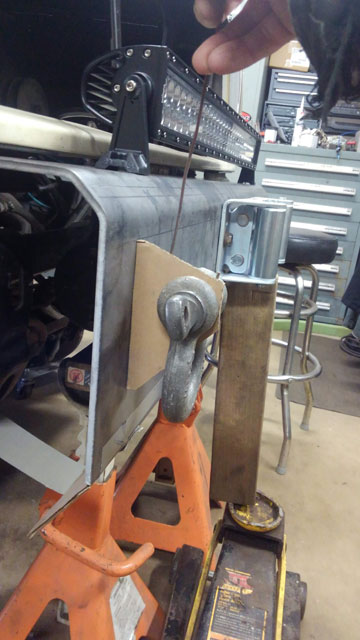 Final design: 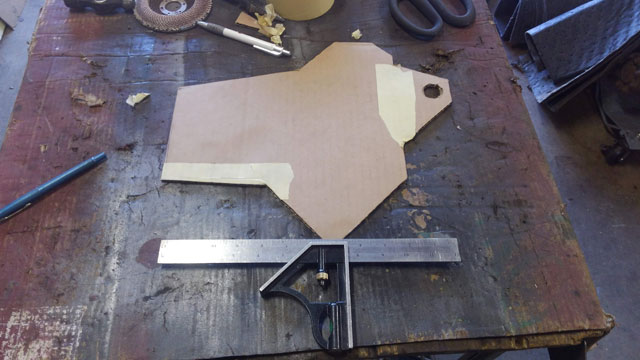
...and duplicated! Built them out of 3/8" plate like i did for the rear, which is pretty time consuming! 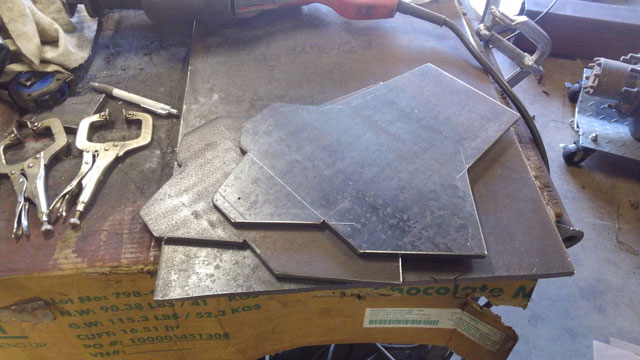 Welding them to the center plate: 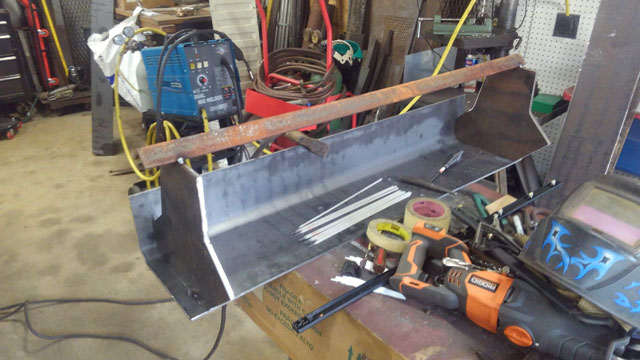 Laying out for bumper bolts. Im reusing 3 holes in the frame, plus adding two more. 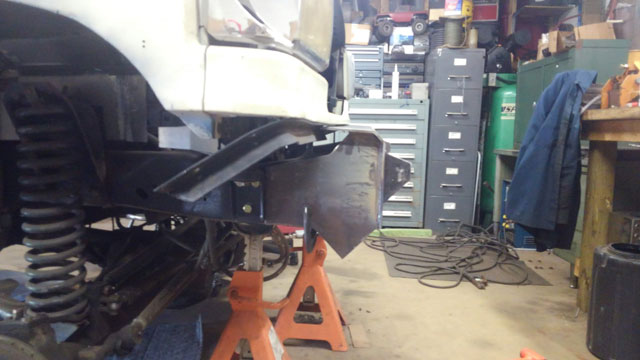  Drilling 1/2" holes in 3/8" plate kind of sucks! 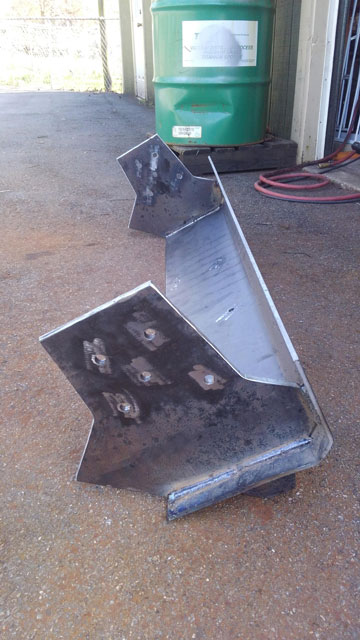 Which gets us to yesterday. Shes officially bolted on! 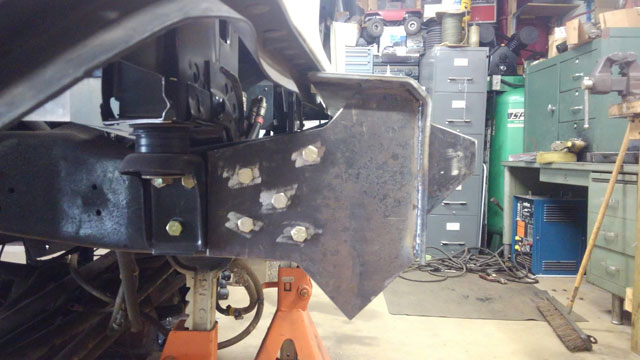 I can already tell, this thing is gonna be heavy! Tomorrow im going to start laminating the shackle tabs, to get that done and over with before the bumper gets too heavy to easily move around. Once thats done ill start working on the corners. |