|
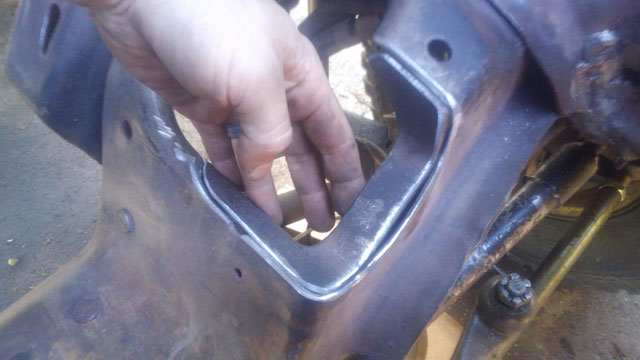
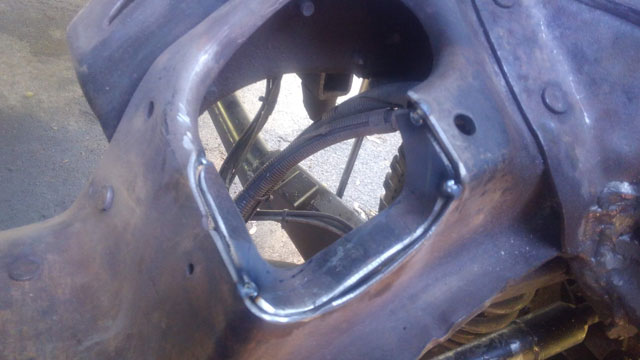
Ok, i finished refreshing the NP203/205 doubler. All degreased: 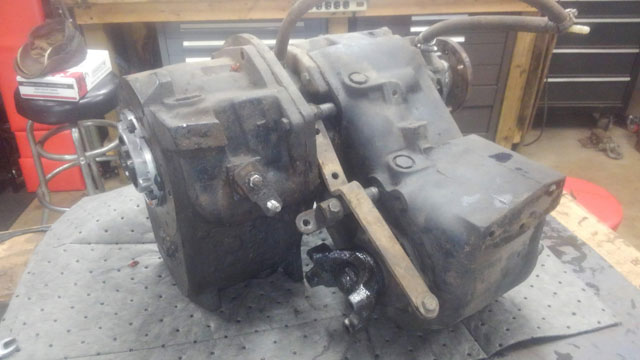 NP203 range box removed: 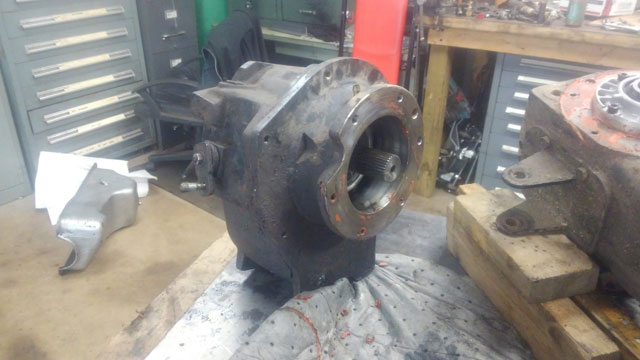 Seeing as this kit is from 2005, the intermediate shaft is a stock shaft cut down & resplined, as opposed to a new 4340 shaft that most kits use now. Fortunately, the shaft still looks good: 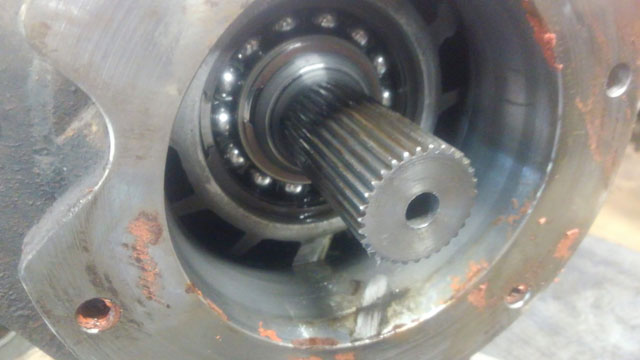 Ok, lets get this thing cleaned up! 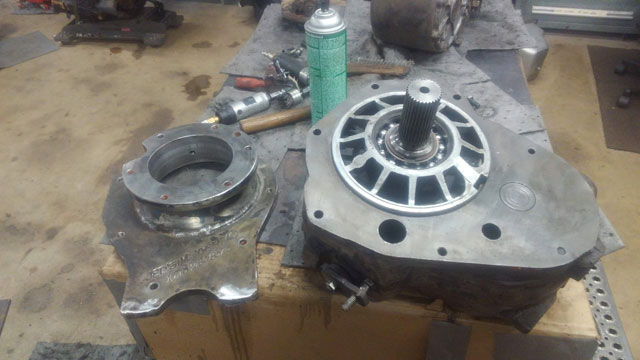 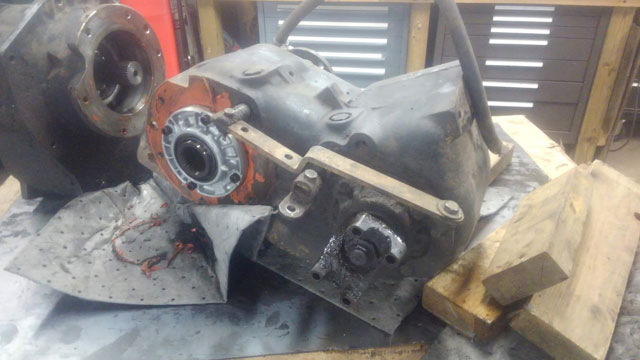 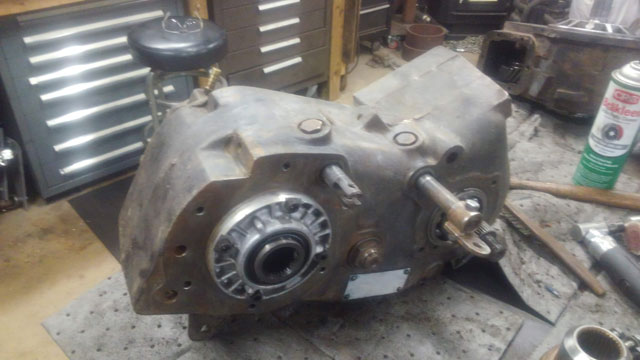 ...and done! All cleaned up, new output shaft seals, new shift rail seals, and a fresh coat of paint! 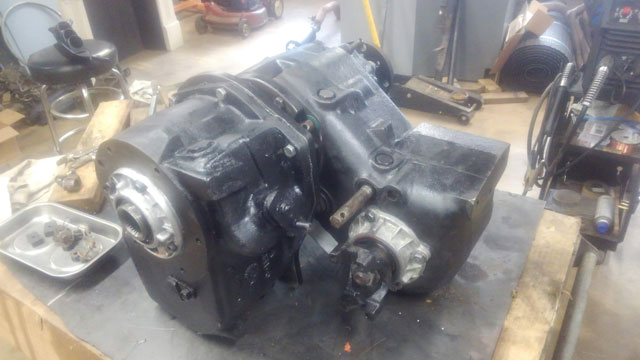 Next up is the transmission...  Talked to the builder today. Heads are in and he's already started cutting for valves. Currently looking at decking the block .010 to bump compression a bit, but we'll figure that out once the heads are done. Hes going to order the timing set/cam/lifters/etc tomorrow. I ordered a new Kaase oil pump + hardened shaft from ARP today. Also ordered a wideband O2 + controller & an adjustable FPR as well so i can tune it once its running. Researching online it seems its hit or miss if its possible to tune it on the stock injectors so ill have to get it running, mess with the fuel pressure, and then (probably) have to go back and get bigger injectors. But thats a ways off yet. Disassembled & started cleaning the NP203/205 doubler; hoping to start putting that back together tomorrow. Fed Ex doesnt seem to want to deliver my shift kit (no updates since saturday) so doubtful ill be doing anything to the trans this week. Ok, so referencing this pic i took a couple weeks ago:  I decided to just go for it, and notch it. Here's hoping i made it the right shape! Frame all cleaned up: 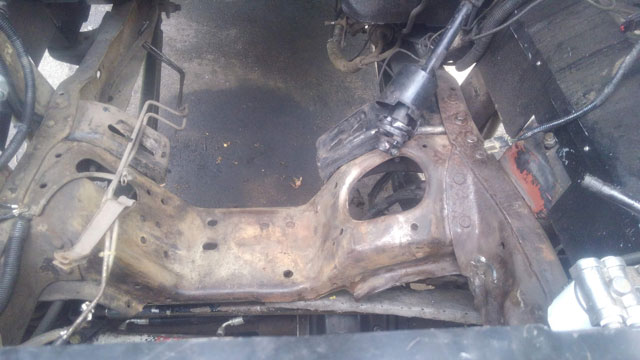 Not real easy to see, but ive drawn several different lines on the frame, to try to figure out how i want to do this 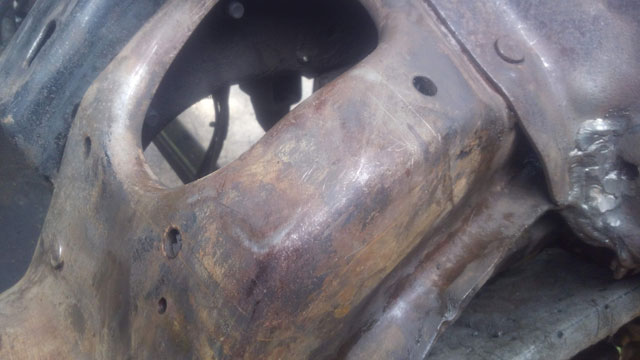 The point of no return! 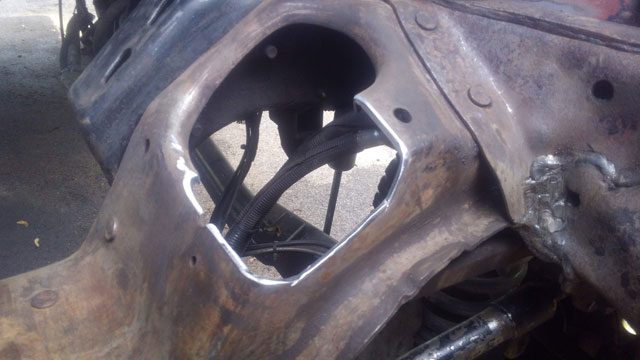 Here's the piece i removed for reference: 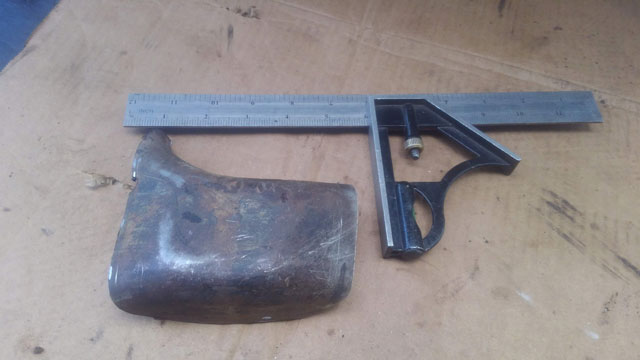 The rough mockup in cardboard: 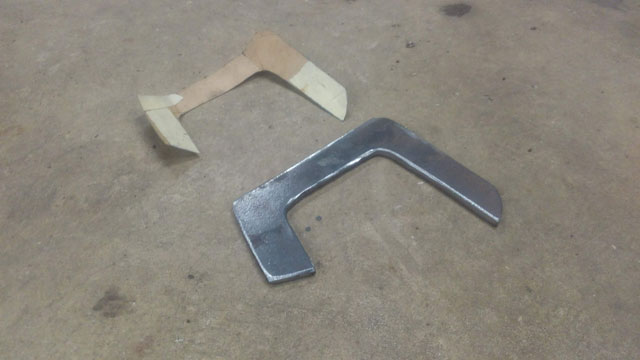 And here's what i ended up with, original shape was pretty close: 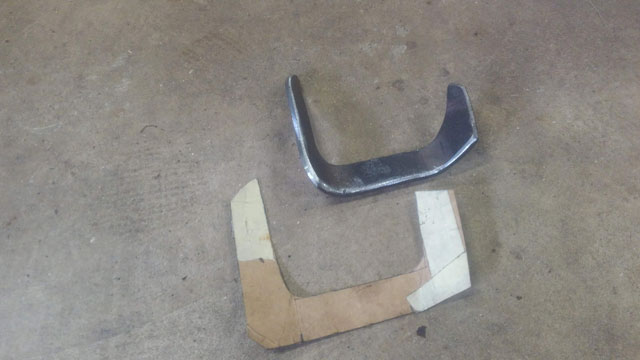 Fitting/welding:
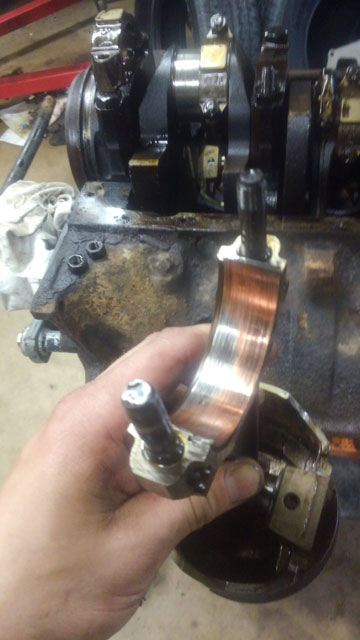
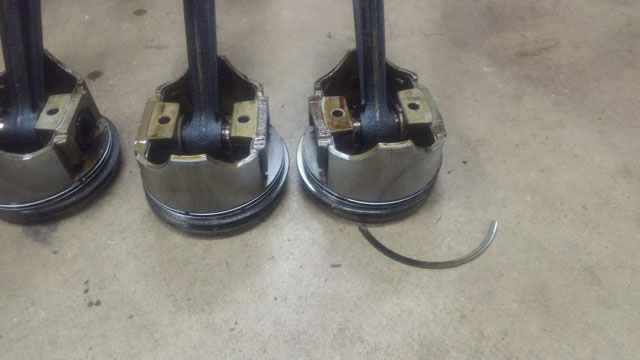
...and the end result! 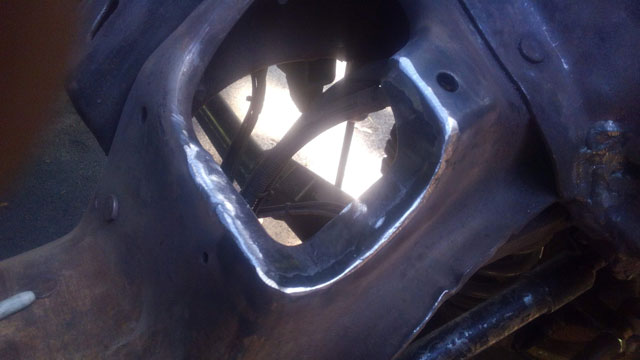  There is a ton of room. This has got to be good enough, altho im not gonna lie, im a bit nervous about this one. Mainly because i wont be able to verify its good until the motor goes in. Here's hoping! Talked to the builder this morning. Block is going to need .015, so we're gonna go right to .030. Crank will need .010 on the mains. He's on board with that cam i posted yesterday. Still researching pistons, but it sounds like he's found a set thatll get us ~9.6:1 compression, which should be pretty sweet. Unfortunately, both F4 heads are cracked! One of my E7 heads is cracked at an exhaust flange as well, so its looking like new heads are going to happen. Well, the block, crank, rods, pistons & heads are officially at the machine shop! He's figuring atleast .010, so most likely will get a .030 overbore. No idea on deck height at this point, but we might take some off to bump compression a bit. Thinking about running this cam: www.compcams.com/xtreme-energy-computer-controlled-hydraulic-flat-cam-for-ford-429-460.html And im thinking about this throttle body as well: www.summitracing.com/parts/BBK-3502 Were gonna try and build something torquey that will still run on the stock EEC. Im expecting to have to adjust fuel pressure a bit but hopefully not much else. We'll see how it goes! Plan for the rest of the week is to clean up my mess in the garage. Then bust open the 203/205 doubler, give it a good cleaning, change all the seals and get it ready for re-installation. Then im gonna set the C6 up on the bench and slap a shift-kit in it while im waiting for the motor to come back. I also want to change the converter while its apart since its probably original from 1988. So lots going on right now, even if there arent any posts showing it! Lifters and cam are now out: 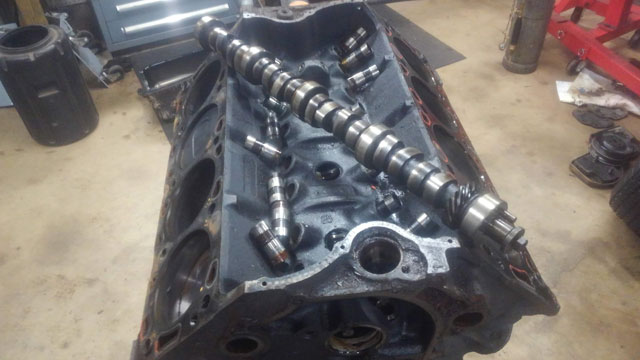 #8 rod bearing. This is the worst of the bunch, but not by much: #6 had a broken ring, which corresponds to the score in the cylinder bore:
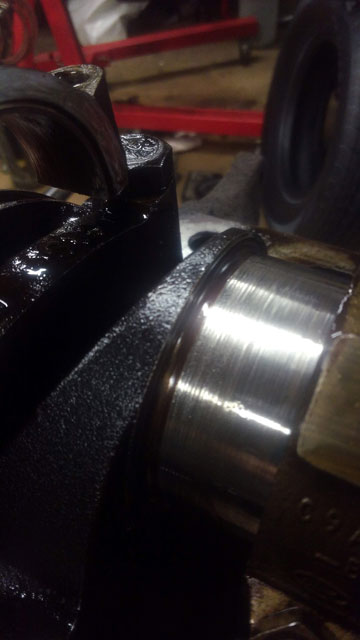
 #1 main bearing pretty worn: 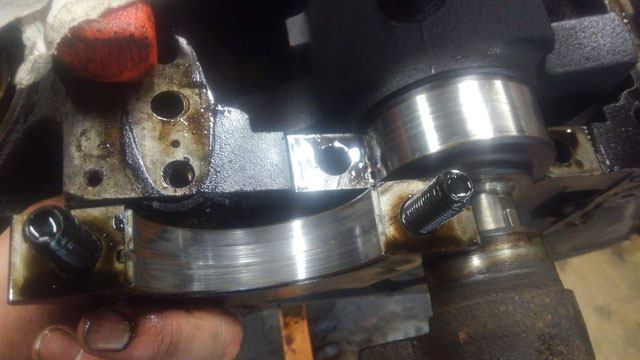 #2 is shot! This is the worst of them: 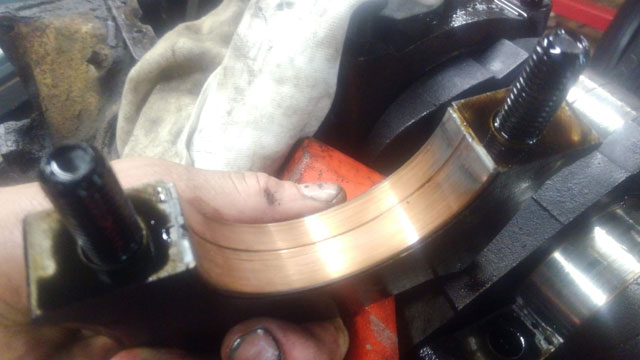 All main bearings worn, with corresponding scoring in the crank journals 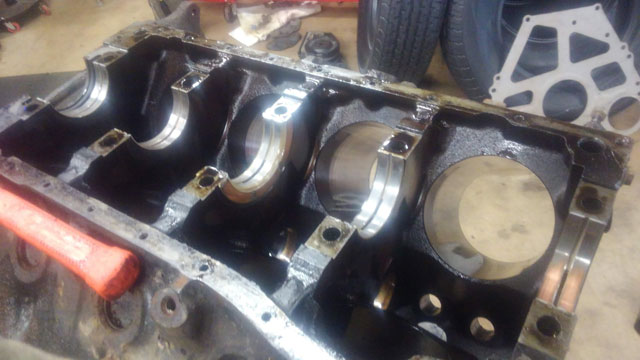 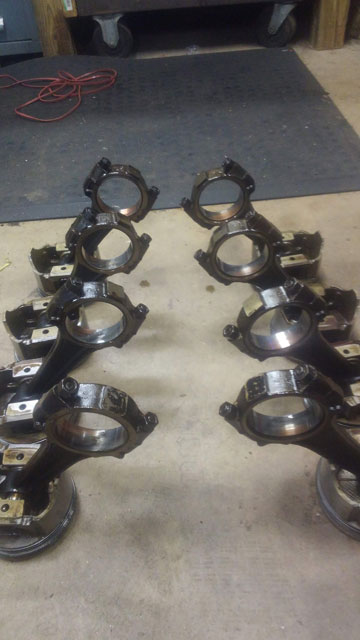 Tuesday this mess of parts will be going to the machine shop so we can see where we stand. 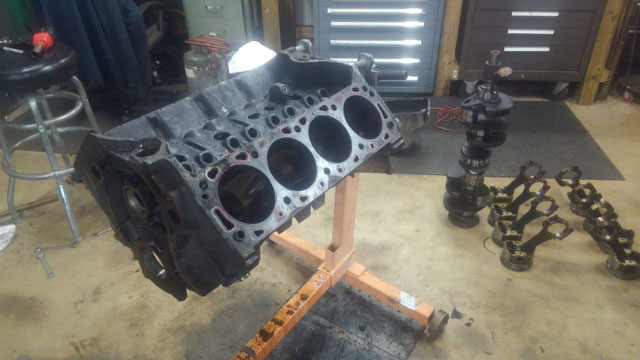 The verdict is in: She needs a rebuild. I suppose we already knew that, but heres what we found: Your typical wear in the cylinder bores: 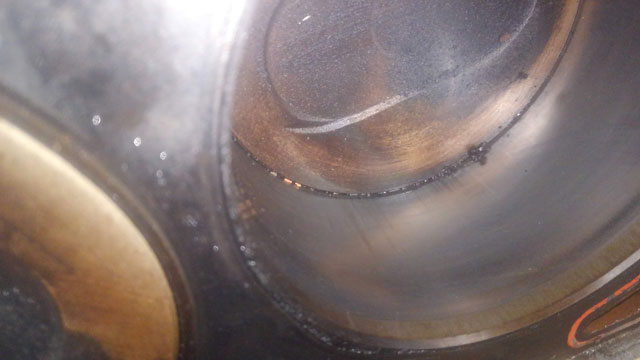 And a decent score in the #6 cylinder: 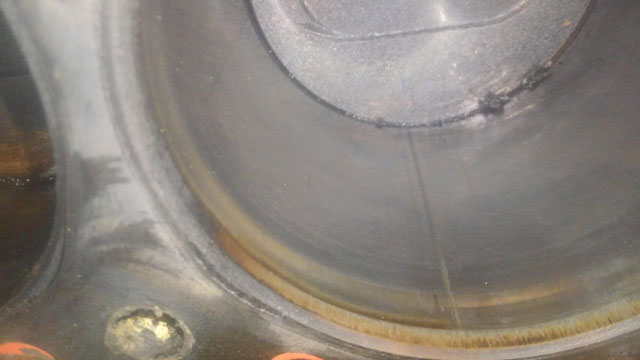 All the other cylinders look decent, so i flipped it over and pulled the pan. 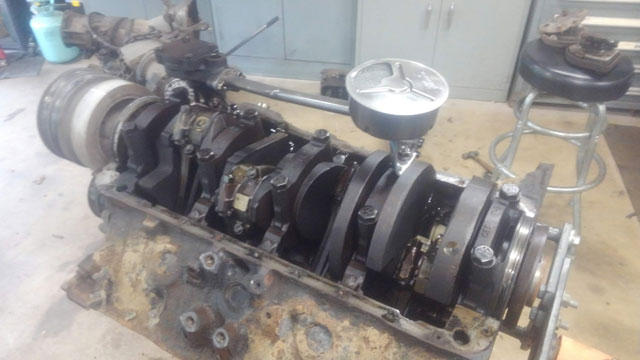 The oil pump screen is nice and clean, and so was the pan. Spun the motor over via the crank bolt, and you can hear the #8 wrist pin clunking away. Its pretty sloppy. So this is the source of the noise. Now to find a machine shop willing to work on this thing... its time for the next round of upgrades! 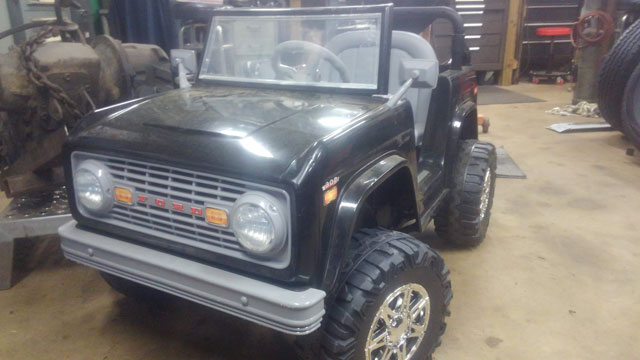 While they body is superb, the powerplant leaves a lot to be desired. 6v, one wheel drive just doesnt cut it. It puts along ok in the driveway but doesnt go at all in the lawn, which seems to be a common complaint for these things. Fortunately last year i got my hands on a second one cheap, so i swapped a second motor/gearbox into it to make it 2wd. But, the 6v system just isnt torquey enough. Enter ML Toys 12v conversion! 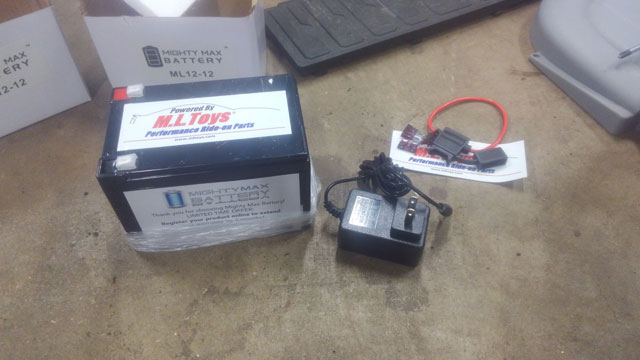 Its as simple as it looks- a new 12v battery to replace the 6v one, a new in-line fuse, and a new battery charger that still plugs into the stock charging port. Interestingly enough, the body is already designed to accept either a 6v or 12v battery, which means the bigger battery just sets in place like it belongs there. You can see the second gearbox/motor installed as well. That was a simple swap as well since the body was apparently designed to be 2wd all along. 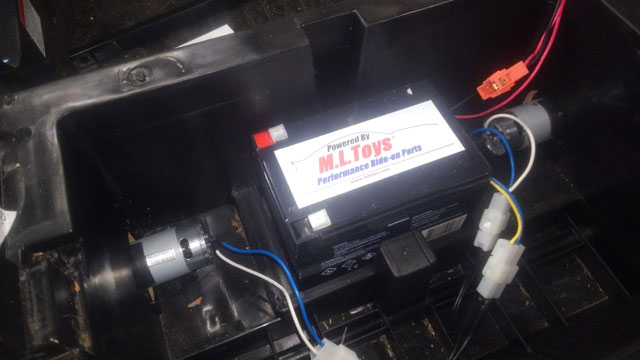 ...and the verdict is in....it runs like a champ now!  This was just what it needed to get the little guy cruising around the yard! The 12v conversion is just torquey enough to get it cruising around the yard, without it being too fast. Altho next year once hes good at driving this thing, maybe we'll look into that 18v conversion they sell... Found the older air-oil cooler in the garage: 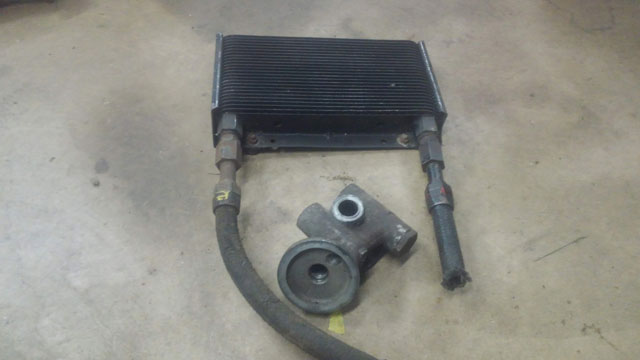 Fits in there better that the coolant based cooler, but still doesnt clear frame: 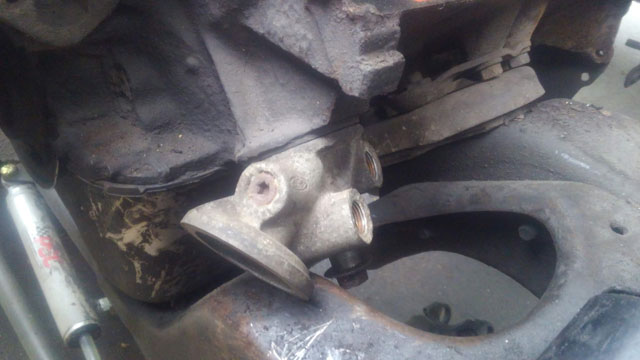 This is good enough to verify our original plan will work for either cooler/adapter. So now the block can come out! 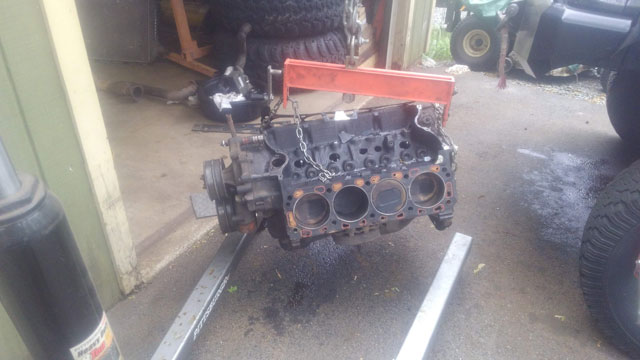 The parts pile has grown: 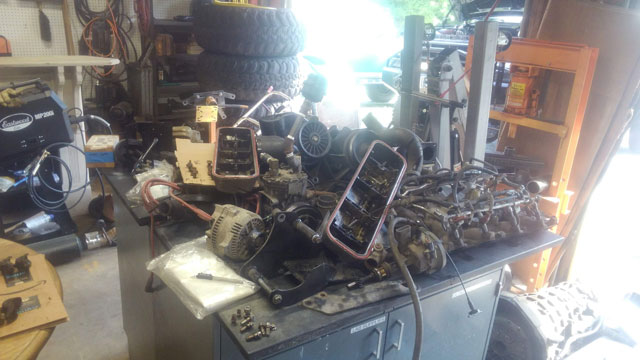 Theres really not much left to remove at this point: 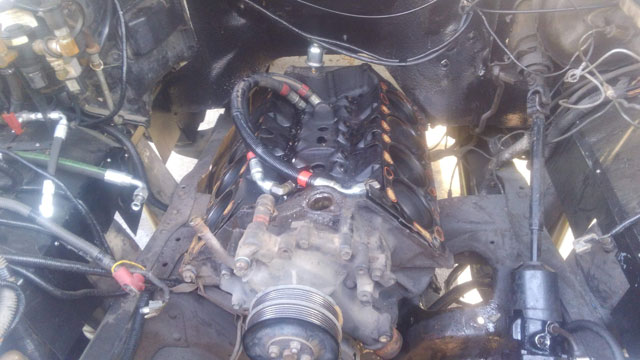 So, one of the things i would like to run, is the OEM oil cooler. Thus far i have been using a remote mount unit with a smaller filter due to a lack of free space. So before i pull the block out, i decided to see what it would take to get it to fit. So this is the '95+ oil cooler. Water cooled. It fits in pretty tight against the block, and intersects the lower radiator hose. 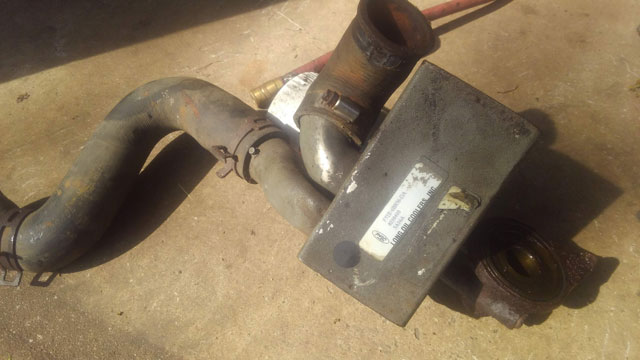 This is pretty much the orientation when installed on the motor. The oil filter ends up sticking out forward, under the belt drive, where its pretty easy to access 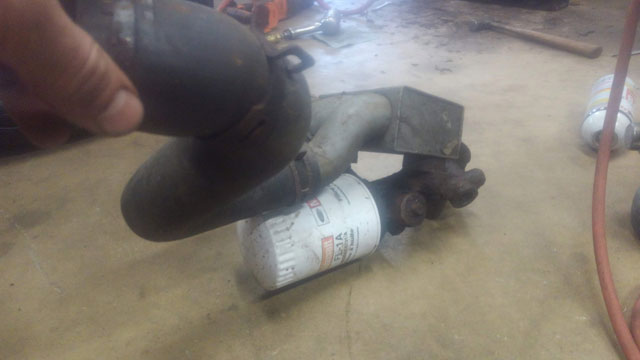 On the right is the OEM oil filter stud, if the filter is threaded directly onto the block. On the left is the bolt & adapter if youre running the OEM oil cooler: 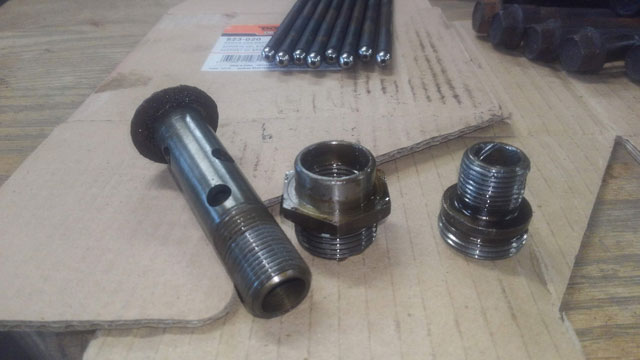 Warning: this next pic is pretty terrible. The big block oil cooler will not clear the small block engine crossmember, altho we already knew that. The question is, what do we have to do to make it fit? 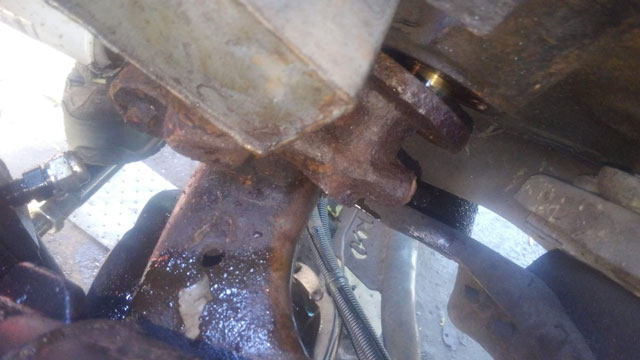 Unfortunately, it looks like this entire section will have to be removed: 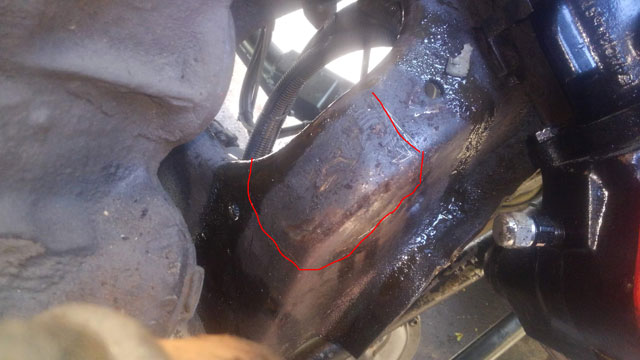 In the long run, i feel running the oil cooler would be the best solution, so once the block is out, im going to clean the frame, and see what i can do, to make this work. Stay tuned! |