|
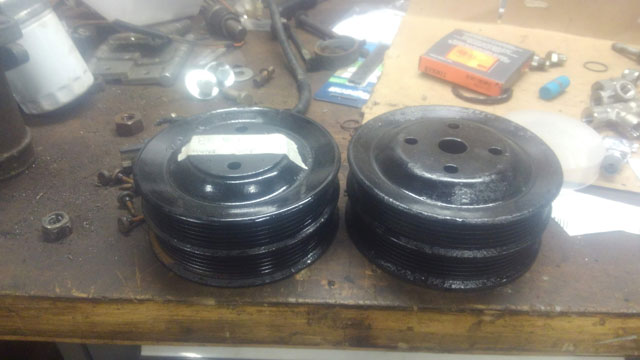
Ok, so i got some more parts slapped back on. For starters, the steering box is back in, along with the p.steering pump, tensioner and idler pulley: 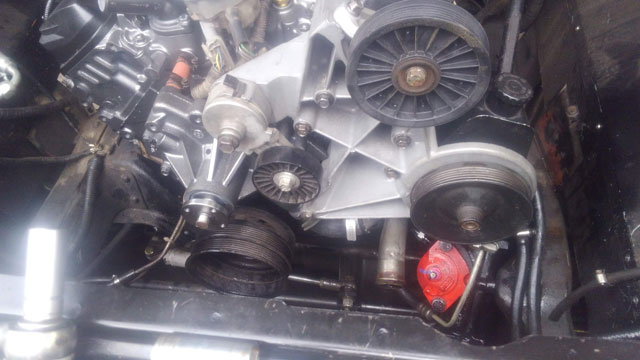 The York compressor is now back on the motor as well:  This i thought was worth noting. The 88-91 460 and the 92+ each have their own water pump pulley:
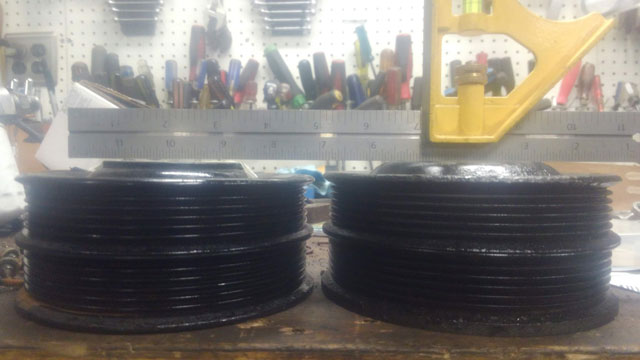
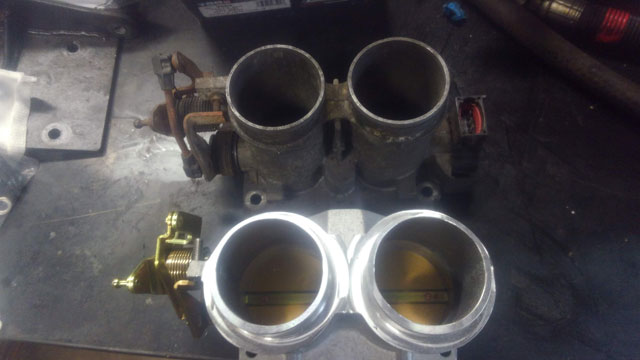
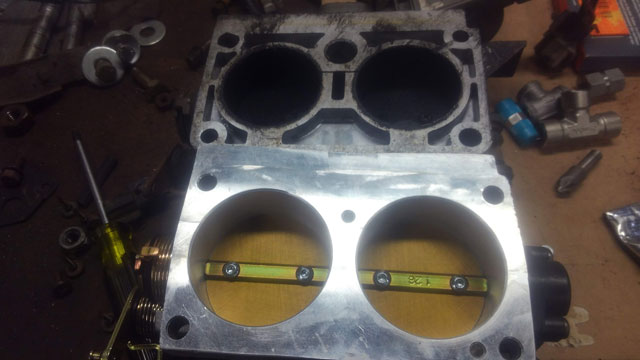
Its difficult to see in the photos, but the 92+ pulley has 1/8" more backspacing than the older pulley. It also has a different hole spacing, so it cant be interchanged with the older pulley, you have to run the pulley thats meant for its specific water pump. But why is this relevant? Because i switched to the 92+ water pump, because i want to run the 92+ oil cooler. The 88-91 water pump has a 2" outlet, and the 92+ has a 1-7/8" outlet. I need the smaller ID outlet to fit the smaller lower radiator hoses for the later model (92+) water-to-oil cooler. it would also appear that the hole for the alternator tensioner is in a slightly different spot on the newer water pump, and the alt must be moved up on the later model accessory drive, because the tensioner bracket is different as well, and neither would work with my hybrid setup. So i modified the older one slightly, and then finally, the accessory drive was complete! 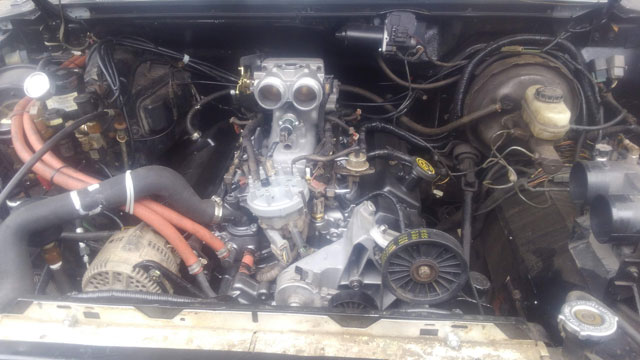 So at this point, i need to get back down to ground level. its time to install the transmission. 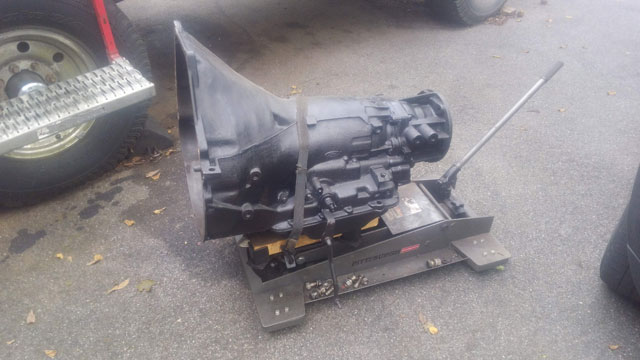 One new torque converter, from Broader Performance: 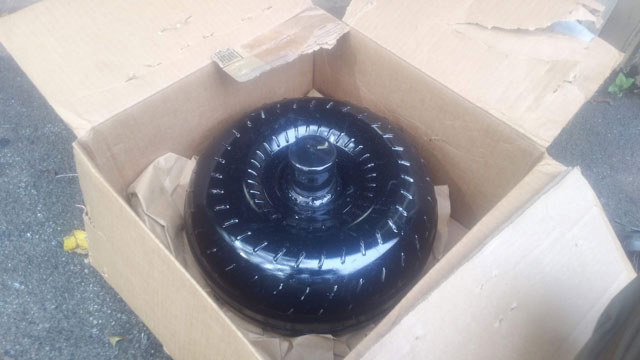 And then of course, the modified trans crossmember and new trans mount:  ...and just like that, the transmission is officially back in its home once more! 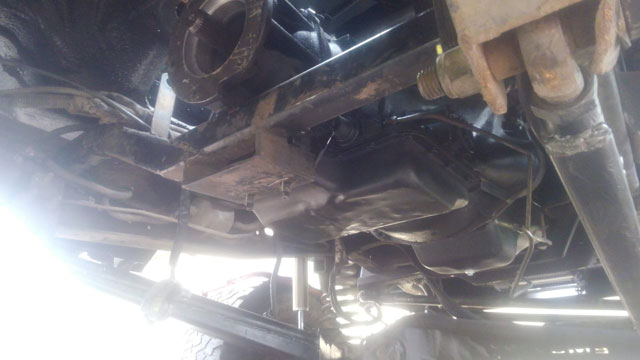 So this is where i called it quits. Tomorrow ill hook up the trans cooler lines, shift linkage, NSS, vent line, vacuum for the modulator, and then i can move on to reinstalling the doubler! We're getting ever closer to firing this thing! Man, the weather has not been cooperating! After about two weeks of rain, i spent a couple days mowing the jungle that was our yard. So now im finally caught back up, and progress can resume! First up, theres now a tee in the OEM port, so i can run both the OEM & the NVU oil pressure senders: 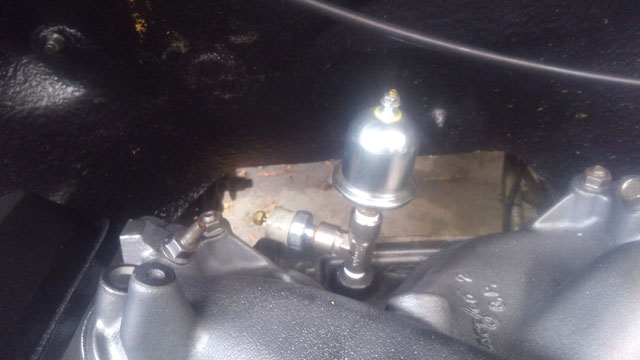 New Ford Performance 47# injectors: 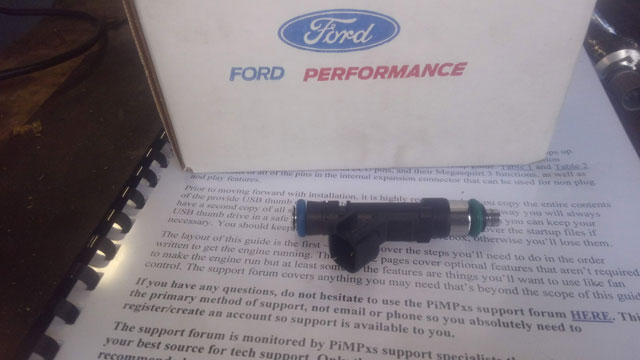 ...and BAM! Injectors, fuel rail, wiring harness, and plenum installed! 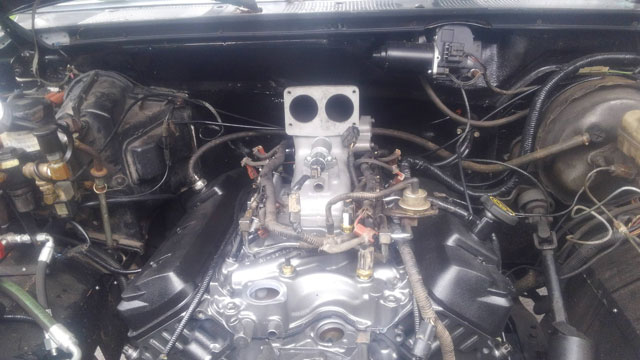 New BBK twin 61mm throttle body: 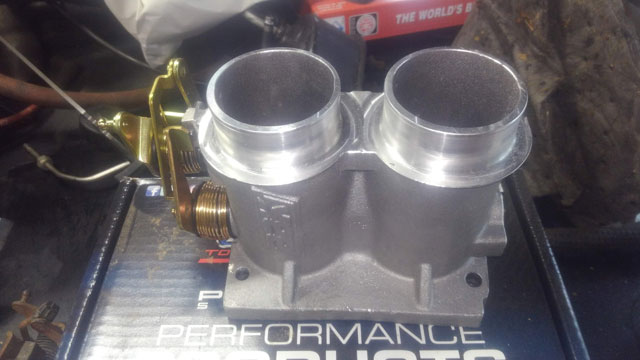 This thing is a beast; way bigger than the OEM throttle body. Should flow a ton more air:
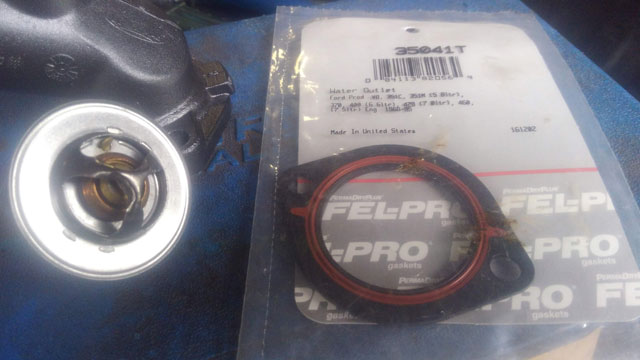
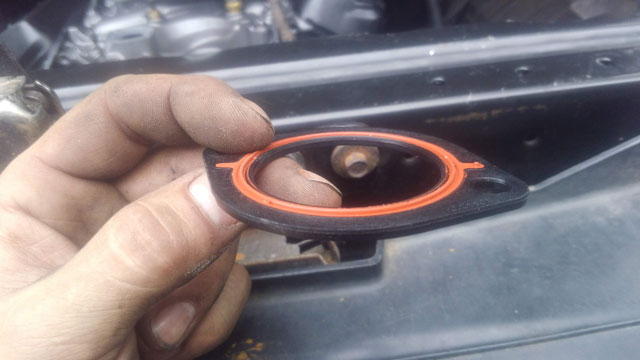
Also picked up this cool Felpro thermostat gasket, p/n 35041T. Supposed to solve the typical ford leaky t-stat housing issue. Its ~1/8" thick, and has an o-ring seal on both sides. Its a pretty nice piece, and looks like it should work well
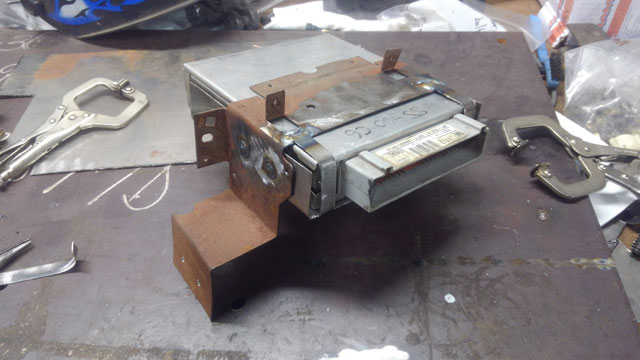
Progress! Now its starting to look like something! 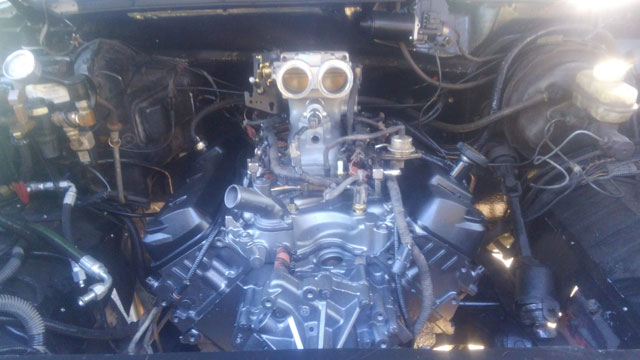 Distributor all ready to go with new o-ring, cap, rotor & TFI module: 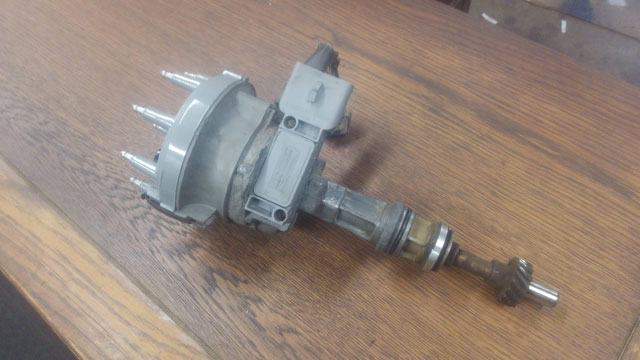 Engine at TDC & distributor installed. Plus a big win- the oil cooler is installed! 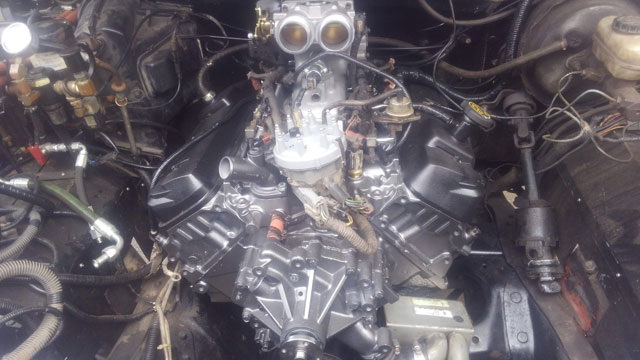 My frame notch was a huge success; Theres lot of room for the oil cooler, and it fit up in there easily with plenty of room to spare. 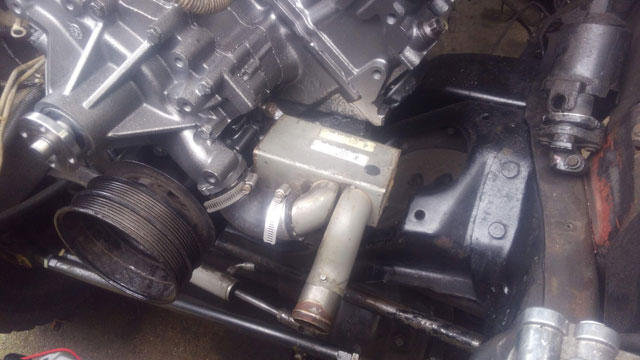 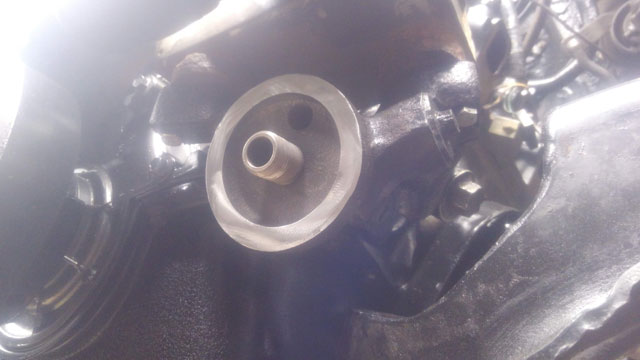 Super excited about this one, it clears like it was made that way by Ford! From here on out, i think everything left to do is basic reassembly, so progress should speed up. My torque converter showed up yesterday too, which was the last item i need to finish reassembly. If all goes well, i might be able to fire the engine in about a week's time! Despite the absurd weather, i have still succeeded in making some headway on the motor install. First up, i am trying to finalize the Stinger PimpX install. As mentioned a little while ago, this thing is a 100% new ECU, based on the Megasquirt 3 technology. It is designed to work with the OEM harness & sensors, however, if you look closely, it has its own on-board MAP & BARO sensors.  It comes with a flash drive that includes a custom tune, and all sorts of tuning and programming software, as well as some PDFs detailing the whole install and tuning process. One thing i did, was to get the install manual PDF printed and bound by Staples. Its pretty cheap, and its nice having it as a reference since its ~35 pages long, and you need to reference it for initial setup & tuning.  I know its difficult to tell in the photo, but this page is going over our setup. You need to configure the ECU for your motor size & injection type. Sounds complicated, but theyve actually made it quite simple: 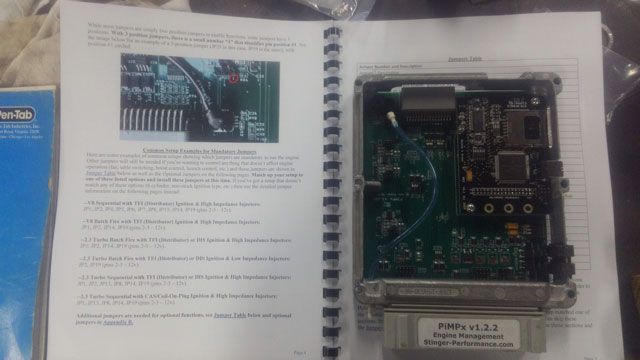 The ECU comes with a handful of jumpers you install on the board to set up if youre a V6, V8, batch or sequential EFI, Mass-Air or Speed Density. In my case, all i need is to install these 4 jumpers, and im good to go!  There is a TON of other things you can customize. Built in boost controllers, electric fan controller, you can configure your ignition type (including TFI, DIS, EDIS CDI box, etc), boost controller, nitrous controller, you can add cam & crank sensors, more O2 sensors, VSS (if not already equipped), there is a ton of customizing you can do. There is an extra port on the bottom of the ECU for adding in all the additional items the stock 87-95 ECU did not support. 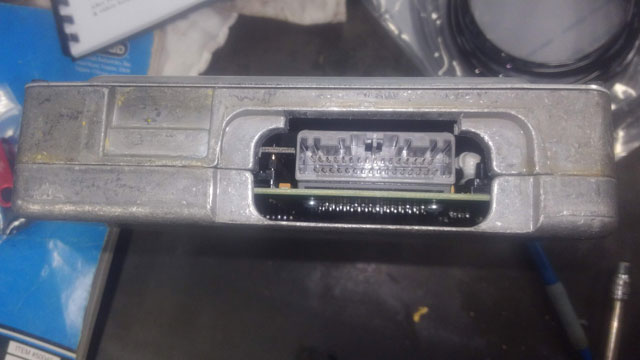 included is some high quality silicone(?) tubing for the map sensor, and a USB cable for tuning 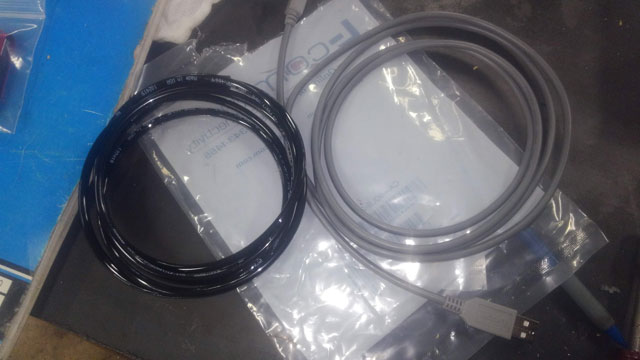 There is a USB port on the side, along with a SD slot for data logging. You need access to the port to load the tune (this will come later on in the install), and thanks to my relocated ECU i did not. 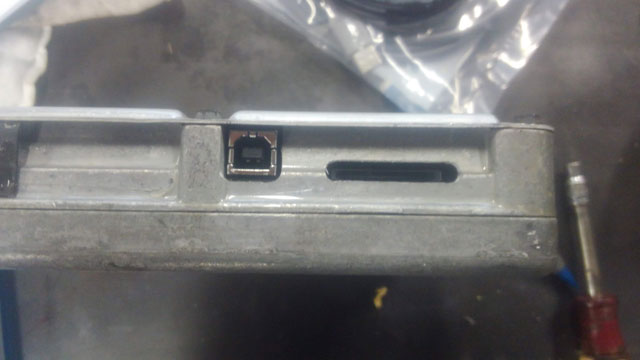 Back when i was getting ready to install the dash, i built this bracket to relocate the ECU:
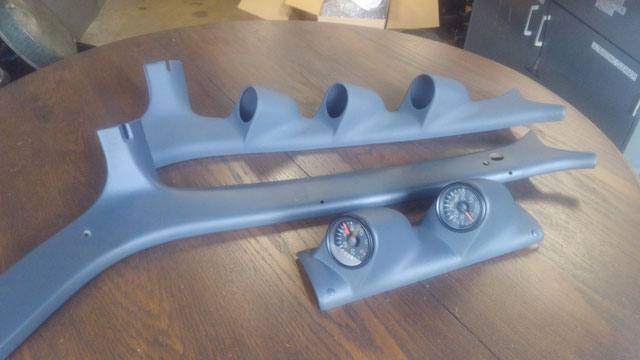
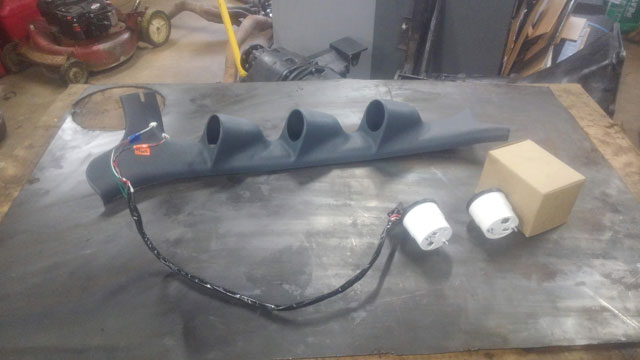
It was a clever design, but it has to be modified. Thankfully i made it bolt-in! So i carefully removed it and notched this side, to give me access to the USB port 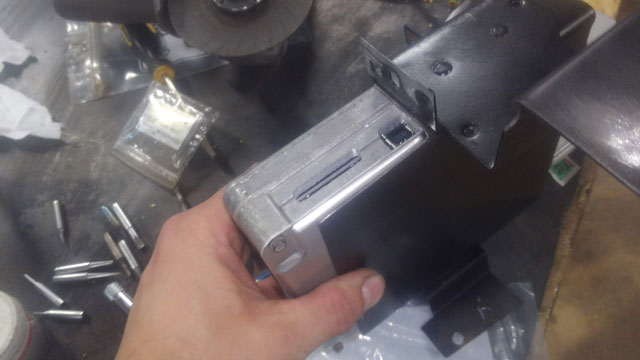 So with that done i need to move on to some wiring mods. First things first, we need to add a wideband O2. The ECU will work with either the stock narrowband sensor or the wideband. If you use the wideband you gain a self-learning feature, which i definitely want. The install is simple, simply supply the +5 reference from the wideband controller directly to the signal wire that the original narrowband sensor goes to, and eliminate the stock O2 sensor. It seems simple enough, but i decided to do what i usually do, and make it more complicated! So, this pic shows where i mounted my wideband controller; up high in some free space above the brake/ebrake pedals: 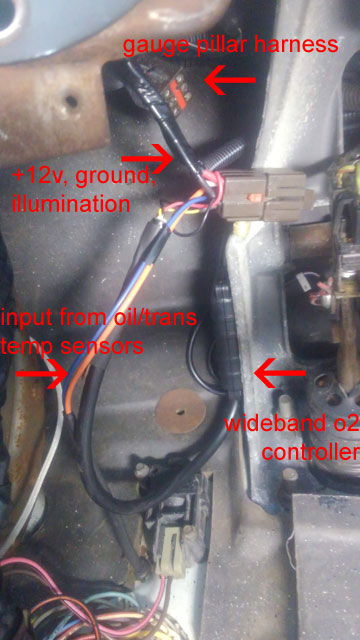 This means the +5v signal wire is right near where the factory ECU would be. So rather than cut into the stock harness, i decided to add a wire to the ECU extension cord i made. So lets take that back out! 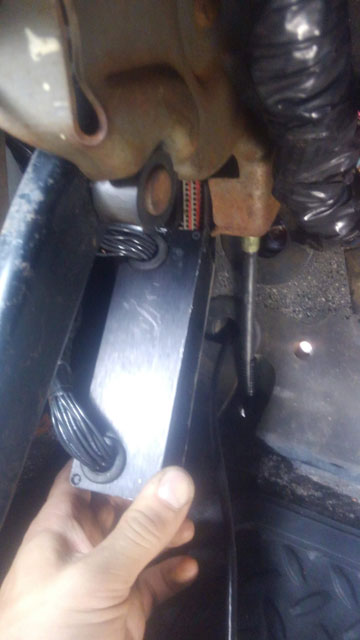 Once opened back up, you can see the board offers not one but two seperate places to tie into each circuit, specifically for piggybacking for aftermarket ECUs and controllers. So all i did, was add a signal wire directly to the signal circuit for the stock O2 sensor, Pin 29: 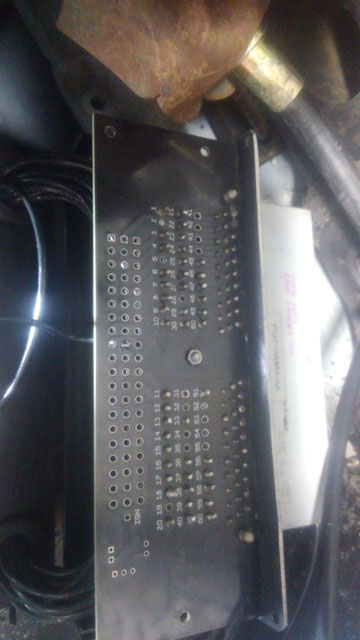 All closed up and reinstalled, with the new signal wire hanging out and ready to be sleeved/run to the controller. 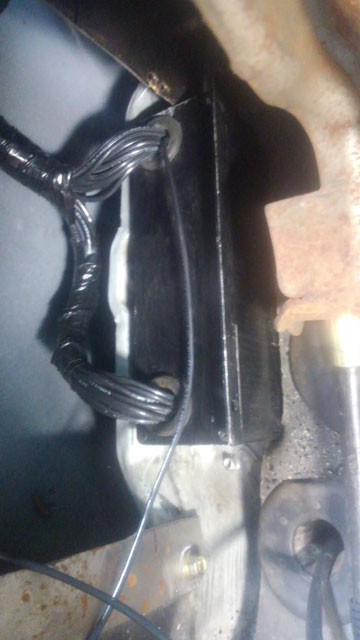 Once that was done i reinstalled the kick panel and tied that wire into my O2 signal. So now ive got both signals wired in, w/oo having to cut or modify the stock harness which is a big win in my book. So now lets move under the hood. This is the wiring for the OEM MAP sensor + O2 sensor. Its a lot of wire, and we dont need it anymore. 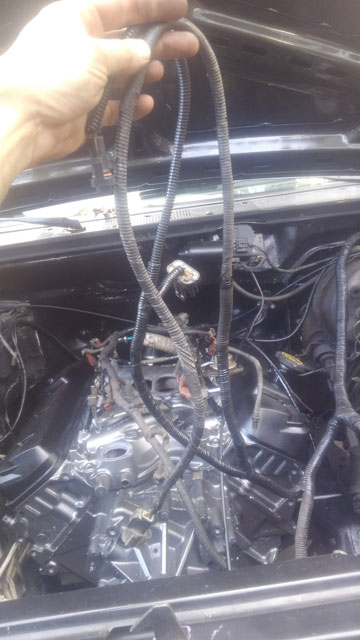 I dont like the idea of simply cutting the wires off, so instead i cut them back, crimped new pins on the wires, and installed a 8-pin plug off a junk harness i had laying around 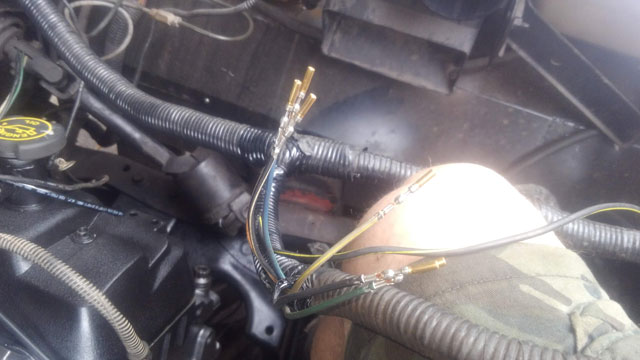 That looks considerably better! Almost like Ford made it that way. 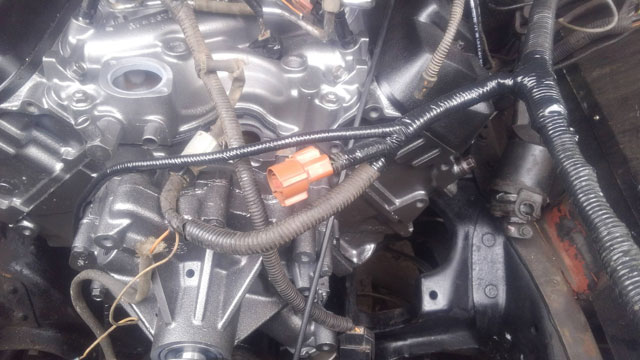 So here's what we removed. Not discarded though; ive made it us as a companion harness that will plug back in and then put away in a box on the shelf. This way, if i ever want to add the stock sensors back in, i can, without having to do any additional modifications to the harness. 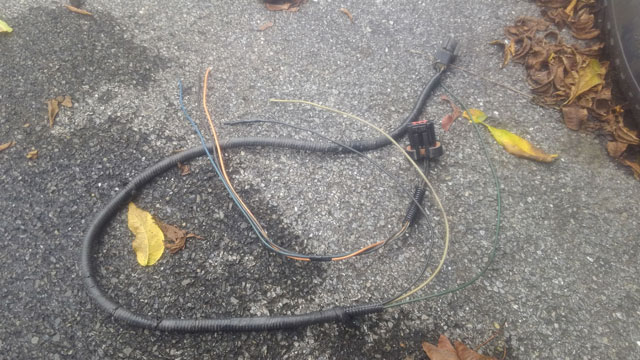 So this should complete the wiring mods for the PimpX, which means its time to finish the motor install! So over the weekend i rolled the motor over and removed the pan, so i could install the new oil pump. I figured, if im spending all this coin on the motor, i might as well spend a little more, and get a good oil pump. Enter this unit, from Kaase Racing Engines: 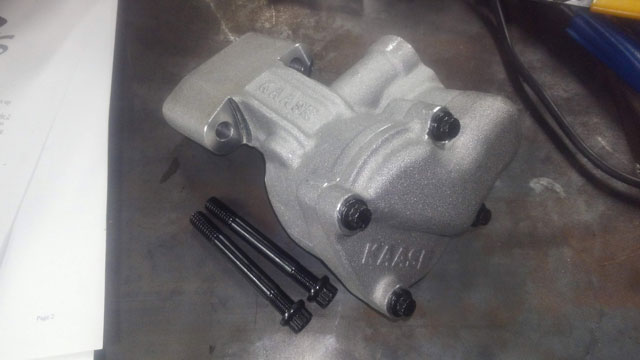 This thing is a beast of an oil pump: 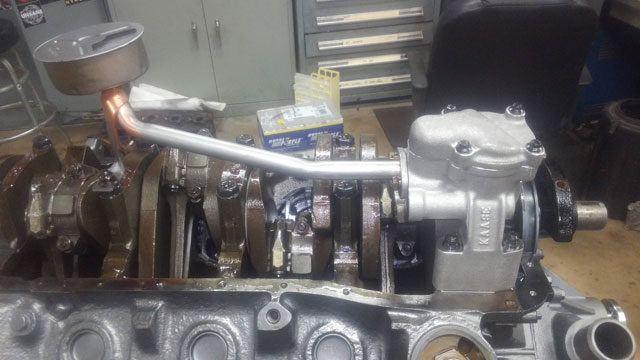 Complete redesign of the pump housing solves a cracking issue at the base of the OEM pumps, and it has dual oil ports to the rotor which helps with oil pressure at low RPMS; perfect for a trail rig. So i put the new oil pan on, rolled it back over, installed the valve covers, and now its actually ready to go in. Ive switched to the valve covers from the '95 motor. They are basically the same as my '88 valve covers, except the PCV valve screws into the passenger cover instead of using a grommet, which is a way better design. 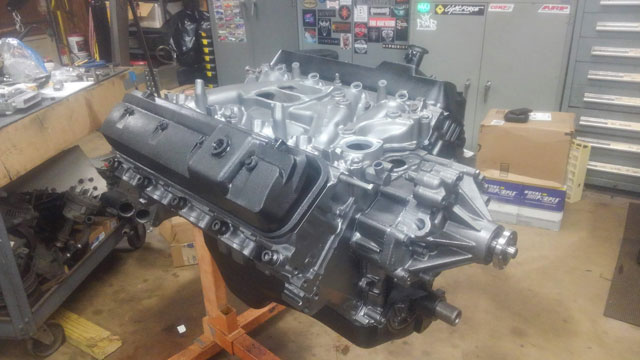 Fast forward to Monday morning, when a buddy came over after work, and this happened: 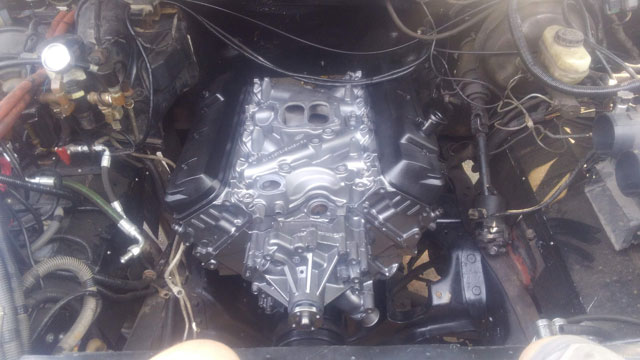 She's in there! We had enough time to throw the trans in, but sadly my torque converter has not arrived yet. Check this out though- 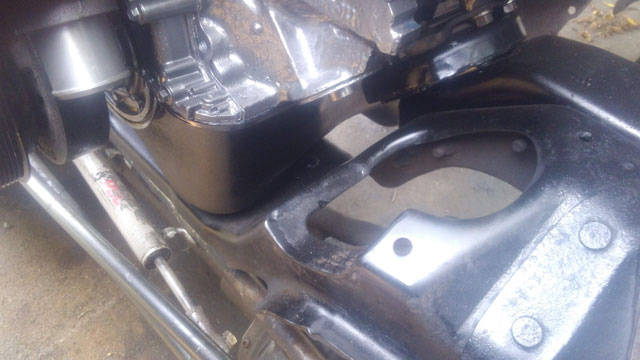 The frame notch is a success! There is a ton of available room for the oil cooler. So im kind of bummed the torque converter isnt here yet, but i still have plenty of stuff i can do in the meantime. And it is supposed to rain most of the week, so whatever gets done, gets done. Progress has been made! First up, i got my air-fuel ratio gauge installed. I removed my a-pillar trim, removed the gauges, and removed my standalone harness for the gauges
Wiring harness dissected, and A/F gauge wiring added! Since its a gauge from NVU the wiring is basically the same. So i spliced in the power, ground & illumination wires, and only had to add a single wire to the harness- the +5v reference from the wideband controller. So overall a pretty easy job to do.  Bam! installed. 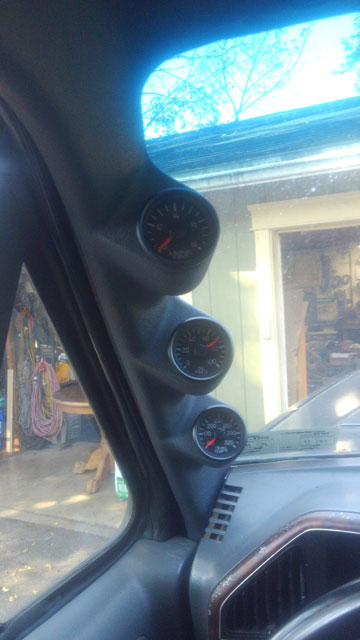 The Glowshift pod fits pretty good actually, but i did trim the top slightly where the windshield trim fits up against it, so it would fit a little tighter. Just some minor work with a razor knife, nothing major. I also took the time to lay out where the original trim screws go, so i could use the OEM screws to go thru both the pod & the pillar so no extra hardware to remove, and it actually looks pretty clean. So, that's done, moving on. I got my new ECU from Stinger Performance, the PimpX!  It comes with a bunch of stuff, including a pretty in-depth 30-something page PDF, which i printed off for a reference since the wifi in my garage sucks. They actually want you to open it up, so here we go! 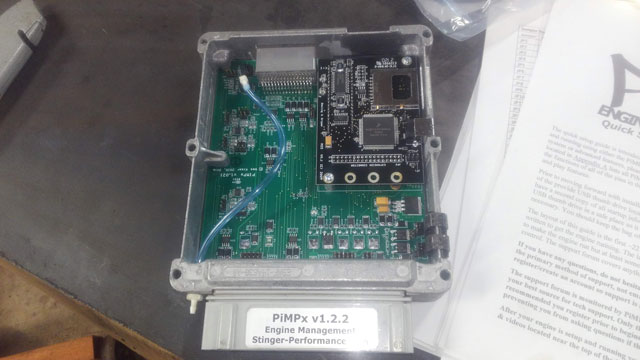 If youve ever been inside your ECM/PCM, then you know it looks nothing like this! This is a 100% custom-built ECU based off the Megasquirt III. It has a bunch of jumpers you need to install in the board to configure your unique setup. They intentionally dont install any just so you have to go thru it and do it yourself, which i actually kinda like since it forces you to set it up exactly for your vehicle. In my case, its only a couple jumpers since im still batch-fire, Speed Density, and running the stock TFI & ignition compnents. It supports a ton of stuff like sequential EFI, coil-on plug, boost switches for forced induction, narrow or wideband O2 sensor(s), it has its own electric fan controller....the list goes on. Im still reading thru the PDF, but im pretty sure i know how im going to configure mine. It uses its own built-in MAP sensor so i have to delete the OEM one, and run the supplied vacuum line from the intake right to the ECU. Also, i am going to be using a wideband O2 in place of the factory narrowband (which gains me self-learning programming), which means i only needed 1 o2 bung in the exhaust, and i will have to tie the wideband controller's output into the oem signal wire from the original narrowband sensor. I think this is the only modification i need to make to the wiring harness tho, everything else should just work like stock. I still have more reading to do on this, so there will be more updates on this over the next couple weeks. Heres the big one though:  The motor is done! All ive got to do is install the motor mounts & flexplate, and sometime next week she's going back in the bronco! And we're back from the shop! 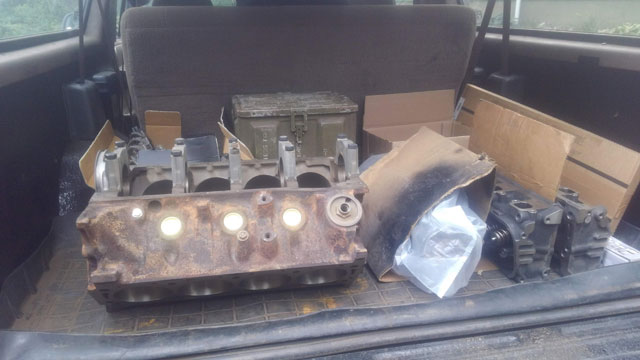 The new heads look really good!  .208 intake valve, .175 exhaust. Should flow a ton of air! 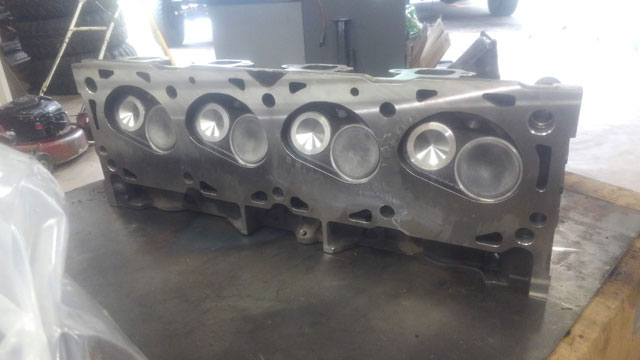 Everything all laid out on the cart: 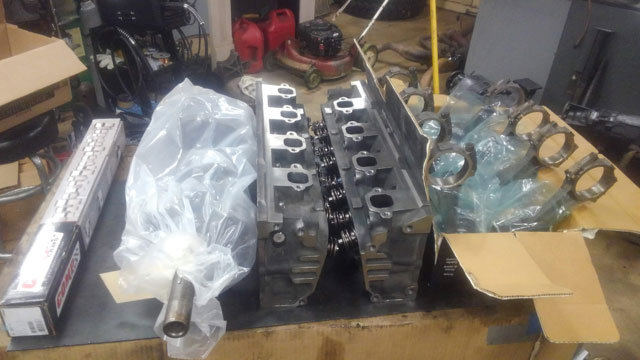 Going with a cam from Comp Cams, specifically this one 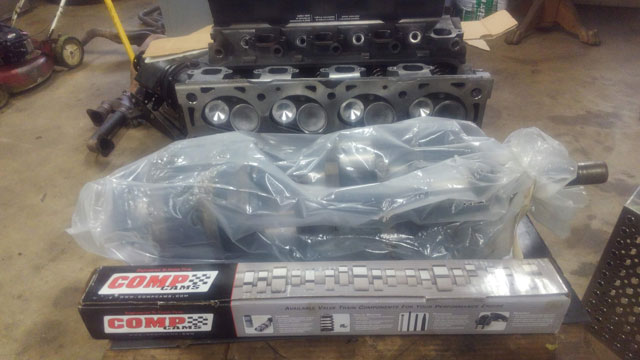 crank is back in  Pistons are +.030 Silvolite Hypereutectic 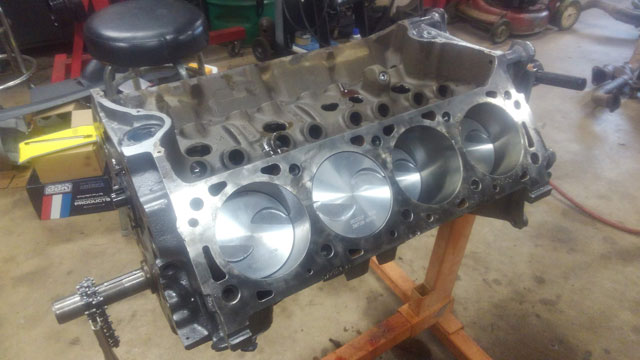 Timing chain, cover, water pump, and heads! 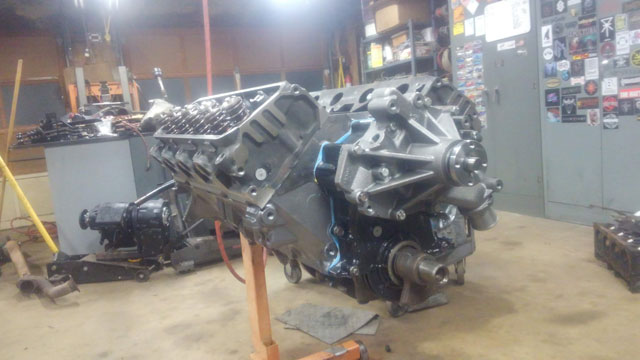 Unfortunately i goofed on the headbolts, so this is where it will sit until my new ARP headbolt set shows up Monday. parts 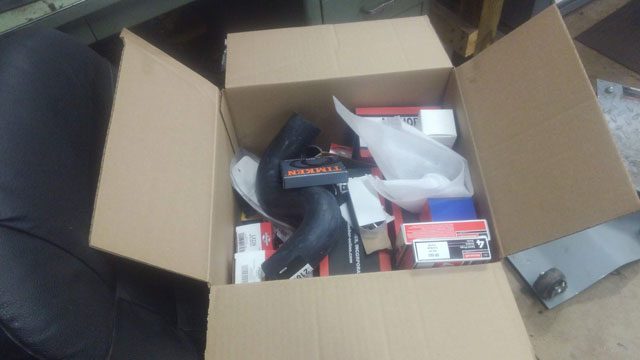 lots and lots of parts 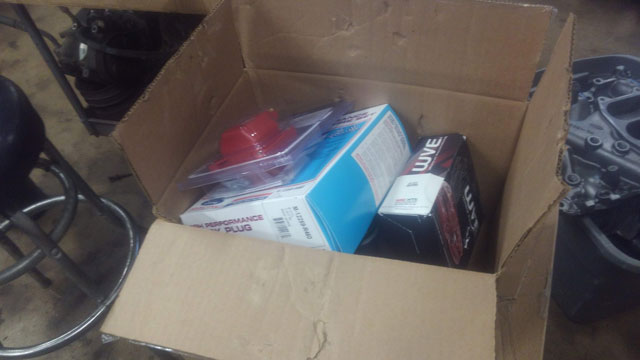 This is basically every sensor for the motor plus tune up parts, gaskets, etc. It also includes a wideband O2 + controller! 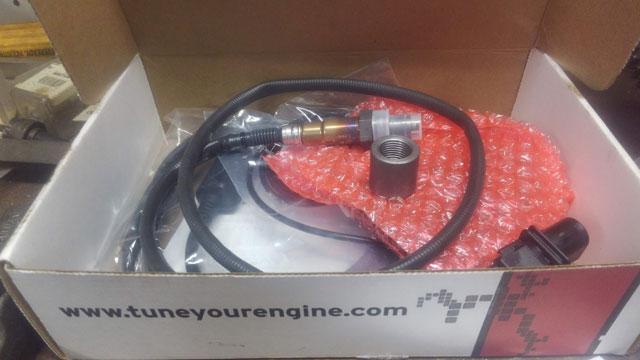 This is Innovate Automotive's LC-2 wideband O2 controller. Fully tunable controller, but does not come with a gauge, which is fine since im getting one to match the other gauges i already have from NVU. I mocked up the exhaust in the bronco, and found a good place to install a bung for the wideband sensor, just behind the stock sensor: 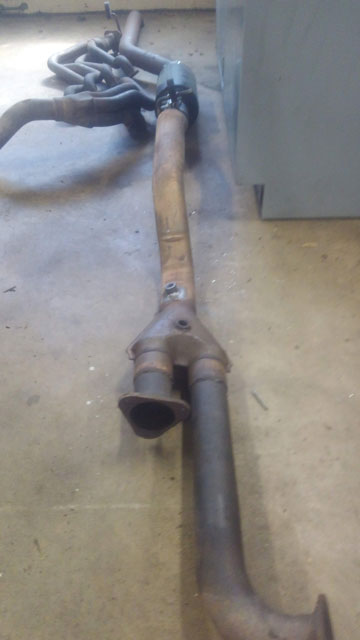 I removed my 2-gauge pod from my pillar, and am installing a 3-gauge pod from GlowShift. Its actually a pretty nice piece and fits very well.  This is the harness i built for the oil pressure & trans temp gauges; its built around a 6 pin connector, and i was only using 5. This works out super conveniently, because i only need to add 1 wire to this harness for the air-fuel ratio gauge- the signal wire from the wideband controller. The rest of the wires for the gauge are all already there. So wiring the gauge will be a pretty simple task. 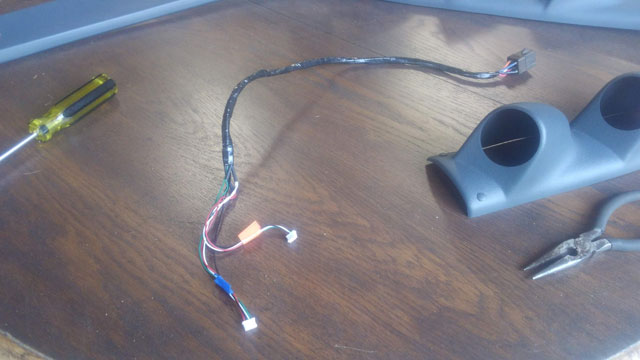 Here's the new Bosch wideband O2 sensor: 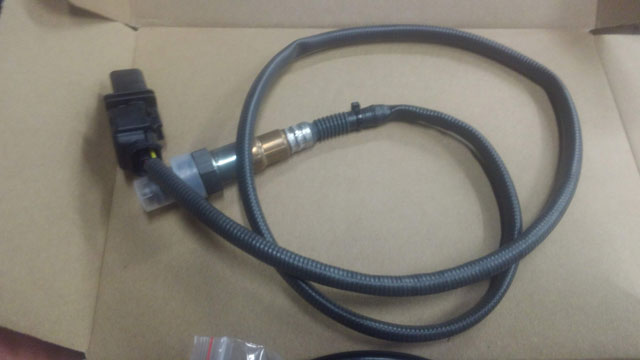 Here's the wideband controller: 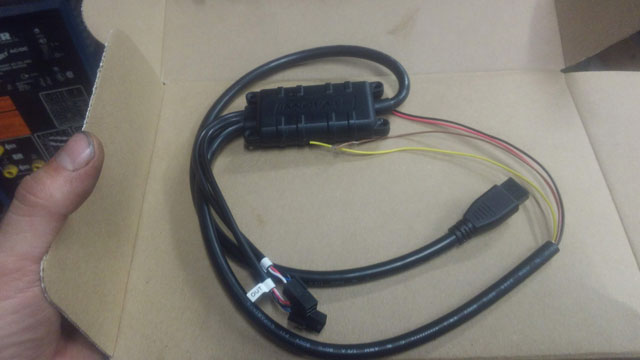 Just a couple wires to connect to make it work, plus the large plug goes to the O2 sensor, the other 2 plugs are optional. One of the small plugs is an input for connecting a laptop for tuning the controller, and the other one is an output if youre using other software/hardware from Innovate. Here's the included harness that connects the sensor to the controller. its available in several lengths; i got the 8' one because i dont know how im going to route the wire yet. 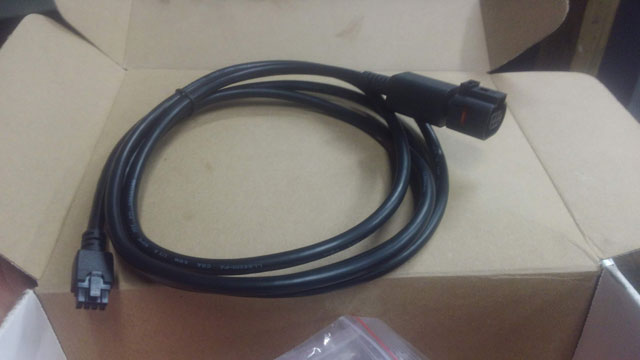 And it also included this adapter harness for connecting a laptop for datalogging or tuning the controller: 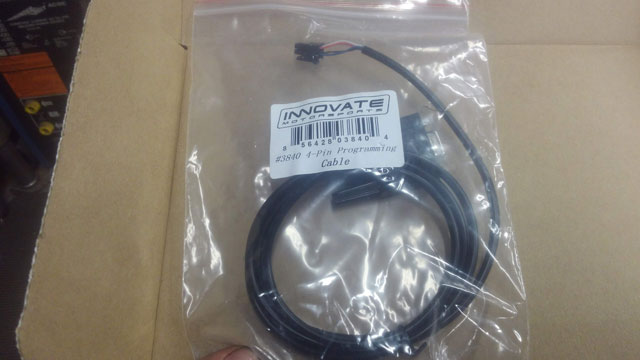 Its unlikely ill need this, but it would be useful for those who like to do more specialized tuning for racing, or want to use the controller to emulate a narrowband sensor. Ive already started wiring the controller up in the truck, but i havent routed the cable for the sensor yet. Its difficult to say exactly where i want it to go, w/o an engine or transmission in the truck to check for clearances. Hopefully the engine will come back soon, and i can get this thing back together and running! I have a torque converter on order from Broader Performance, hopefully it comes soon. I also decided its worth it to just order a tuner, so friday i ordered the PimpX ECU from Stinger Performance. The engine isnt back from the builder yet, but that doesnt mean i dont have things i could be doing. So lets do the things! First up, lets clean that intake: 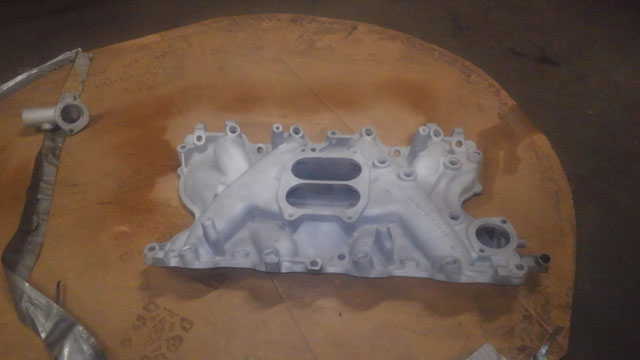 Primed & painted. Also in the background, is the non a/c idler pulley bracket, and the p.steering bracketry 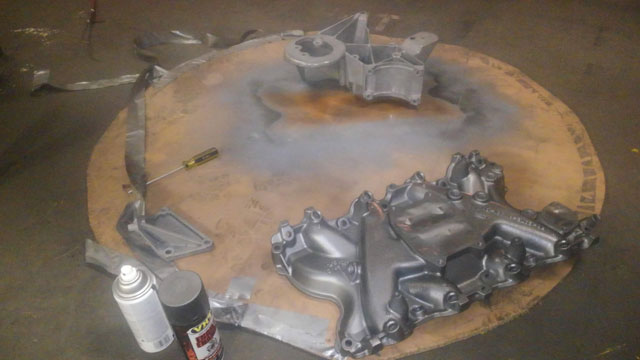 Intake primed/painted with VHT's "Iron" Engine Enamel:  Accessory drive bracketry cleaned up and clear coated, looks like new! 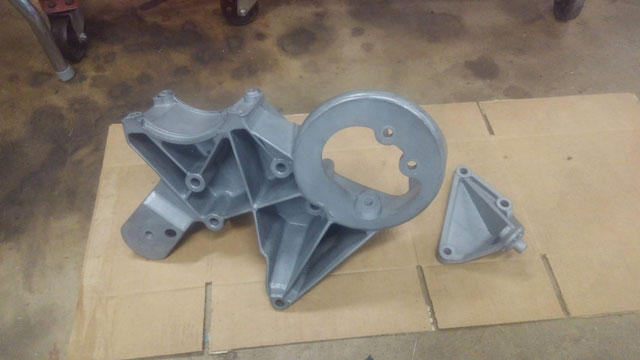 Plenum is done as well: 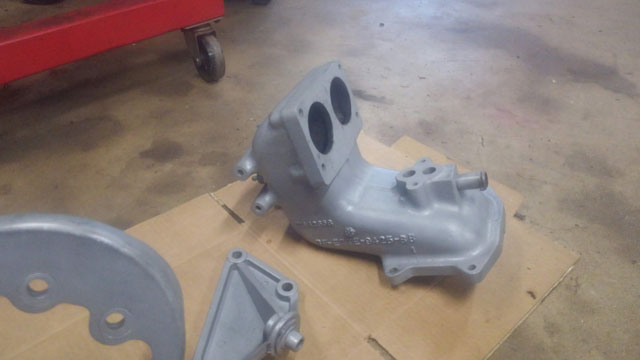 Water pump + crank pulley/damper cleaned up and painted as well: 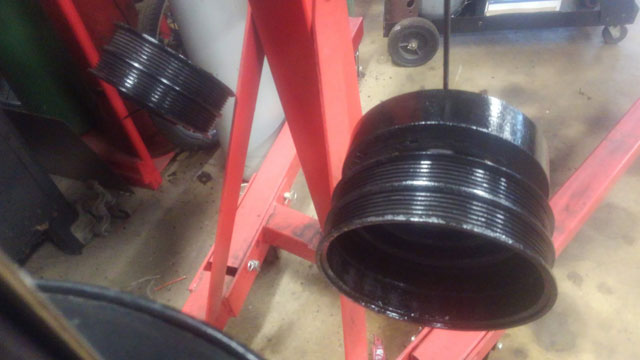 Stock cast aluminum valve covers blasted and painted with a textured black paint that i found in the back of my cabinet:  ...and the oil cooler is now fully rebuilt as well too!  ok this is minor, but has always bugged me. Since the 460 was in a high GVWR truck, it got a different emissions system than the bronco did. That includes these small ports for the air pump, which have been capped off forever since i dont use that system.  I dont like looking under the hood and seeing capped off emissions ports, even if they wouldnt be used, so theyve got to go!  This isnt a super thrilling update. But basically, i cut them off, and then welded the holes shut so no one will ever know they were there in the first place. 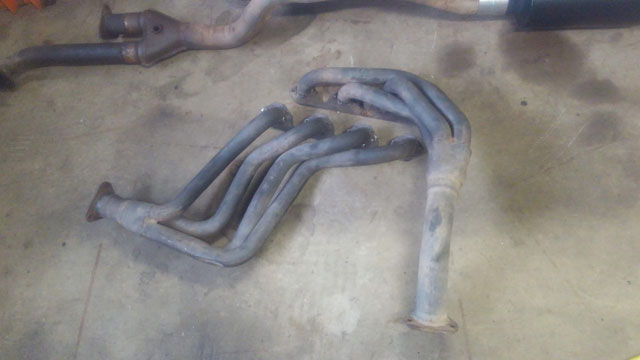 So now while im waiting on the motor, ive been putting together a a shopping list of what i think might be everything left i need to putn the motor back in, that hasnt already been ordered. Time to spend some money on RockAuto! 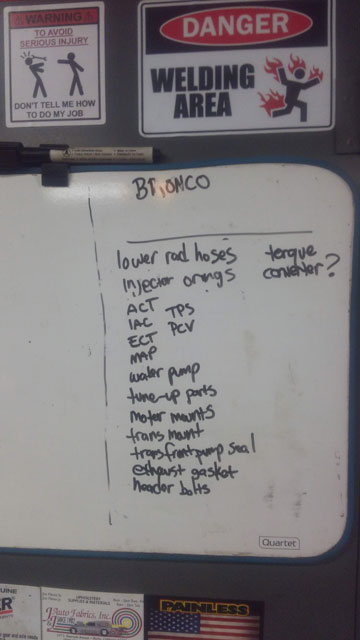 Ok this actually wasnt all that bad to do. So, i ordered a Transgo shift kit, and a lubelocker pan gasket: 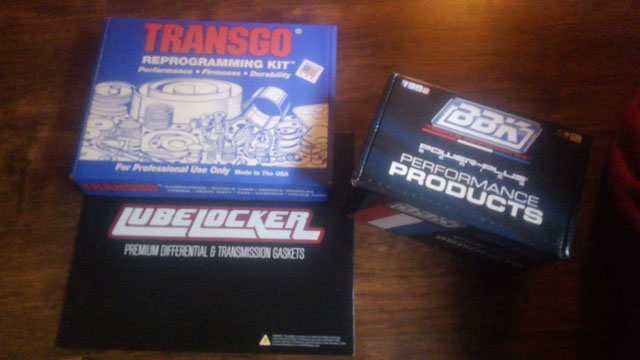 This shift kit is hilarious. Its like 5 springs and a piston! 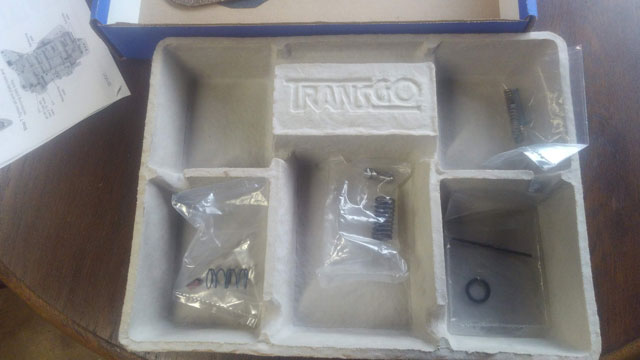 I guess if it aint broke, dont fix it right? So theres not a whole lot of work to do here, but it requires removal of the valvebody to do it. This is entirely possible to do with the trans installed, but since ive already got it out, i opted to do it with it upside down on the cart.
|