|
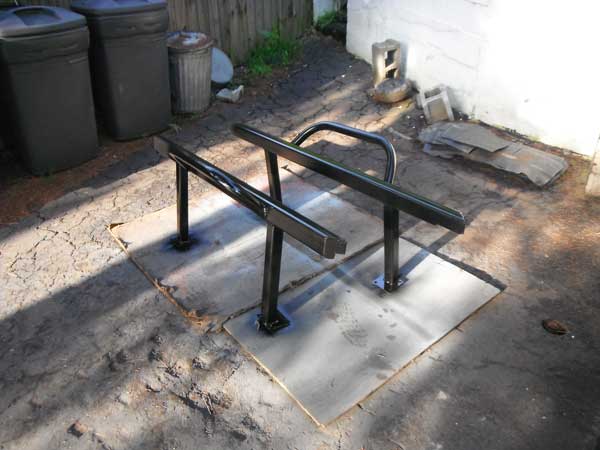
Still messing with the tuning on the '88. The rear dshaft starting making that magical sound they make when the double cardan is about to explode But, its been probably 10 years since i changed a ujoint in it, so i dropped it off to have it fully rebuilt and balanced. So while thats out, im building a set of rock sliders. Ive built them before, and followed the typical design that basically everyone does. 10 years ago now i built a set for the diesel with a low hanging tube step for my vertically challenged wife: Then a couple years ago i built a set for my '96 bronco with a shallower step thats removable, just in case i get stupid and decide to take it wheelin: But when i mocked up something similar on the 88 it looked super dumb: 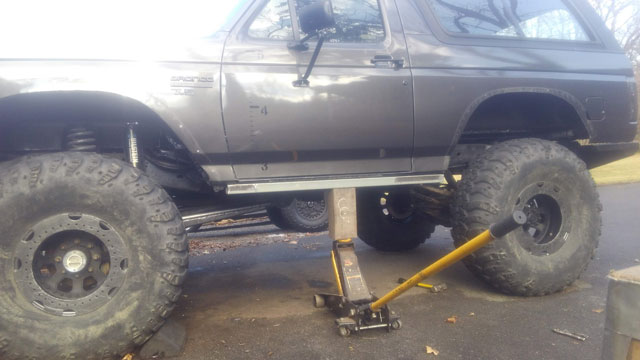 So, i came up with another idea. I dont think ive ever seen anyone build a set like this before. Maybe because its more time consuming, or maybe because its just a bad idea! 3x3 box tubing fits up into the channel in the rocker, and hangs down about an inch: 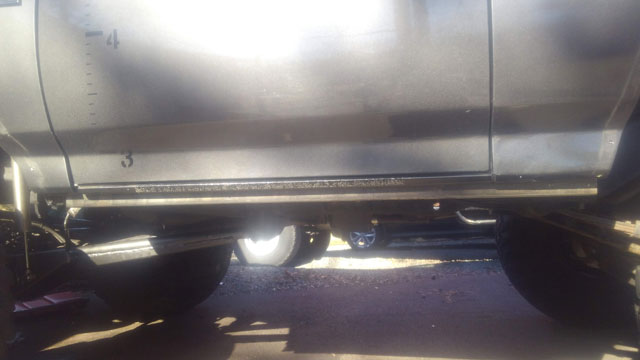 i bent a piece of 1/4" in the press to fit here: 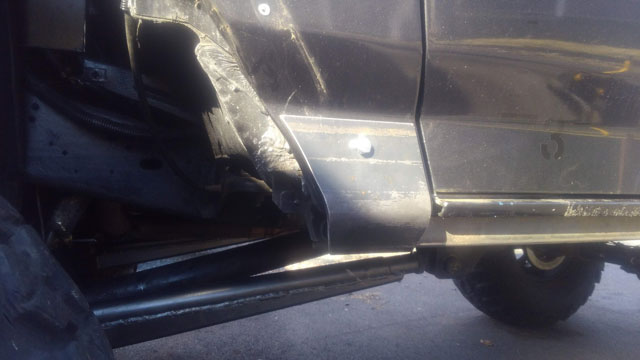 and then the rear quarter guard: 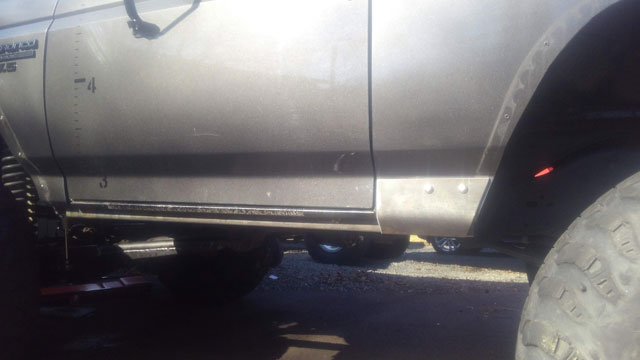 the rear has a bracket that goes behind to sandwich the fender so it doesnt just bend backwards the first time its hit: 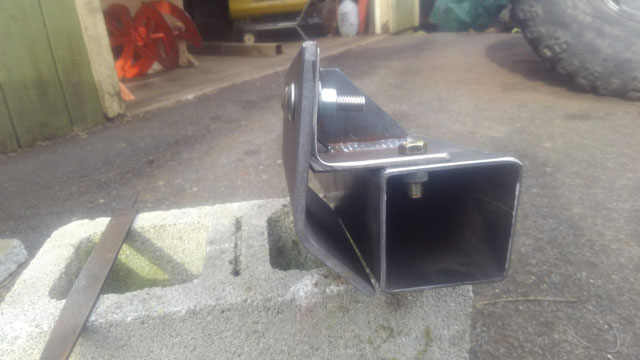 ...and from there im connecting the dots with a piece of 2" flat bar: 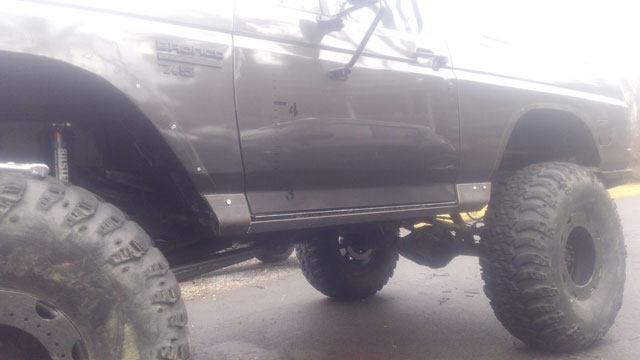 So yesterday i got it all welded up  ...and today its back on the bronco. 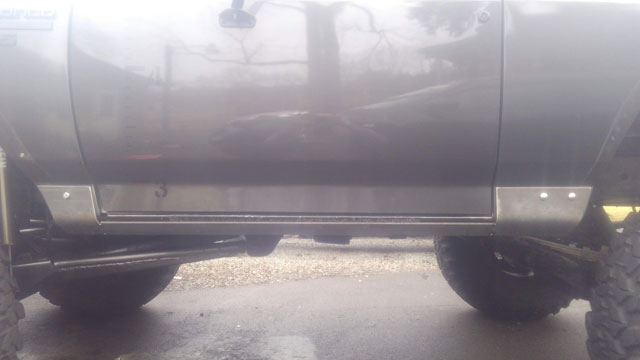 In case you cant tell, its pretty crummy outside, which isnt helping my ancient phone get good pics! So, the flares were installed with rivnuts and machine screws so i could install & remove them whenever. So now im going thru the process of trimming them to fit over the guards: 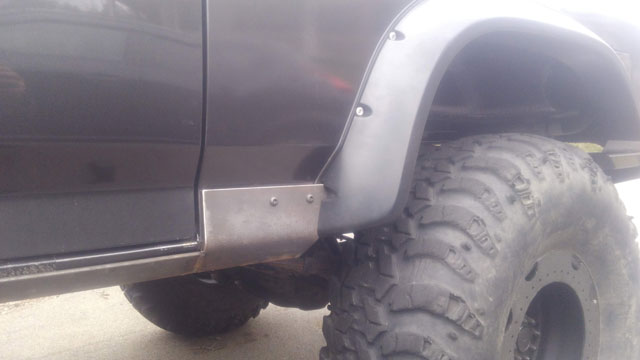 with those back on im now mocking up a tube rail to keep the rocks at bay: 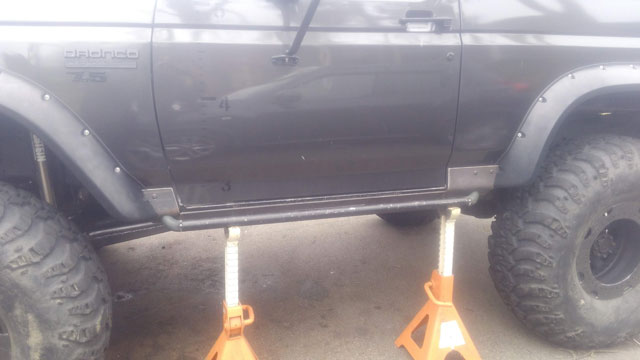 So that's where im at. Tomorrow im going to make some kind of brace behind the rail so it cant bend in (probably 2 short tubes), and then tack it all in place so i can yank it off and start all the finish welding and grinding. And then i get to do it over on the other side! Im toying with the idea of tieing into the frame. The back end is pretty much in line with the rear's front leaf spring hangar, so it wouldnt be too hard to build a short brace that would bolt between the two. Im just not yet sure if its a good idea tieing the body in like that, knowing the truck isnt caged. For now the plan is to just get these things built, and then il figure that part out. Still doing some tuning on the '88. The rear driveshaft is making noise so its out to be rebuilt, so while i wait on that, i decided to put this together! 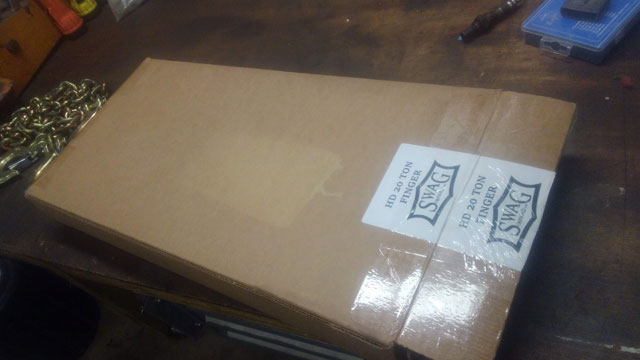 One Swag Offroad Heavy Duty Finger Brake kit! I picked this up during their Black Friday sale, and its been sitting in the garage since then, since my priority was getting the '88 up and running again. So lets bust this thing open! 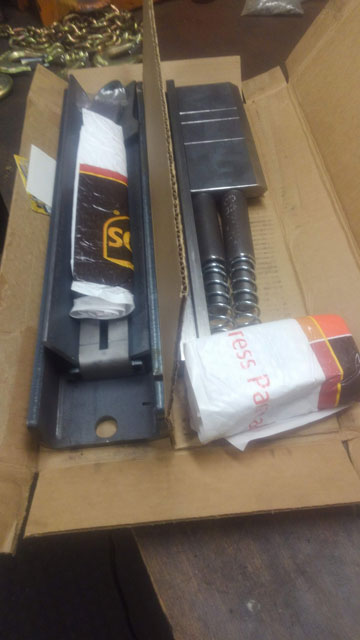 Tons of pieces: 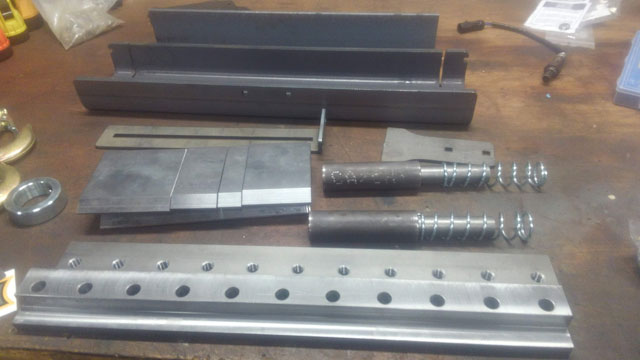 ...and a good set of instructions 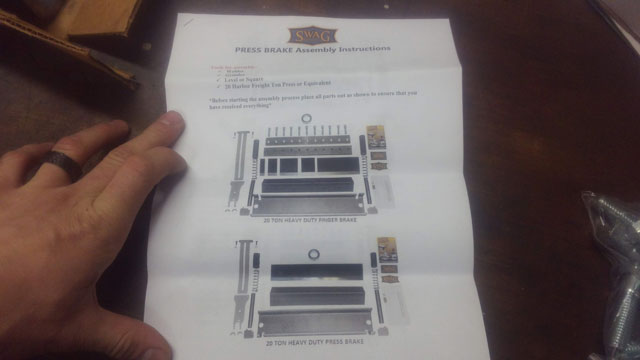 I thought i had more progress pics, but apparently not. So this is the base all done and welded, with the upper jaw behind it, also assembled and welded: 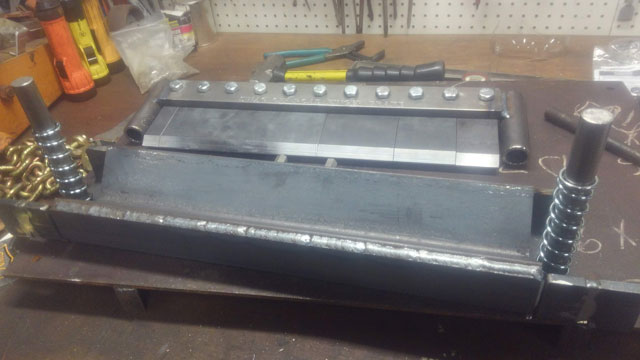 ...and the finished product! 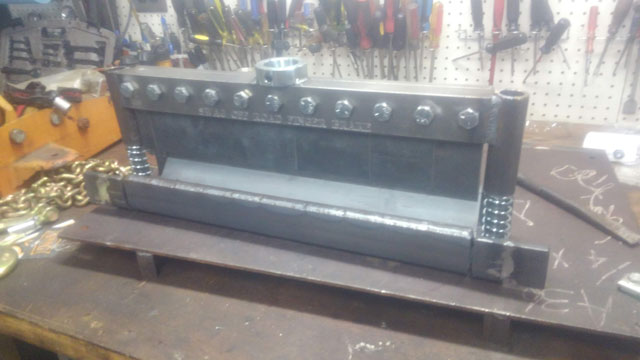 Ive got an idea for a set of rock sliders for the '88, so if all goes well we'll be putting this to use this week! Things need to be done. I fixed my oil pressure gauge; the needle was stuck. I need to make a heat shield for the OBA supply hose down to the frame, and theres a leak in the hose i need to fix as well. I need to adjust my draglink as the steering wheel isnt straight. My remote trans filter is leaking so i will probably just replace the filter after putting a couple more miles on it. The C6 shifts good, altho i thought it would be a bit firmer, so i might make some adjustments there. I swapped out my speedo gear too and got it damn near perfect, im off by only 1mph at 60. Oh, and OD would be nice, because its doing 60mph at 3k rpms. Its loud on the highway. I messed with the tune a bit today. Seems Stinger was just off on the base fuel requirement, because i cranked it up, and its running a ton better! So now i need to really dig in, and learn how to tune this thing.  Finished filling the radiator, primed the oil pump, stabbed the distributor. It lives! 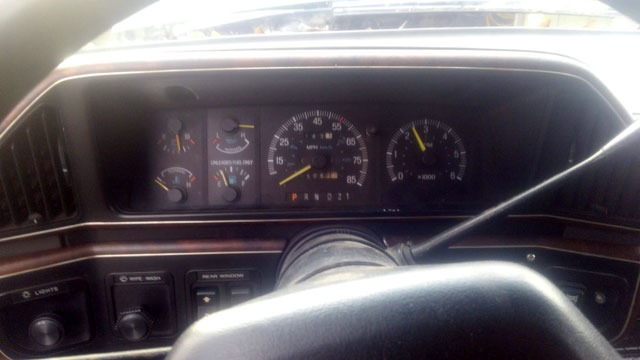 Ran it for 20 minutes at 2-3k rpms to break in the cam, then shut it off. The tune isnt quite right, but i think theres an issue with my wideband, because theres no way its this lean: 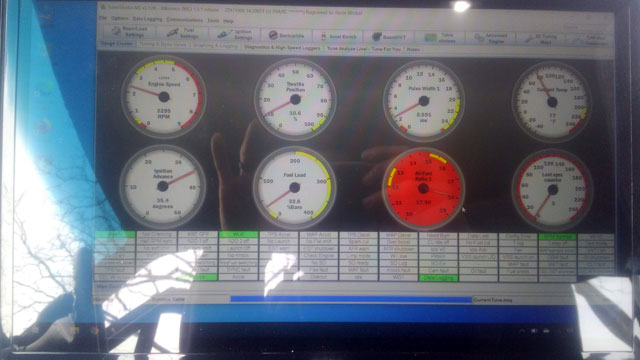 Its like 19:1!: I couldnt find any leaks on the headers or collectors, so it could be the O2 itself. I have another so ill swap it out for the other one and see if it makes a difference. Progress! Replacing the oil cooler with a Ford Performance 90º adapter: 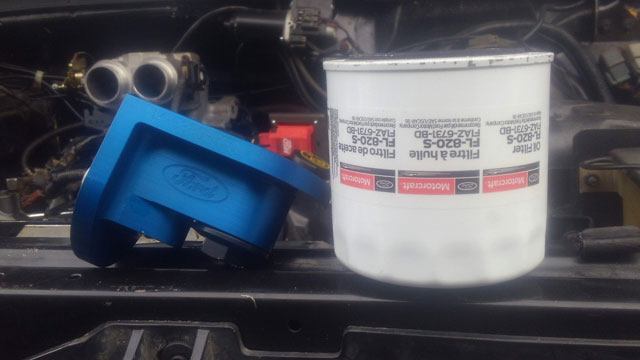 I waited until today to install it, because i wanted the lower radiator hose installed to make sure i got the clocking correct. Its snug, but it fits! 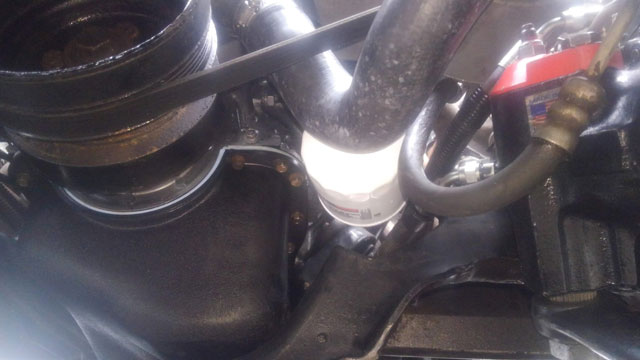 If the radiator is in, that means its time for fluids too: 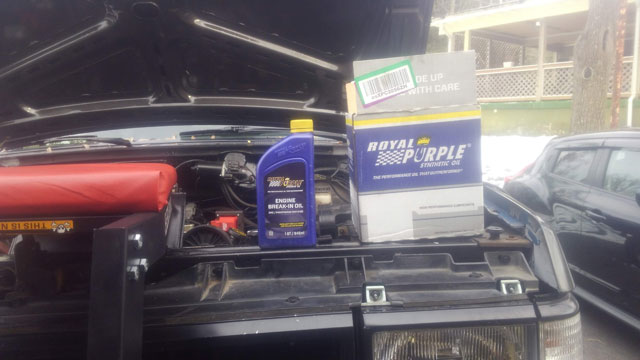 ...and where we left off for the day: 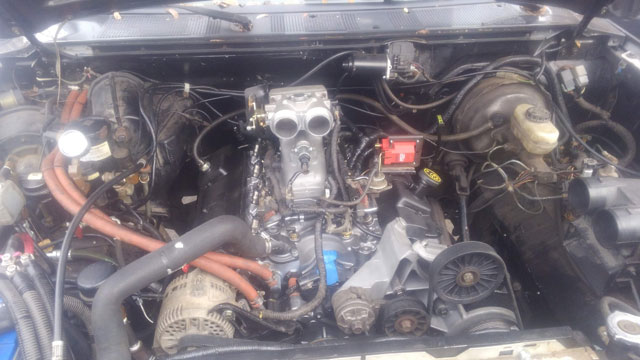 All thats left now is to top off the radiator, prime the oil pump, and stab the distributor. Which means the next day i get out there to work, i should be able to start it up! Here's hoping it all goes well! Cold, but otherwise nice outside, so we made some progress on the '88. The exhaust is now done, with the exception of the wideband O2, which i want to calibrate anyway. Pretty much everything thats left is under the hood, so thats where i went. Put the fuel rail on, and then broke the oil pressure sender. Kinda sucks because the plan was to install the plenum/TB next and finish the harness & vacuum lines. Maybe tomorrow. Anyways, i moved on and instead reinstalled the dipstick, coil + bracket, and most of the accessory drive: 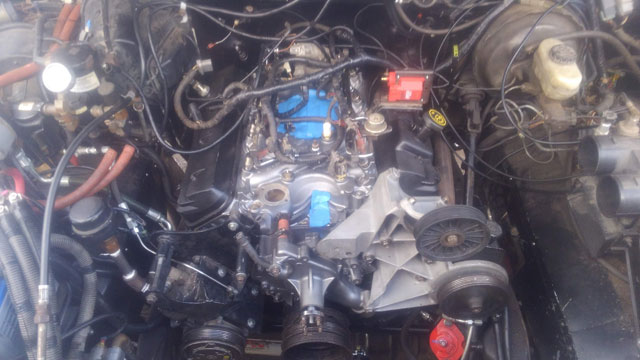 P.steering pump is plumbed, and so is the York. Its a rats nest of wires under the right now but itll all clean up once the TB is reinstalled. We're getting pretty close to finally firing this thing up! With the world the way it is, you just cant get tires as easily as you used to, or nearly as cheap. So the 96 needs tires, and winter is upon us. So i decided to try out a set of tires ive been eyeing for a while, but was never brave enough to try. Thunderer Trac Grip MTs. So here we go! 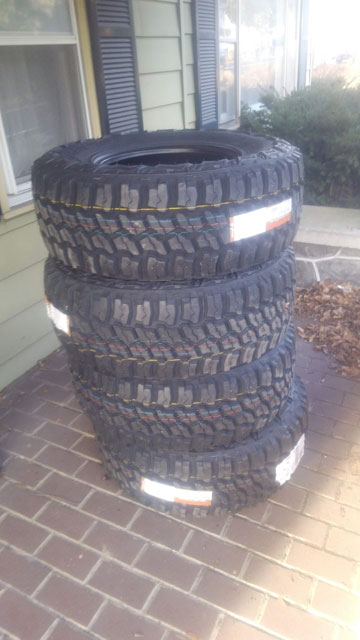 So they arrived yesterday, and i got them installed today, just in time for snow! 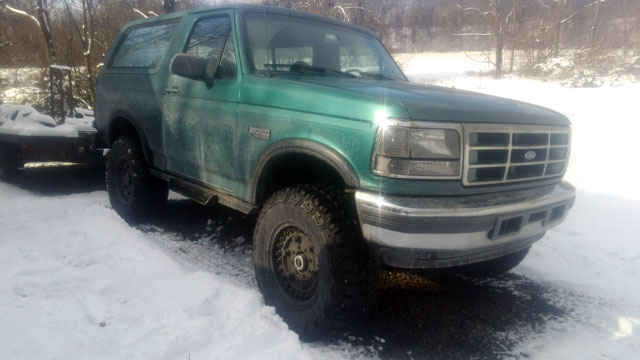 They look good on the bronco, and the tread pattern looks pretty decent 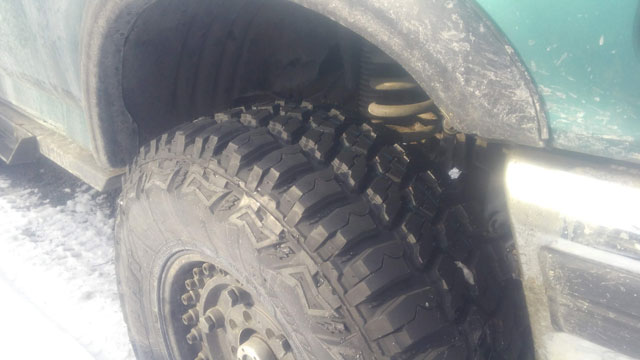 I had them bead balanced, and theyre nice and smooth on the highway. First impressions is they actually arent all that loud; they didnt seem much noisier than the old mostly bald BFG A/Ts they replaced. As youd expect theres a low hum in the background, but i thought theyd be pretty loud and theyre not. So i guess time will tell if they were a good purchase, but first impressions are good. Not much progress made. Took some time off for the holidays, then life happened. Anyways..... I have the doubler, transmission & motor mounts back together again. Reinstalled tcase shifters & trans tunnel. Antiwrap bar back together. I also made a new tracbar for the front, since my old was was a bit short, and bent a little bit. I must have goofed on the lower tracbar mount location on the 'new' D60, presumably because of how hammered the old body was. Ended up that when the new body was 100% done, i had to extend my tracbar a good 1½", which left me with quite a good bit of the shafts from the heims sticking out. It looked like a failure waiting to happen. So i built a nice beefy (and slightly longer) one using parts i got from RuffStuff during their black friday sale. 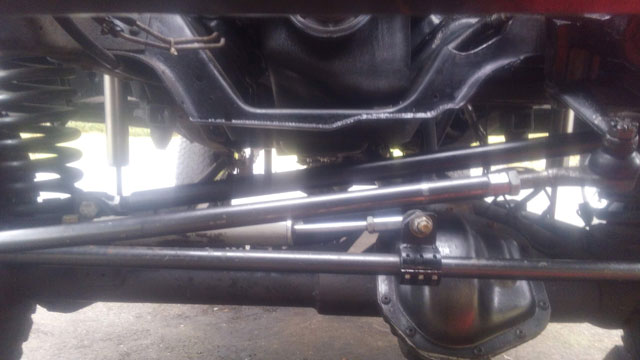 Im hoping to get back out there tomorrow to see what else i can get done. Its january and there's snow in the forecast. Not a great update, but progress is progress. So, this happened: 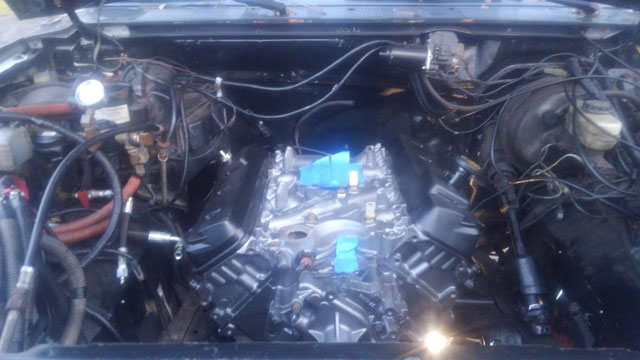 Damn thing fought me every step of the way, but its in. Its the holidays, so we'll get back to this one in january. Happy new year everyone! Welp, the engine for the 88 is back, so lets get it assembled! Rotating assembly: 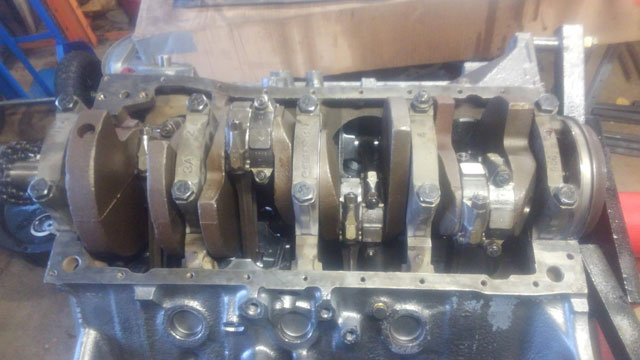 oil pump/pickup: 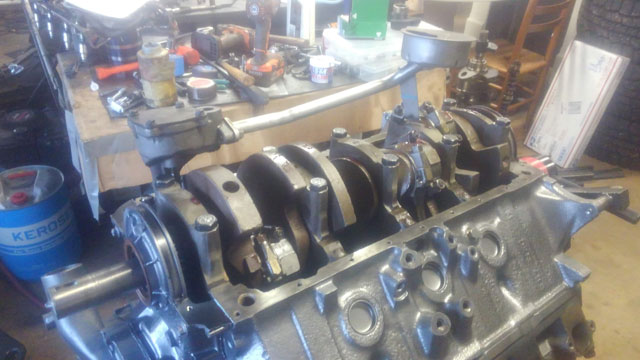 heads 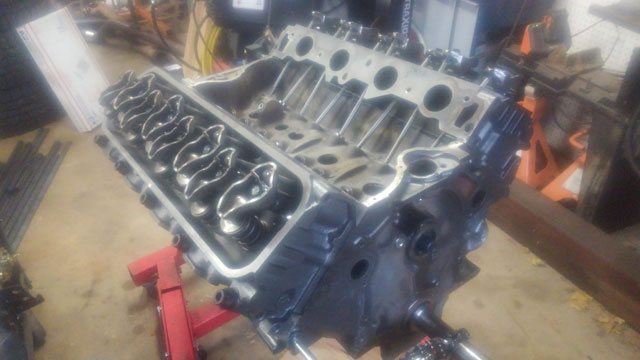 ...and damn near everything else! 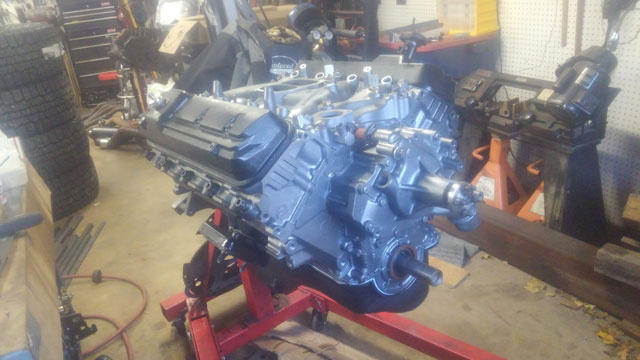 So with that all done, we're pretty much ready to drop the motor back in! And as long as the weather holds, that should be happening next week... |