|
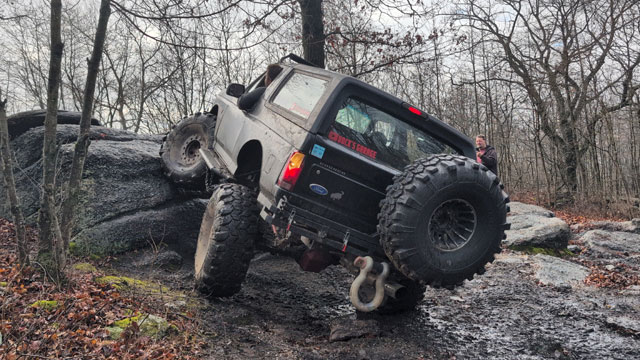
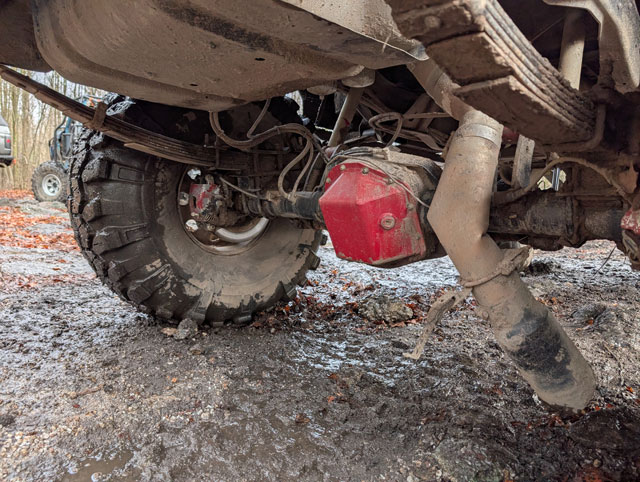
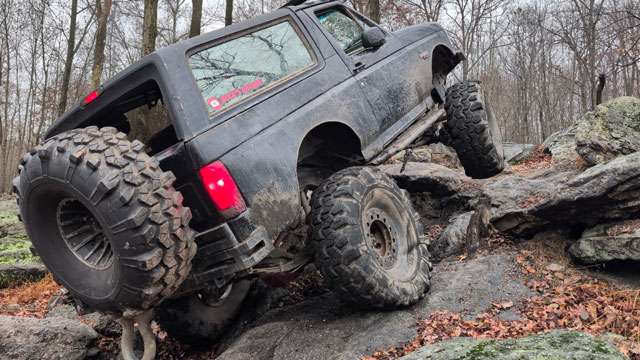
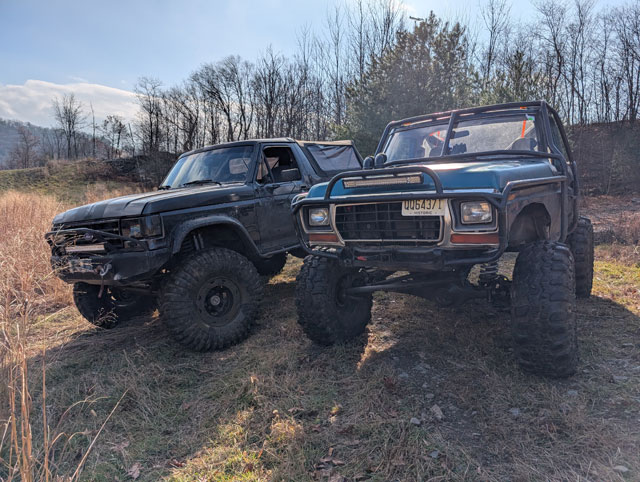
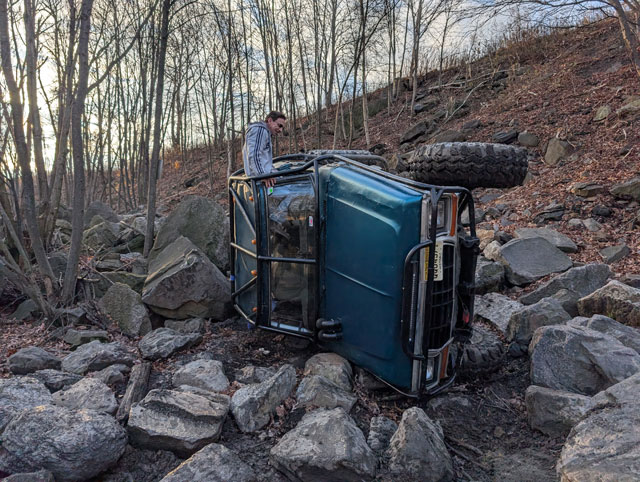
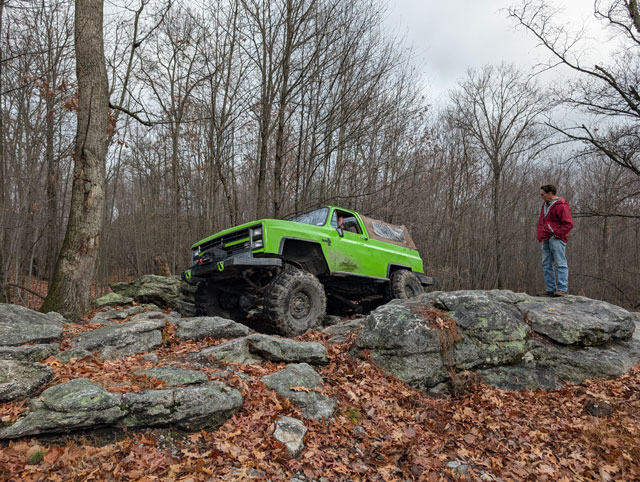
Hey, my speedometer gear came early!  Its definitely the right gear this time so thats cool 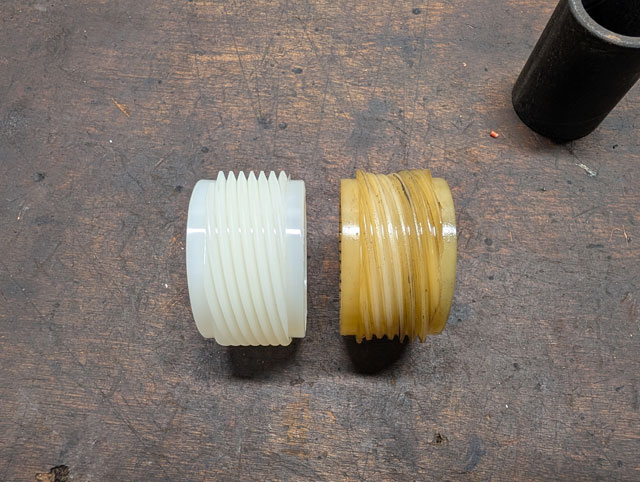 My high steer kit showed up too 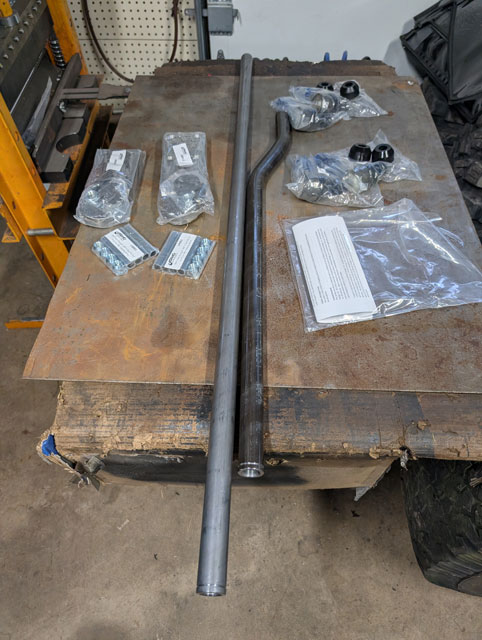 These high steer arms are beefy 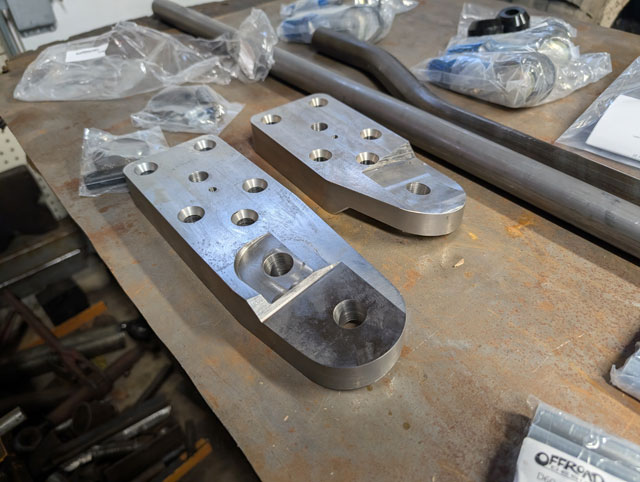 I can already see this is going to be a packaging problem 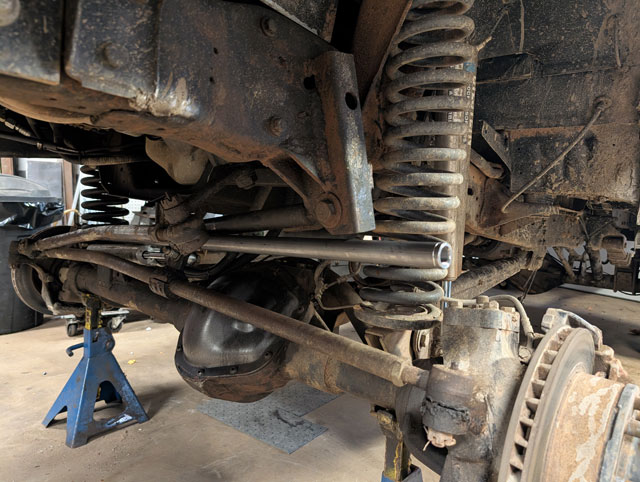 Clearly im going to need to completely rework the tracbar & brackets 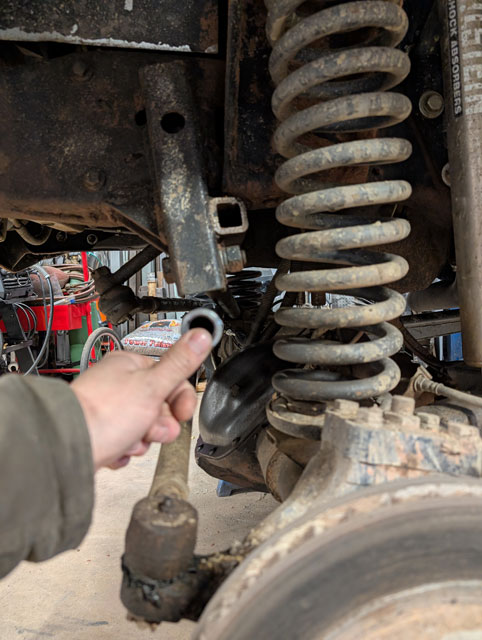 I think the plan for Monday will be to put the transfer case back together and get some paint on the steering arms and tierod. Then i can put those together, and begin figuring out just how im going to stuff a draglink and tracbar into this thing. Speedo gear says its supposed to arrive Monday. High steer kit from ORD says tomorrow. So what to do while i wait? How about install a single-din touchscreen headunit in the green 96 from Temu!  Supports Apple Car Play and Android Auto fully wirelessly  Came with a mic and a backup camera that actually doesnt suck, at least during the day 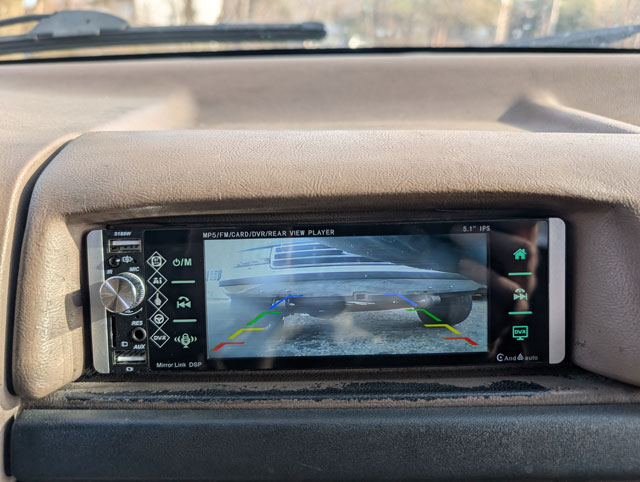 Full EQ, 3 USD slots, built-in microSD slot, aux input, claims it plays DVRs, has canbus connections, video out, all sorts of options. Bought it back in October for $35. Well see how long it lasts lol https://www.temu.com/goods.html?_bg_fs=1&goods_id=601099565670736 Bad weather inbound so i turned the bronco around and pulled it back in 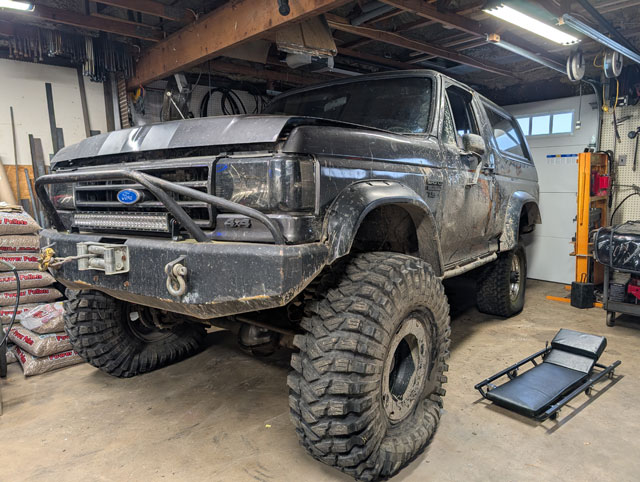 We're looking at 1-8" of snow or ice tonight, they have no idea. So for now its in here and ready to continue with repairs. First up i figured id take a look at why my speedometer suddenly stopped working on the way out of Rausch Creek, turns out the drive gear in the case is shot: 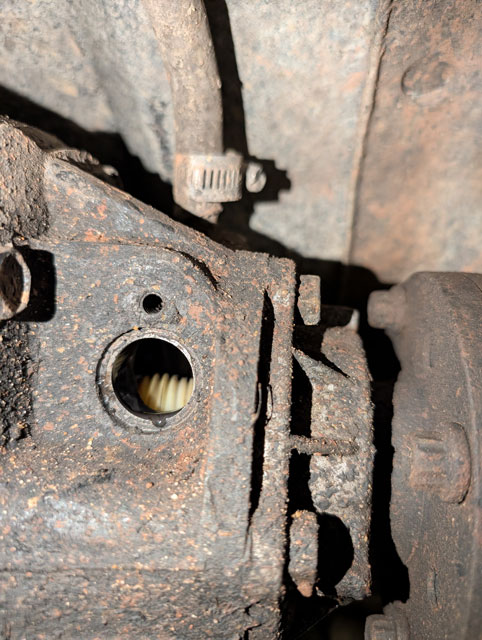 Fortunately Bronco Graveyard has one so thats on order. So my next move will probably be to drop the rear shaft and pull the tailhousing of the 205 apart. Then ive got to deal with this mess of steering links  For now the thought is to pull it out of the garage after the speedo is fixed and use the winch to straighten the tierod, but ive also been thinking about ordering that 1.5" 7075 tierod from ORD to replace it. The draglink i might not straighten; the bend in it doesnt really hurt its function so if i can rotate it to get the wheel centered i might just call it good. Got some work done on the 88 as well. Got new seals, plus some 3M weatherstripping cement (which if youve never used before, works great) 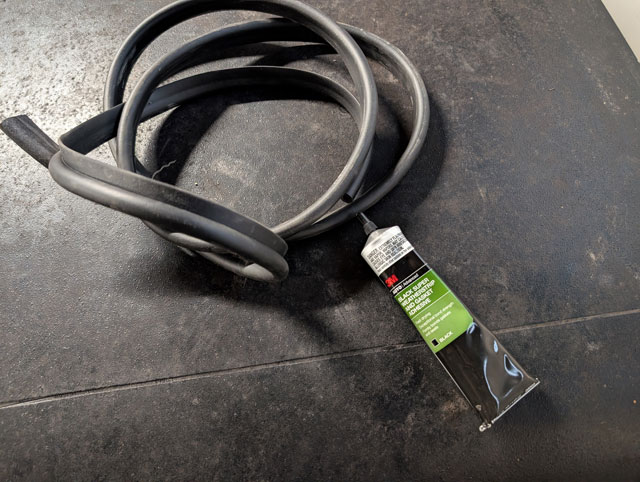 So a buddy came by yesterday and helped me set the top back on the bronco 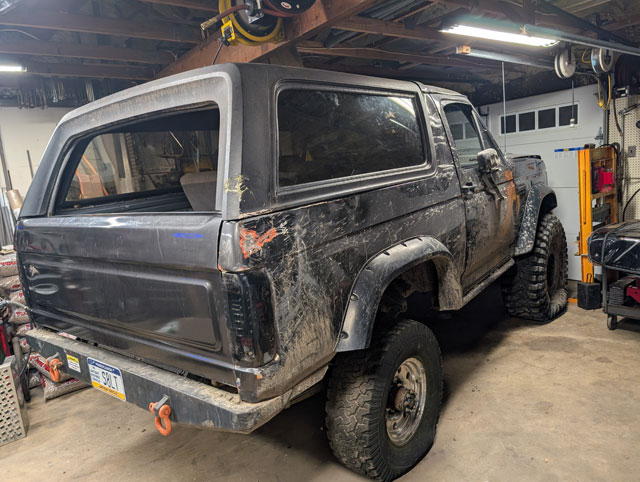 This was a bigger job than we expected. Seems wheeling w/o the top on i have mangled the cab corner more than i thought 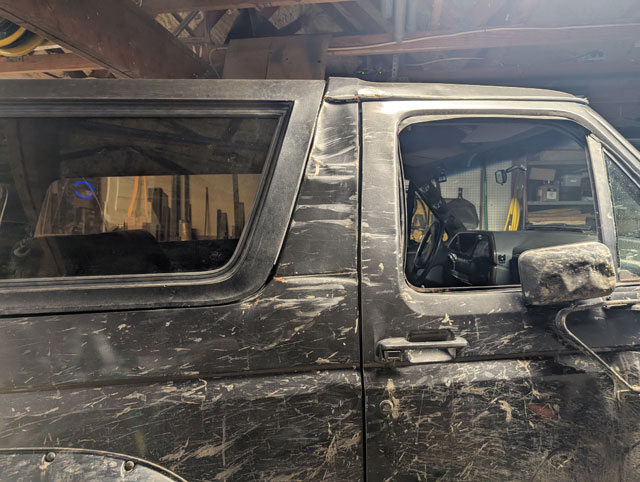 Top does not seal so well on this side anymore 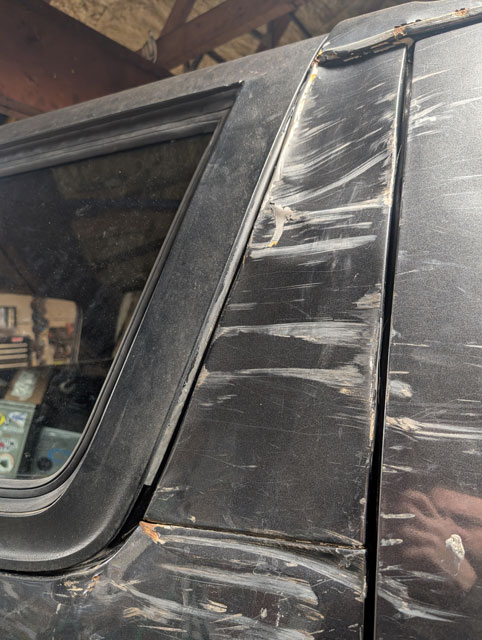 It was a bit of a challenge to get the top on, and not all of the bolts line up anymore. Thinking it might not be a bad idea to cut the roof out of that parts bronco, altho i also dont know that its worth that kind of effort when ill just end up smashing it again. For now, the hard top wont be coming off the gray one any time soon. 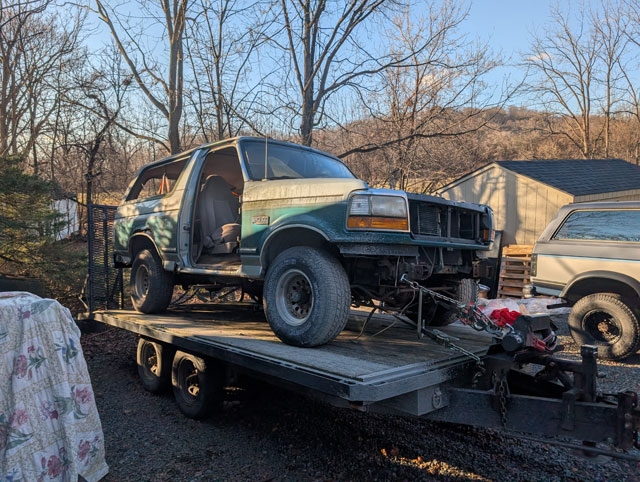 96 Bronco with a 351w under the hood! Im saving the motor for the green 96. That one has 245k on the clock, low on oil pressure and burning oil so it needs a rebuild. Long term plan is a cheap stock rebuild on this motor, which i can hopefully drop in with that ZF5 i bought years ago and never did anything with. That way i minimize the down time on my DD. This thing is a badly rotted out plow truck with a broken frame, but being a 96 theres still plenty of good parts on there to salvage for mine, so thats the plan. New brake line installed, along with a new parking brake cable from Lokar: 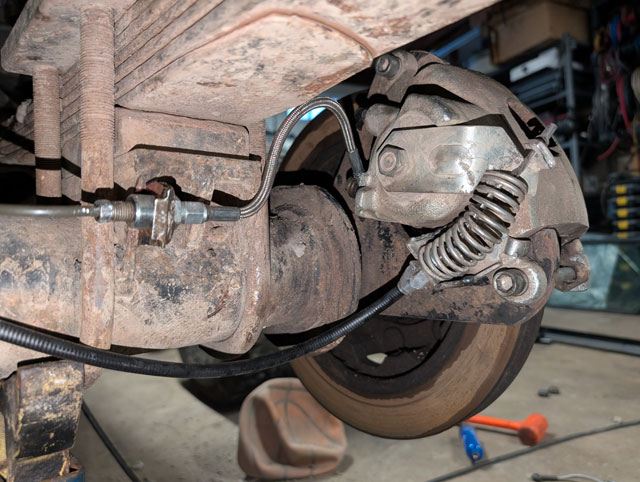 I accidentally cracked the reservoir on the master cylinder, so that got replaced + brakes bled: 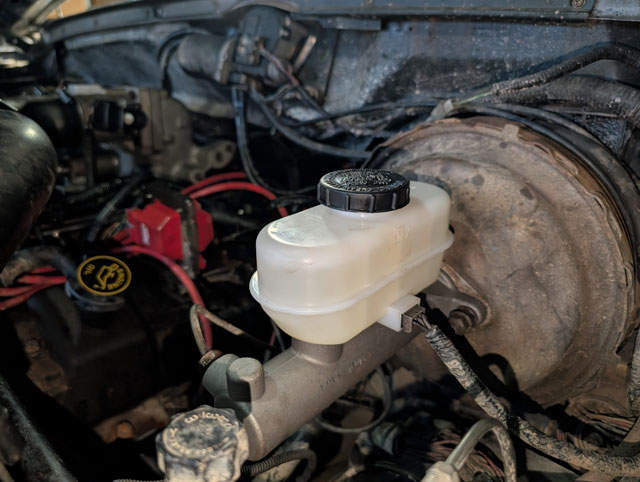 Still havent got the hard top on, i didnt catch that the seals were backordered until i went to install them and they werent here! I re-ordered them w/o the backordered seal (the redundant seal for the top that goes on the body), so i should be able to get the top on Friday. Started breaking down the soft top this morning after work  I immediately ran into a problem. I guess i crunched the b-pillar worse than i thought- its rolled over enough i cant access the screws to remove the rail 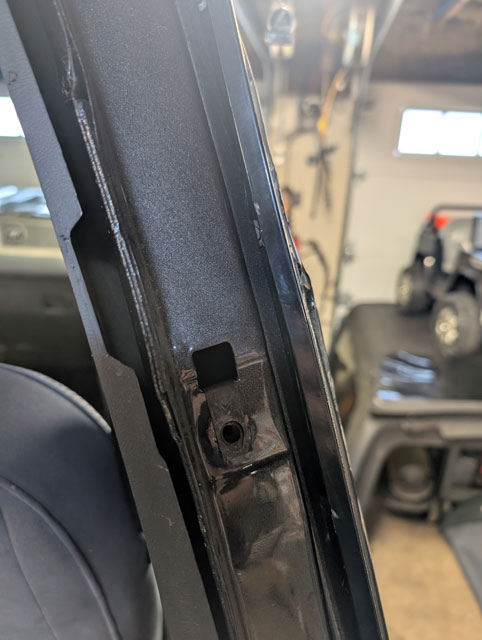 Hopefully this doesnt cause a problem when i go to put the hard top back on 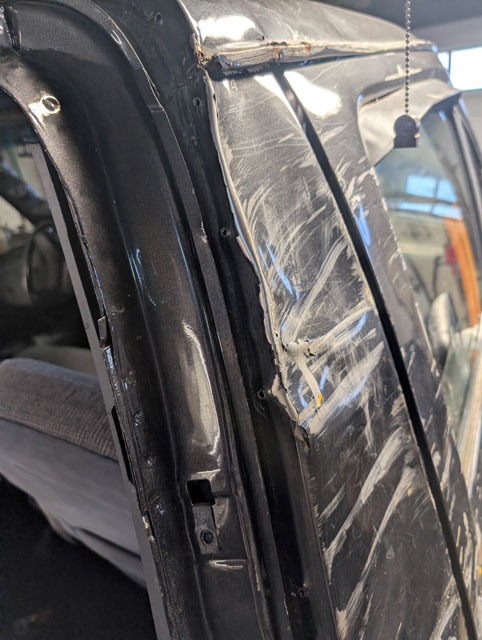 Ok, bronco is ready for hard top 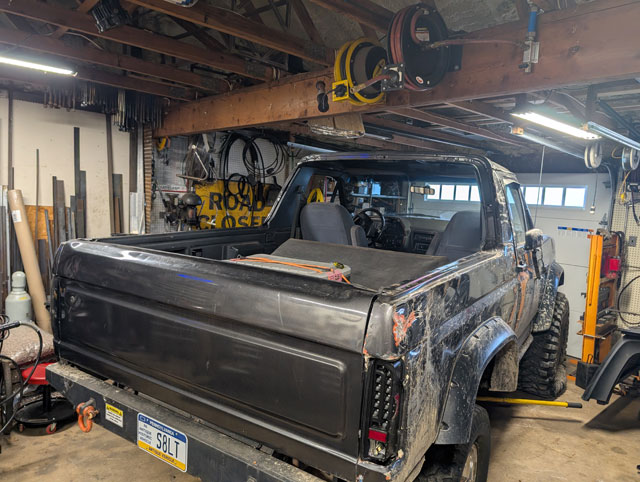 Unfortunately, i forgot to order a new seal for the front of the top :shaking: Rummaged through the shed and i dont have one, so its on order from Bronco Graveyard. So that's stalled for now. Decided to move on to this: 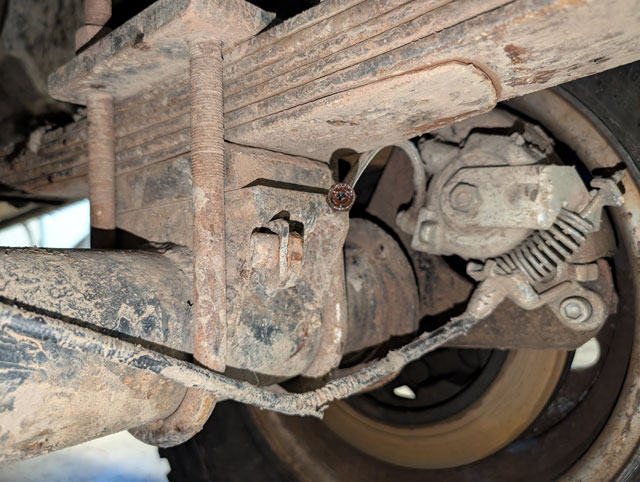 I need a new hose, and -3 AN adapter. Fortunately, this i did have in the shed  Leftover/spare parts from almost 20 years ago! I dont remember where i ordered the short stainless lines from, but im down to my last spare so ill have to find a source sooner or later. For now though, this will get the brakes fixed, so thats tomorrows project - get the brake hose replaced and either reinstall or replace the steel line that runs to this corner and get em bled. This thing has been sitting neglected since the wheelin trip, finally got some time to work on it 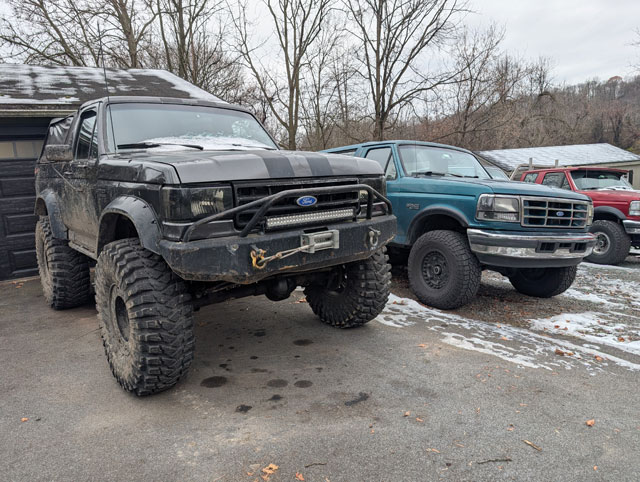 I need to get the soft top off, decided this winter we're going to run the hard top instead of the half cab. But, i want to pull the sliding windows out over fears im going to break one offroad 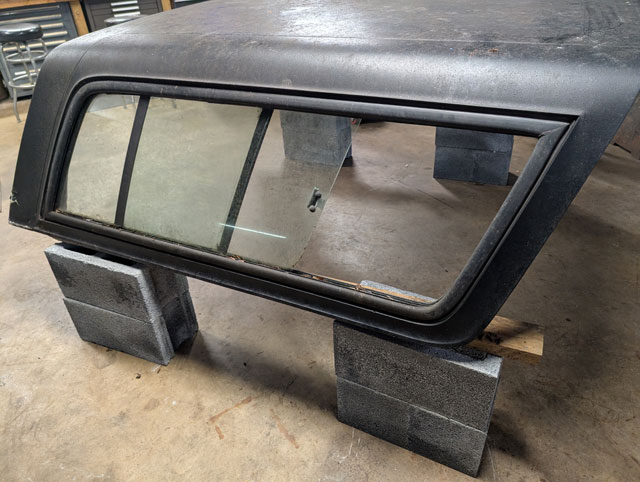 The top has been sitting up on blocks out in the stones for a year now.....pulled the windows out to find an ant colony in the seals!  Dug a set of tinted windows out of the shed 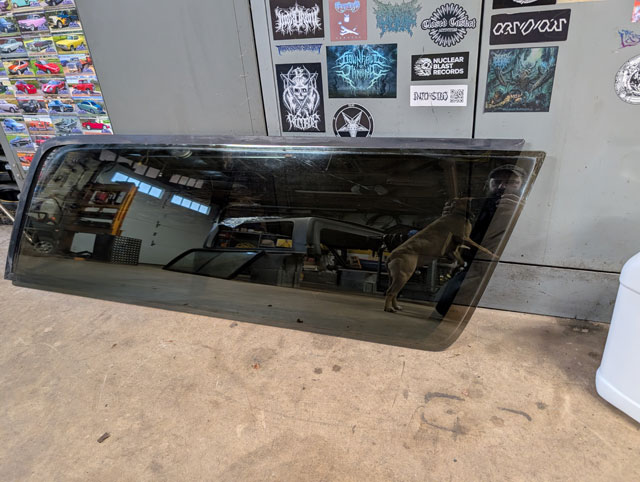 new seals from LMC 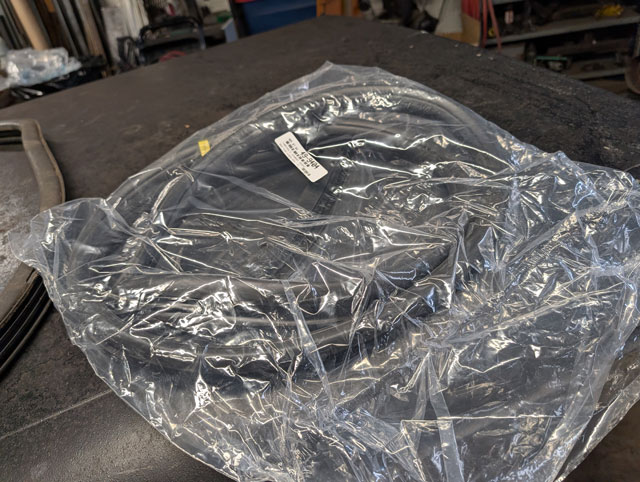 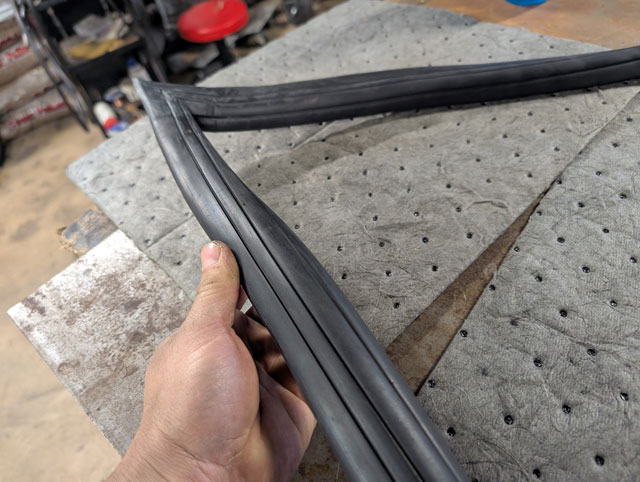 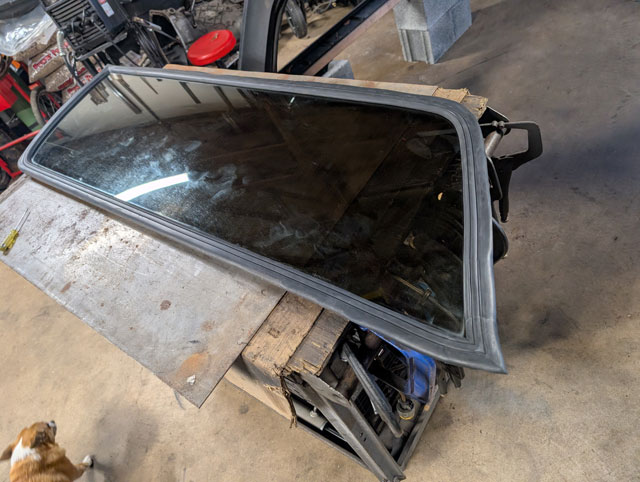 ...and windows installed! 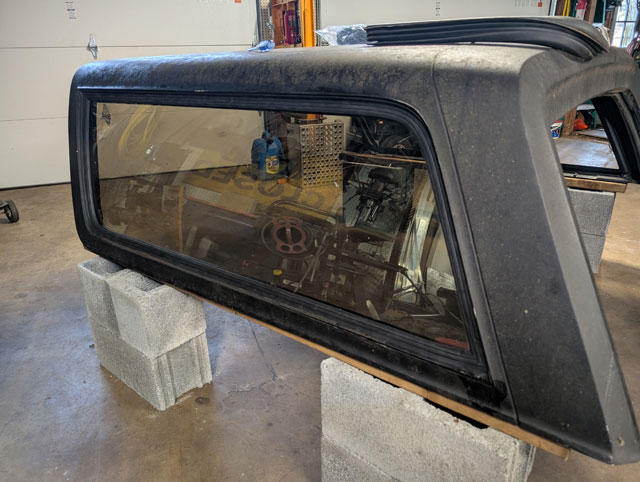 I threw the top on top of my toolcart and rolled it out of the way..... 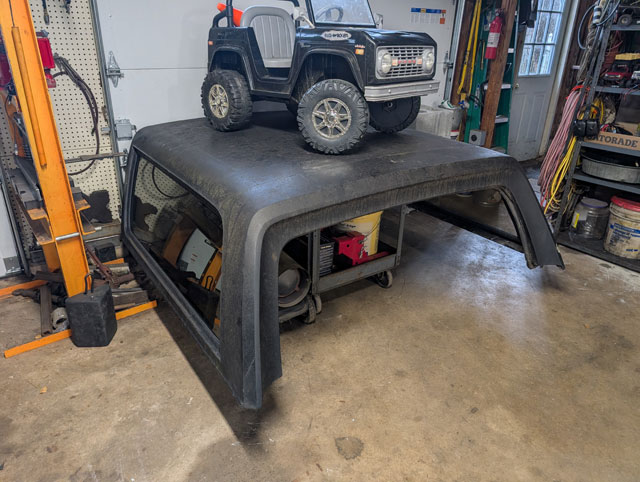 ...and then shoehorned the bronco into the garage! 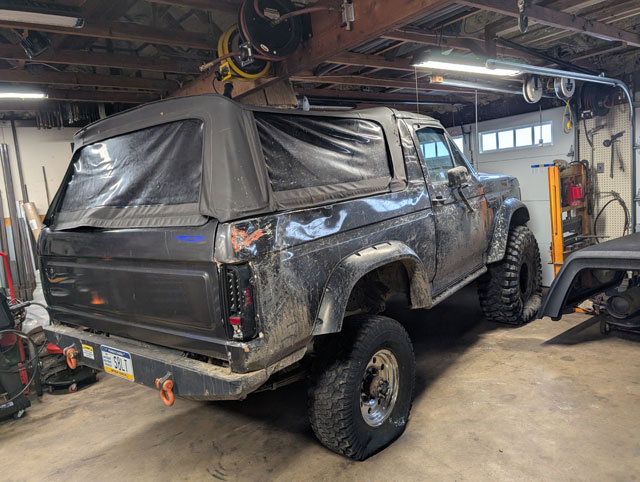 Had to put a set of 305s on the back, it was the only way to get it low enough to get it thru the doorway! Its been in the 20s for a couple days now and its only going to get colder over the next few days, so im going to work on the bronco in the garage in the heat so i dont have to worry about cold windows not wanting to flex. Gonna try to get the top swapped tomorrow, and then start fixing the brakes and steering from the Rausch Creek trip. Rausch Creek! 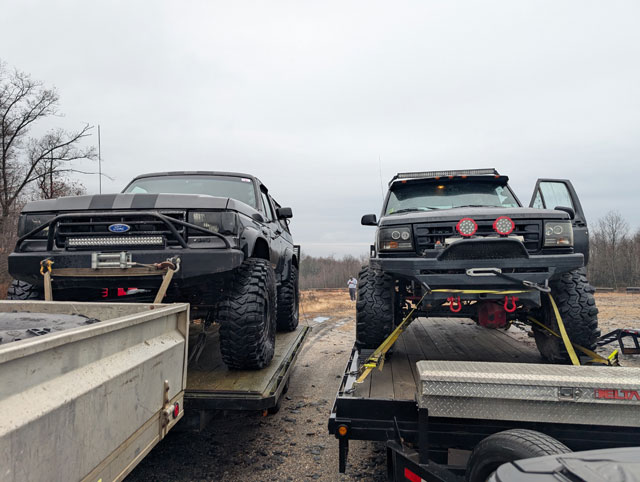 Joe: 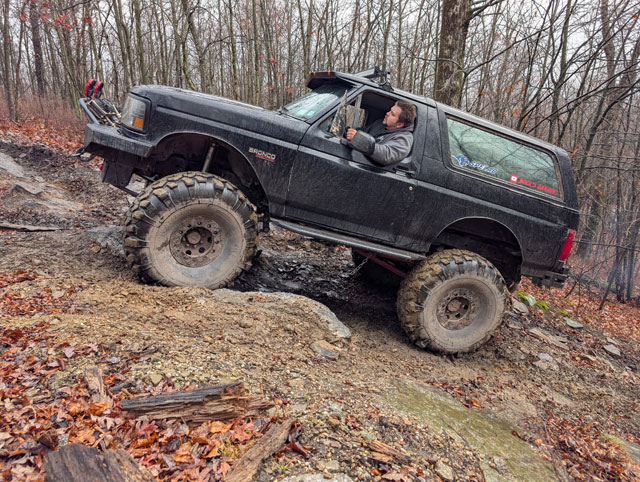 Joe Sr: 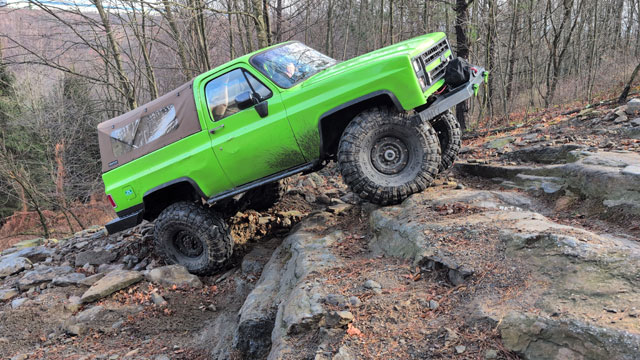 Ox: 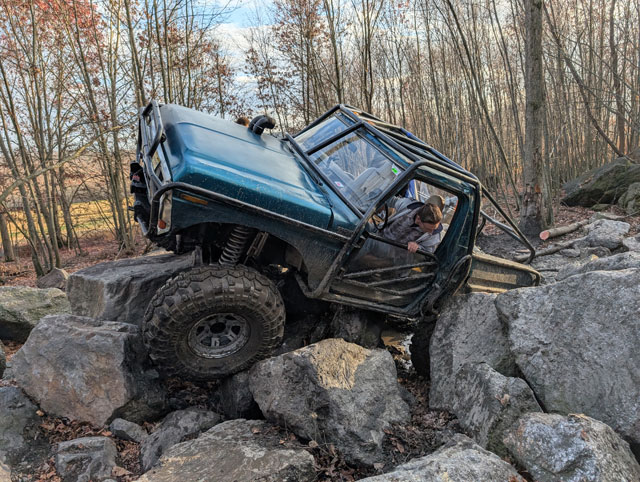 PXL_20251122_202236042.jpg PXL_20251122_170558488.jpg PXL_20251122_174644129.jpg trail_f.jpg PXL_20251122_150939407.jpg PXL_20251122_151215846.jpg PXL_20251122_203406136.jpg PXL_20251122_163113763.jpg PXL_20251122_202940250.jpg I sheared off a brake line adapter on the rear axle 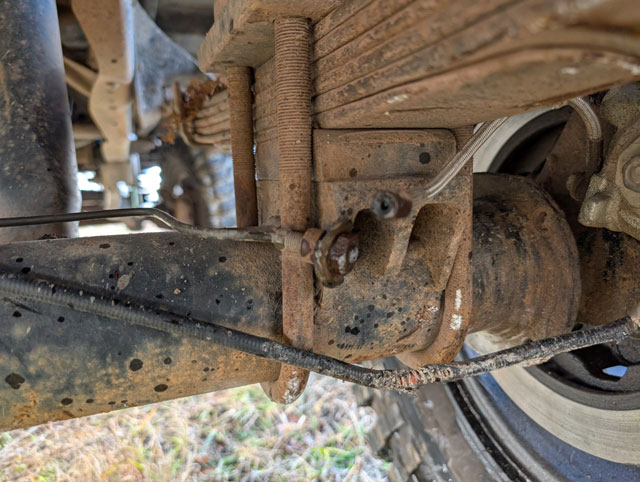 and i bent the crap out of my steering so ive got to fix that too 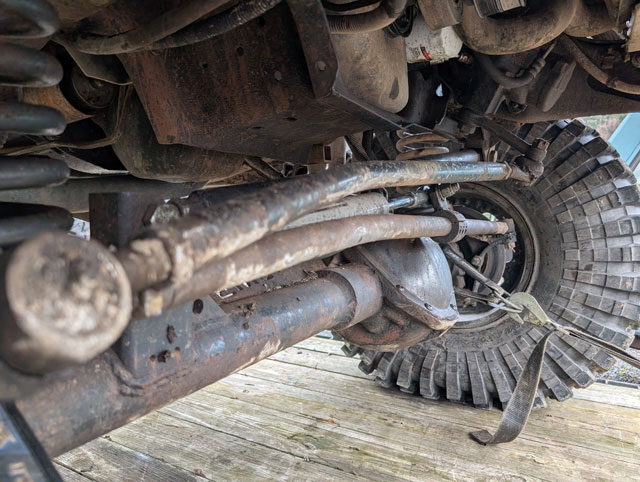 Epic day of wheeling. I dont really know where to start, but there was lots of video shot, so at some point in time myself or Joe will probably get a video put together. The diesel ran incredible, im guessing ive had a big boost leak for a long time because boost is up and EGTs are down. Well worth all the headaches! |